
If the holidays had a flavor, it would be peppermint — cool, crisp, and just sweet enough to spark nostalgia. And if your calendar is packed but your sweet tooth’s still shouting, these 3 ingredient peppermint cloud cookies are your last-minute baking miracle. They’re light as air, melt-in-your-mouth soft, and come together with pantry basics and zero stress.
Whether you’re juggling cookie swaps, potlucks, or just trying to impress the in-laws (without destroying your kitchen), this recipe checks every box: minimal ingredients, maximum wow factor. No butter required. Forget the flour. And that mixer? Totally optional. All you need are whipped egg whites, a touch of sugar, and that unmistakable peppermint twist — the kind that transforms simple meringue into a sweet, snowy holiday cloud.
Ready to whip up something magical in under 30 minutes? Let’s bake.

Why You’ll Love These 3 Ingredient Peppermint Cloud Cookies
Light, airy, and minty — just like peppermint cloud cookies should be
There’s something instantly captivating about the first bite of 3 ingredient peppermint cloud cookies. Light as air yet rich with flavor, they strike that perfect balance between festive charm and textural finesse. One bite in and you’ll understand the name — these cookies don’t just taste like a treat; they taste like a moment.
A cookie that melts in your mouth — not in your hands
The moment you pick one up, you know you’re not holding an ordinary cookie. It’s weightless, almost ghost-like, but don’t be fooled — these 3 ingredient peppermint cloud cookies pack a punch. Their delicate shells crack open with the gentlest pressure, revealing an interior that dissolves on your tongue like spun sugar kissed by winter air.
The meringue structure is what makes this possible. Whipped egg whites trap air and, once stabilized with sugar, transform into a glossy, voluminous cloud that bakes into a crisp exterior with a soft, chewy center.
The secret lies in the technique
Although the ingredient list is short, technique is everything. Whipping the egg whites to stiff, glossy peaks before folding in the peppermint and sugar is what gives these cookies their namesake cloud texture.
- Undermixing leads to flat, spread-out cookies
- Overmixing deflates the air and leaves you with a dense result
- But just-right mixing creates that perfect crunch-to-melt ratio
These technique-based cookies reward focus, but they’re still simple enough for beginners to get right — making them ideal for family baking days or quick holiday prep.
Flavor that cools and comforts
What really sets 3 ingredient peppermint cloud cookies apart is their flavor. The peppermint isn’t overpowering — it’s cool, crisp, and calming. It lifts the sweetness of the sugar and brings a brightness that cuts through the richness of a cookie tray crowded with chocolate and caramel.
And because the base is so neutral, the peppermint shines without competition. You get clarity, balance, and a whisper of wintry magic in every bite.
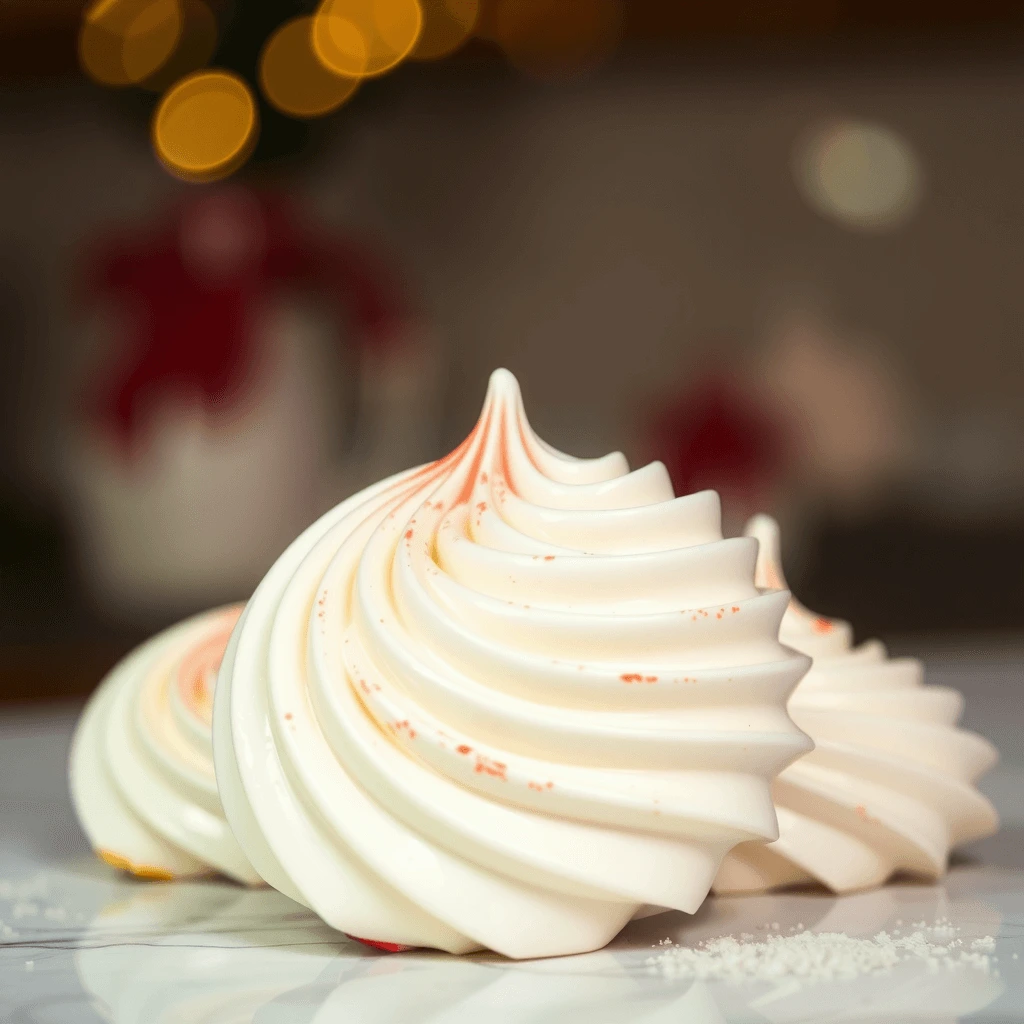
The visual appeal of edible snow clouds
Besides the flavor, these cookies are undeniably beautiful. Their snowy white hue, piped swirls, and shimmery sugar-dusted finish make them look like edible ornaments. When arranged on a holiday platter, they add height and contrast to denser baked goods — creating visual interest and variety.
Want to dress them up even more? Here’s how:
- Add crushed peppermint candy for sparkle and crunch
- Pipe with a star tip for bakery-style swirls
- Drizzle with chocolate for contrast and richness
- Dust with powdered sugar or edible glitter for an enchanted snow effect
Make-ahead friendly and crowd-approved
Despite their elegance, 3 ingredient peppermint cloud cookies are shockingly low-maintenance. They can be made ahead of time, stored for several days (if they last that long), and hold up beautifully for gifting. Their long shelf life, gluten-free base, and allergen-friendly ingredients make them a dependable choice when baking for a crowd.
They’re also surprisingly light, making them perfect as a post-dinner sweet or a mid-afternoon bite between sips of cocoa or cider.
One bite and you’re hooked
In a holiday season overflowing with sugar and noise, 3 ingredient peppermint cloud cookies offer a quiet kind of joy — crisp, clean, and utterly charming. They’re the cookie you make when you want something beautiful without the stress. The one that disappears first from the dessert table. The one you bring once and get asked for again and again.
Simple ingredients. Ethereal texture. Festive flavor.
Sometimes, less really is more — and in this case, it’s absolutely delicious.
Easy peppermint meringue cookies for busy holiday bakers
Let’s be honest — the holidays are magical, yes, but they’re also chaotic. Between gift lists, travel plans, school events, and family dinners, even the most devoted bakers start looking for shortcuts that won’t sacrifice taste or charm. That’s where 3 ingredient peppermint cloud cookies step in like a calm, cool, sugar-dusted miracle.
They’re the kind of cookie that fits effortlessly into a packed day: no chilling, no rolling, no fancy tools, and practically zero cleanup. You’ll go from mixing bowl to cookie tray in minutes — and the result looks like you’ve been prepping all day.
Minimal effort, maximum holiday payoff
Baking during the holidays can easily turn into a full production, but it doesn’t have to. These cookies keep things beautifully simple:
- Only three basic ingredients: egg whites, sugar, and peppermint extract
- Made in one bowl, with minimal dishes to wash
- No chilling time required — just mix, pipe or spoon, and bake
- No flour, butter, or rising agents to measure or worry about
And because they’re naturally gluten-free and nut-free, you won’t have to second-guess whether they’ll work for a cookie swap or school party.
Bake in small batches — or scale up stress-free
Whether you’re making cookies for a cozy night in or preparing trays for a neighborhood exchange, this recipe scales like a dream. You can easily double, triple, or even quadruple the batch without needing to adjust baking times or buy special ingredients.
The meringue mixture is light and forgiving. Just whip your egg whites to stiff peaks, fold in your peppermint and sugar, and bake as many trays as your oven can handle. Because they bake at low temperatures, you can even load multiple racks without burning or browning.
Great for beginner bakers, kids, and multitaskers
Even if you’re not a confident baker, these 3 ingredient peppermint cloud cookies are beginner-friendly. The steps are simple and forgiving, and the visual cues — glossy peaks, smooth texture — are easy to spot even for first-timers.
And if you’ve got little hands in the kitchen? Even better.
- Let kids sprinkle crushed candy canes or sanding sugar before baking
- Use plastic piping bags or spoons to portion out fun shapes
- Add red food coloring swirls or mini chocolate chips to personalize each batch
This is the kind of recipe that turns baking into bonding — without turning your kitchen into a war zone.
No stress, no mess, just magic
The beauty of these cookies isn’t just in their flavor or texture — it’s in their reliability. They’re elegant enough for a cookie tray, light enough for post-dinner coffee, and easy enough to pull together while your pie crust chills or your lasagna bakes.
If you can separate an egg and run a mixer, you can bake a batch of cookies that looks like it came from a pâtisserie.
And when you taste that cool snap of peppermint in a cookie that weighs almost nothing at all? You’ll realize you didn’t need more time this season — just the right recipe.
No fancy tools needed to make 3 ingredient peppermint cloud cookies
There’s a reason so many home bakers fall in love with 3 ingredient peppermint cloud cookies — they don’t require a trip to a specialty baking store or a kitchen stocked like a culinary school. These cookies are built on the idea that simple, everyday ingredients can still produce something elegant and extraordinary.
You don’t need pastry bags, piping tips, stand mixers, or expensive flavor extracts to create something show-stopping. In fact, you probably already have everything you need in your kitchen right now.
The three essentials: egg whites, sugar, and peppermint
At the core of these cookies are three classic pantry staples:
- Egg whites – the structure builders. They create volume, lift, and that iconic airy texture that defines meringue-based cookies. Use fresh or carton egg whites made for whipping — both work beautifully.
- Granulated sugar – not just for sweetness. It stabilizes the whipped egg whites, helps create a glossy texture, and gives the cookies that crisp outer shell.
- Peppermint extract – the flavor anchor. Just a few drops transform this minimal recipe into a holiday-ready treat with cool, bright, minty clarity.
That’s it. No flour to fuss with. No leavening agents to measure. Not even a drop of dairy. Still, these 3 ingredient peppermint cloud cookies manage to feel like something truly special.
Optional upgrades that don’t require a shopping spree
If you’re looking to elevate the base recipe just a little, here are some optional (but easy) additions you might already have on hand:
- Crushed candy canes or peppermint discs for texture and sparkle
- Natural food coloring for candy cane swirls or pastel hues
- Mini chocolate chips for peppermint bark vibes
- Vanilla or almond extract to layer flavor complexity
- Edible glitter or sanding sugar for a festive, bakery-style finish
These extras add flair without complicating the process — or your shopping list.
You don’t need a stand mixer to whip egg whites
Don’t own a KitchenAid? No problem. These cookies were designed with simplicity in mind, and whipping egg whites can be done a few different ways depending on what tools you’ve got:
- A hand mixer with whisk attachments works just as well (and is easier to clean)
- If you’re up for it, a balloon whisk and some elbow grease will do the trick — it’ll take longer, but it’s doable
- Make sure your mixing bowl is glass or metal, not plastic, as even the tiniest bit of grease can sabotage your peaks
Pro tip: To make whipping easier, let your egg whites come to room temperature before starting. They’ll whip faster and trap more air.
No piping bags? No problem.
A polished finish is nice, but not essential. These cookies are beautiful even when dropped by the spoonful. If you don’t have a piping bag, here are some fuss-free ways to shape your meringue:
- Two spoons: Drop rounded mounds directly onto your parchment-lined tray
- Zip-top bag: Fill, snip the corner, and pipe rustic swirls
- Ice cream scoop or tablespoon: For consistently sized cookies
The lightness and sparkle of these 3 ingredient peppermint cloud cookies shine regardless of shape. It’s their taste and texture that people remember — not the symmetry.
Bake with confidence, not clutter
One of the biggest barriers to holiday baking is the feeling that you need to “gear up” — pull out mixers, bowls, trays, cooling racks, decorating kits. But not here.
This recipe is minimalist in every sense:
- One bowl to mix
- One baking sheet to bake
- One airtight container to store
You can have cookies cooling on the counter in under 90 minutes — with hardly any mess to clean up afterward.
A humble cookie with star power
These cookies don’t just save you time and money — they make you look good. They offer the kind of results that feel fancy, even if you made them in 20 minutes with a whisk and a spoon.
That’s the quiet brilliance of 3 ingredient peppermint cloud cookies: They remind us that baking doesn’t have to be complicated to be beautiful. Sometimes, all you need is a little sugar, a whisper of peppermint, and the confidence to keep it simple.
Shareable, freezer-friendly peppermint cookies kids love
One of the biggest advantages of 3 ingredient peppermint cloud cookies is their wide appeal. They’re a hit with kids, they freeze beautifully, and they’re easy to package and share — whether you’re gifting them to a neighbor or passing around trays at a holiday party.
They’re light in flavor, gentle in texture, and practically made for gatherings. Whether you’re baking with a five-year-old sous chef or prepping for cookie swaps in bulk, these cookies check every box.
Safe, simple, and fun for kids to make (and eat)
Because the base of these cookies contains no flour, no nuts, and no raw dough, they’re a great baking activity for kids of all ages. Unlike sticky doughs or hot stovetop recipes, 3 ingredient peppermint cloud cookies are clean, cool, and quick.
Here’s why kids love them — and parents do too:
- The batter is soft and fluffy, fun to pipe or spoon
- The flavor is mild, sweet, and familiar — not too minty
- There’s no dough chilling, rolling, or cutting to fuss with
- They can decorate with crushed candy canes, sprinkles, or swirls of food coloring
- The final product is light and melt-in-your-mouth — perfect for small bites
Plus, they feel like magic. Watching egg whites transform into stiff peaks and bake into glossy, airy cookies gives kids a satisfying sense of wow. It’s a delicious way to sneak in a little science.
Allergy-friendly for classroom and party settings
Thanks to their naturally gluten-free, nut-free, and low-fat profile, these cookies are ideal for holiday parties at school, church, or daycare. You won’t need to navigate complex dietary restrictions, and they’re a safe bet for most group settings.
That makes 3 ingredient peppermint cloud cookies one of the easiest cookies to share widely — with fewer questions, substitutions, or stress.
Easy to freeze and ready when you are
Another reason these cookies are a baker’s dream? They freeze like a charm.
Whether you want to prep ahead of time or keep a stash on hand for surprise guests, here’s how to freeze your peppermint cloud cookies like a pro:
To freeze baked cookies:
- Cool completely
- Layer between sheets of wax or parchment paper in an airtight container
- Freeze for up to 1 month
- Let thaw at room temperature for 20 minutes before serving
To freeze unbaked cookies:
- Pipe or spoon meringue onto a parchment-lined baking sheet
- Freeze until solid, then transfer to a freezer-safe container
- Bake from frozen, adding 3–5 extra minutes as needed
Their light structure and sugar-stabilized base mean they don’t dry out, crack, or collapse. They taste just as fresh after thawing as they did the day they were made.
Made for gifting, swapping, and sharing joy
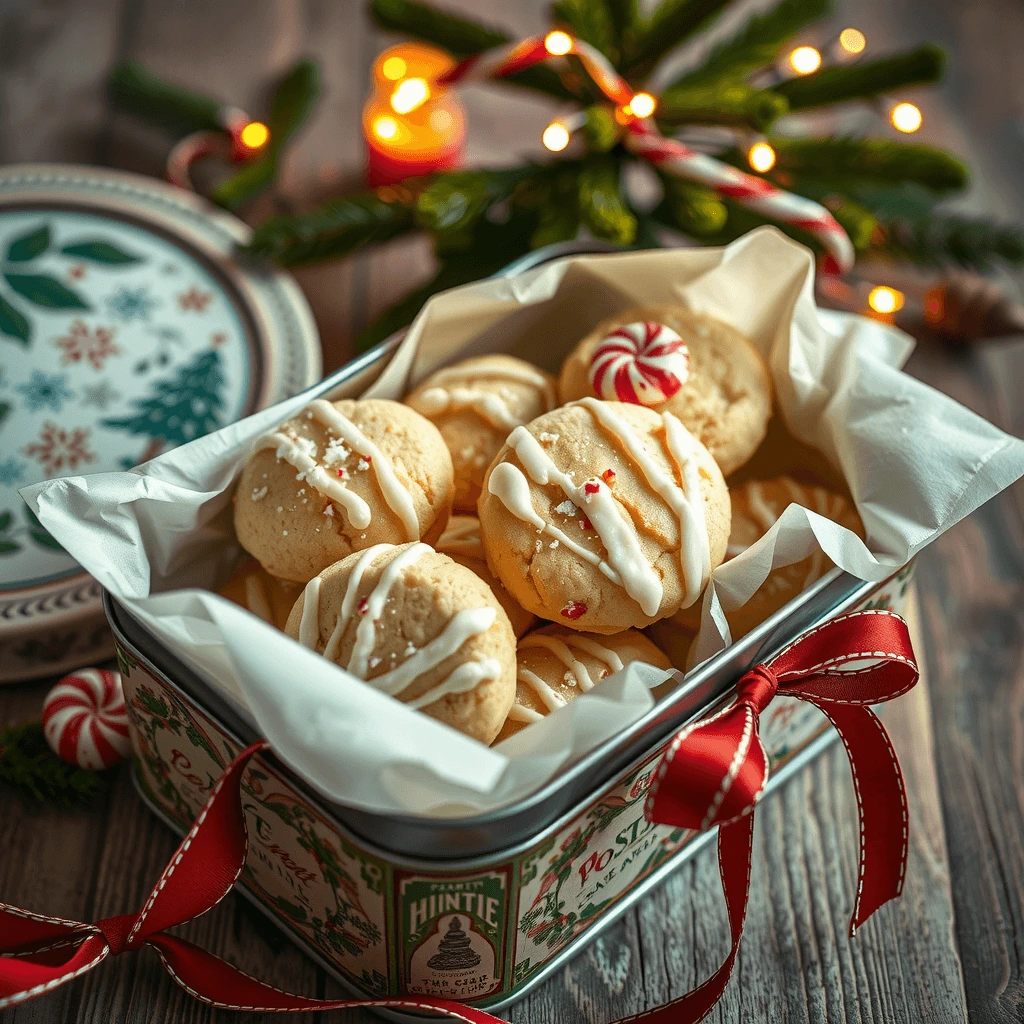
There’s no better gift than a homemade cookie — especially when it looks as lovely as it tastes. These cookies are practically designed to be shared:
- Pack in clear cellophane bags with ribbon for stocking stuffers
- Stack in holiday tins for neighbor gifts or thank-yous
- Arrange in cookie boxes with dividers for variety trays
- Include a handwritten recipe card for a sweet personal touch
Their crisp shells, light weight, and resistance to melting make them perfect for mailing, too. Just cushion between layers of parchment and wrap tightly to avoid breakage in transit.
Why people love receiving these cookies
Beyond their flavor and texture, 3 ingredient peppermint cloud cookies make people feel considered. They’re elegant without being fussy, handmade without being heavy, and festive without being overly sweet.
They’re the kind of treat that says, “I made this for you,” without requiring hours in the kitchen.
Bake once, share endlessly
With one batch, you can fill multiple cookie tins, dessert platters, or gift bags — making these cookies an efficient choice for busy bakers who still want to spread cheer.
Simple to make. Easy to store. Loved by all.
That’s the beauty of 3 ingredient peppermint cloud cookies — they’re not just cookies. They’re connection, joy, and a little bit of sugar-dusted magic, ready to be shared one bite at a time.
Ingredients Breakdown for 3 Ingredient Peppermint Cloud Cookies
Peppermint extract – the festive heart of cloud cookies
If sugar is the backbone and egg whites are the wings, then peppermint is the sparkle. It’s the flavor that transforms a simple meringue into a true holiday treat — cool, invigorating, and unmistakably festive. In 3 ingredient peppermint cloud cookies, it brings clarity, contrast, and that iconic seasonal edge that instantly says, December has arrived.
It doesn’t overpower. Nor does it disappear into the background. Instead, it strikes that rare balance — just enough to wake up your taste buds and remind you of candy canes, hot cocoa, and twinkle lights.
A timeless flavor with built-in nostalgia
Peppermint has deep roots in holiday baking. From striped candy canes to peppermint bark, it’s a flavor that brings memories rushing back — often before the first bite. When woven into the delicate structure of 3 ingredient peppermint cloud cookies, it becomes something new: light and crisp, yet refreshingly bold.
Unlike heavier extracts like almond or rum, peppermint offers:
- A clean, cool finish that balances sweet meringue
- Aromatics that linger in the kitchen long after baking
- Visual opportunities when paired with crushed peppermint candy or red swirl coloring
It’s not just a flavor — it’s a feeling baked right in.
Choosing the right peppermint extract
Not all peppermint extracts are created equal. And when you’re only working with three ingredients, quality matters more than ever. Choose your extract thoughtfully to let the flavor shine without tasting artificial or harsh.
- Pure peppermint extract: distilled from real peppermint oil; bright, clean, and the gold standard
- Imitation peppermint flavoring: less expensive, often sharper or flatter in flavor
- Peppermint oil: very concentrated; use sparingly — just a drop or two can overpower the entire batch
For most recipes, ¼ to ½ teaspoon of pure extract delivers the perfect balance of flavor without overwhelming the sugar or altering the texture.
How to avoid over-flavoring your meringue
Because meringue is delicate and peppermint is strong, it’s important to fold the extract in at the right time — and in the right amount.
Here’s how to get it just right:
- Add peppermint extract after your egg whites reach stiff peaks and all sugar is fully incorporated
- Fold gently to avoid deflating the meringue
- Start small: ¼ teaspoon may be plenty; taste a tiny bit before piping
If you’re experimenting with other flavors alongside peppermint — such as vanilla or chocolate — use a light hand. Peppermint dominates easily, and balance is key.
Complementary flavors that play well with peppermint
One reason 3 ingredient peppermint cloud cookies work so beautifully is that the peppermint is both bold and versatile. It pairs with a surprising number of other ingredients, allowing you to adapt the base recipe without sacrificing its character.
Here are a few tried-and-true pairings:
- Dark chocolate drizzle: adds richness and balance, mimicking peppermint bark
- Vanilla bean: rounds out sharpness, adds warmth
- Almond extract: creates a cool-meets-nutty depth
- Lemon zest: for a mint-citrus hybrid that feels fresh and modern
- Coconut: adds chewiness and subtle tropical notes that offset the mint
Each pairing offers its own twist on the cookie’s cool, festive base — perfect for variety trays or personalizing gift boxes.
Visuals that elevate peppermint flavor
Flavor isn’t the only way peppermint makes these cookies shine. Its color and texture cues give you endless ways to visually reinforce the taste — turning your simple cookies into holiday masterpieces.
- Swirl a drop of red gel food coloring into your meringue for a marbled candy cane effect
- Sprinkle crushed peppermint candies on top for a crackling crunch
- Pipe into snowflake or wreath shapes for full holiday impact
- Use white chocolate drizzle + peppermint dust for a “snow-dusted” effect
These visual enhancements communicate flavor before anyone takes a bite — which matters especially at cookie swaps or holiday dessert tables.
Why peppermint wins — every single time
When all is said and done, peppermint just works. It’s reliable. It’s unmistakable. And in a cookie that’s this simple, it brings everything into balance.
In 3 ingredient peppermint cloud cookies, peppermint isn’t an add-on — it’s the soul. It’s why the cookies don’t taste flat. It’s what makes them stand out on the tray. And it’s the very thing that makes each crisp, cool bite feel unmistakably like Christmas.
And once you’ve baked a batch and watched them vanish, you’ll know: there’s no substitute for that minty magic.
Egg whites – the magic behind fluffy peppermint meringue cookies
If peppermint brings the flavor, egg whites bring the form. They’re the reason these cookies feel like edible clouds — soft, airy, and barely there. Though often overlooked, egg whites are the unsung heroes of this recipe. Their ability to trap air and hold structure transforms just a few pantry staples into something elegant, ethereal, and incredibly satisfying.
Without egg whites, you’d have no lift, no crisp edge, and no signature melt-in-your-mouth center.
How egg whites create structure and volume
Egg whites are made up of water and proteins. When you whip them, those proteins unfold and bond around air bubbles, forming a stable foam. This foam expands in the oven, creating the light, cloudlike texture that defines meringue-based cookies.
- As you beat the whites, you’ll notice them transition from frothy to glossy to stiff
- Adding sugar gradually during the whipping process helps stabilize the foam
- Once baked, the exterior becomes crisp while the inside stays soft and marshmallow-like
Thanks to this process, you’re not just baking — you’re harnessing chemistry.
Tips for whipping egg whites to perfection
To get cloud cookies with the ideal texture, your whipping technique matters. While it may seem simple, even minor missteps can deflate your mixture and ruin the lift.
Here’s how to do it right:
- Start with room-temperature egg whites — they whip faster and hold more air
- Use a clean, grease-free metal or glass bowl — even a hint of fat can sabotage your peaks
- Whip on medium speed at first, then increase as the foam forms
- Add sugar slowly, one spoonful at a time, once soft peaks begin to form
Eventually, you want stiff, glossy peaks — not dry or curdled. The whites should stand upright when you lift the whisk, with a slight curl at the tip.
Can you use carton egg whites?
Yes — but with a few caveats. Carton egg whites can be a time-saver, especially when you’re baking in bulk or want to avoid waste. However, not all brands whip well.
To ensure success:
- Choose a brand labeled “100% liquid egg whites” with no additives or stabilizers
- Look for “whips up like fresh” or “suitable for meringue” on the label
- Avoid egg white substitutes or products with gums, which won’t form peaks
If you’re unsure, do a quick test whip with a small amount to check consistency before committing to a full batch.
What to do if your egg whites won’t whip
Sometimes, even when you do everything right, your egg whites refuse to cooperate. Here are a few troubleshooting steps that can save your batch:
- Wipe your bowl and beaters with vinegar or lemon juice to remove invisible grease
- Check that no yolk sneaked in — even a drop of fat will prevent peaks
- Avoid plastic bowls, which often retain oil even after washing
- Don’t add sugar too early, or the foam will never develop
When in doubt, start over — it’s better to lose two egg whites than an entire tray of failed cookies.
Why egg whites matter more than you think
It’s easy to take egg whites for granted, especially in a minimalist recipe. Yet here, they do all the heavy lifting — literally and figuratively. They’re the ingredient that turns a few humble kitchen staples into something light, beautiful, and bakery-worthy.
Moreover, egg whites make this recipe naturally gluten-free, lower in fat, and appealing to health-conscious bakers. They bring function and form — and in doing so, prove that sometimes, the simplest ingredients are the most powerful.
Granulated sugar – sweetness and structure for peppermint cloud cookies
Sugar may seem simple. But in the world of peppermint cloud cookies, granulated sugar does the heavy lifting behind the scenes. It’s not just there to sweeten — it’s the foundation, the backbone, and the reason these cookies hold their shape and achieve that signature contrast between a delicate, crisp shell and a marshmallow-soft center.
Without sugar, the meringue would collapse, the texture would fall flat, and the cookies would lose their magic. In short, sugar isn’t just an ingredient here — it’s an architect.
Why sugar matters more than you think
In many recipes, sugar simply adds sweetness. However, in this one, it does much more. As egg whites whip, sugar dissolves into the mixture, stabilizing the foam so it doesn’t collapse under its own weight. This stability is key for achieving that tall, cloud-like lift.
Additionally, sugar delays moisture evaporation during baking. That’s why the outside of each cookie sets into a crisp shell, while the inside remains soft and tender.
- Sugar binds with egg white proteins, locking in air bubbles as they form
- It creates a glossy, stable meringue with structure that doesn’t deflate
- It caramelizes slightly during baking, contributing to the golden sheen and subtle crunch
Because of these effects, granulated sugar isn’t just a supporting player — it’s a structural hero.
Choosing the right sugar for the job
While standard white granulated sugar works beautifully in this recipe, some bakers prefer to go a step further for precision. Let’s break down the options:
- Granulated sugar: Ideal for traditional meringue; just add it slowly to help it dissolve properly
- Superfine (caster) sugar: Dissolves faster, producing a smoother meringue with less risk of graininess
- Powdered sugar: Not recommended — it contains cornstarch, which affects texture and stability
If all you have on hand is granulated sugar, don’t worry — just be sure to add it slowly while whipping to help it dissolve. Rushing this step is the number one reason meringue cookies fall flat or turn gritty.
How to add sugar the right way
Here’s the truth: how and when you add sugar determines whether your cookies float like clouds or fall like pancakes.
- Wait until soft peaks form in your egg whites before adding sugar
- Add it slowly, one tablespoon at a time, beating well after each addition
- Beat until stiff peaks form — the mixture should look glossy, thick, and hold its shape
The sugar needs time to dissolve fully. If you rush this part, the meringue will collapse or bake unevenly. But when done right, it creates a foam so stable, you could pipe it into stars and swirls that hold their shape through baking and beyond.
Sugar’s role in crisp edges and perfect texture
One of the most satisfying elements of these cookies is their texture: a whisper-crisp shell that gives way to a chewy, airy center. That magic? All thanks to sugar.
- As the cookies bake, sugar on the surface begins to caramelize
- This creates the thin, slightly crunchy crust that contrasts with the soft interior
- Additionally, sugar locks moisture into the center, so the middle doesn’t dry out
It’s this precise balance — crisp but not brittle, chewy but not gooey — that keeps people reaching for more.
What to do if your sugar doesn’t dissolve
If you notice grainy meringue or visible sugar crystals in your mixture, it likely didn’t dissolve properly. Here’s how to fix it next time:
- Warm your egg whites slightly (place the bowl over warm water) to help sugar dissolve faster
- Use superfine sugar for faster incorporation
- Whip longer at a moderate speed, allowing sugar time to dissolve fully
- Avoid using sugar substitutes — they often don’t behave the same way in meringue
Remember, meringue rewards patience. Don’t rush it, and the payoff will be a cookie that’s ethereal, elegant, and flawlessly textured.
The final word on granulated sugar
To sum it up: without granulated sugar, you wouldn’t have cloud cookies — you’d have a puddle of peppermint-flavored foam. Sugar adds far more than sweetness. It provides structure, delivers that satisfying crunch, and breathes life into the texture that defines this cookie.
And the best part? You already have it in your pantry. No need for complicated syrups, stabilizers, or specialty products. Just one simple ingredient, used with intention, can create bakery-level cookies that wow with every single bite.
Optional mix-ins for 3 ingredient peppermint meringue cookies
While these cloud cookies shine on their own, adding crushed peppermint candies or a smooth chocolate drizzle can take them from simple to spectacular. These finishing touches add more than visual appeal — they introduce contrast, crunch, and richness, transforming your minimalist meringues into full-blown holiday showstoppers.
And let’s be real: holiday desserts should dazzle. Whether you’re packaging them as gifts, plating them for guests, or posting them on Pinterest, a few thoughtful toppings can make all the difference.
Crushed peppermint: sparkle, crunch, and festive flair
Crushed peppermint candies aren’t just pretty — they bring texture and a second layer of flavor. When sprinkled onto your cookies before baking, they partially melt into the surface, adding sparkle and crackle. When added afterward, they remain crisp, providing that classic candy cane crunch.
- Use candy canes or peppermint discs — both work beautifully
- Place them in a zip-top bag and crush gently with a rolling pin or kitchen mallet
- Sprinkle over cookies before baking for a melted-in swirl, or after baking for crunch and color
Pro tip: Go easy. A light dusting adds contrast; too much can melt into sticky pools or overpower the delicate flavor.
How to keep the peppermint from getting sticky
Crushed candies can sometimes absorb moisture and become tacky over time. To avoid this:
- Let cookies cool completely before adding crushed candy post-bake
- Store cookies with wax paper between layers
- Add candies right before serving for maximum texture
- Avoid humid environments — moisture is the enemy of crisp toppings
The result? Cookies that look like they were made by the elves at a boutique bakery — but came from your kitchen in under an hour.
Pairing peppermint crunch with chocolate
If you really want to make your cookies pop, consider adding a chocolate drizzle over the top. Not only does it look elegant, but it also pairs beautifully with the minty flavor — think peppermint bark in meringue form.
Chocolate drizzle: rich contrast to airy sweetness
Chocolate provides the exact opposite of what the meringue brings — it’s dense, velvety, and slightly bitter, creating harmony on the palate.
Here’s how to do it right:
- Melt high-quality dark or semi-sweet chocolate (or even white chocolate for contrast)
- Let the cookies cool completely before drizzling
- Use a spoon, piping bag, or fork to flick thin ribbons across the tops
- Allow the chocolate to harden at room temperature or chill briefly in the fridge
Want even more magic? After drizzling, sprinkle crushed peppermint over the chocolate while it’s still wet. It will stick beautifully and create that classic holiday bark combo — but in cloud cookie form.
Elegant, elevated, and still easy
The best part? These add-ons don’t require any extra baking, complicated tools, or extra ingredients you wouldn’t already have on hand. They’re quick, impactful, and ideal for:
- Holiday cookie exchanges
- Festive gift boxes
- Dessert tables that need a pop of color
- Instagram-worthy bakes that scream homemade, but elevated
So while these peppermint cloud cookies can absolutely stand on their own, a touch of chocolate or a sprinkle of crushed candy might just be the thing that gets them remembered.
How to Make 3 Ingredient Peppermint Cloud Cookies (Step-by-Step)
Whip egg whites to perfection for peppermint meringue cookies
Every great peppermint cloud cookie begins with perfectly whipped egg whites — and this step, though deceptively simple, is absolutely non-negotiable. If your peaks are too soft, the cookies will spread. Too dry, and they’ll crack and crumble. But get it just right? You’re rewarded with cookies that rise like clouds and melt like snowflakes.
This is the foundation of your recipe. So let’s break it down step-by-step.
Start with room temperature egg whites
Before reaching for your mixer, make sure your egg whites are at room temperature. This small detail makes a big difference.
- Room temperature egg whites whip faster and reach greater volume
- Cold whites tend to resist aeration, which means less lift in your final cookie
- If you’re short on time, place your whole eggs in a bowl of warm water for 5–10 minutes
Additionally, be careful when separating eggs — even a trace of yolk can sabotage your meringue. For best results, separate your eggs while cold, then let the whites sit until they warm up.
Use the right bowl and tools
The type of bowl you use can make or break this step. Even if you do everything else right, a greasy bowl will kill your peaks before they start.
- Choose a glass or metal mixing bowl — plastic tends to retain oils
- Wipe your bowl and beaters with vinegar or lemon juice to eliminate invisible grease
- Use a hand mixer or stand mixer with a whisk attachment for best results
Yes, you can whisk by hand… but unless you’re training for a baking marathon, go electric.
Begin slow, then increase speed gradually
Start whipping on low to medium speed. This gives the proteins time to stretch and start trapping air without breaking too early. Once the whites are foamy, increase to medium-high.
- At soft peak stage, the whites will form peaks that gently fall over
- Continue whipping, and you’ll reach stiff peak stage — this is your goal
How to tell when you’ve reached stiff peaks
This is where the artistry comes in. Look for the following signs that your meringue is ready:
- The whites should be thick, glossy, and bright white
- When you lift the whisk, the peaks should stand tall and not droop
- If you tilt the bowl, the mixture should stay firmly in place
- The meringue should feel smooth when rubbed between your fingers (not grainy)
If you’re unsure, test with the classic bowl flip test — carefully invert the bowl over the sink. If it stays put, you’ve nailed it.
What to avoid during this step
There are a few common pitfalls that can ruin your meringue before you even get to the sugar:
- Adding sugar too early: wait until soft peaks form before adding any
- Overbeating: once the mixture looks dry or clumpy, you’ve gone too far
- Grease or yolk contamination: wash everything thoroughly and separate eggs carefully
- Humidity: try to whip meringue on a dry day or in a climate-controlled kitchen
Once your peaks are glossy and hold firm, you’re ready for Step 2: Gradually fold in sugar and peppermint — where sweetness and holiday magic come together.
Fold in sugar and peppermint extract like a pro
Now that your egg whites are whipped to stiff, glossy peaks, it’s time to turn that fluffy foam into something sweet, stable, and delicious. This step is where structure meets flavor — and it requires a little finesse.
You’re not just dumping ingredients in; you’re building the foundation of your cloud cookies. So slow down, follow the rhythm, and let the ingredients work together the way they were meant to.
Add sugar slowly — and whip, whip, whip
Sugar is your stabilizer. It helps maintain the integrity of the whipped egg whites and forms the crisp outer shell that defines the cookie’s texture. However, if you add it too quickly, it can deflate the meringue or leave a grainy finish.
Here’s how to do it right:
- With your mixer running on medium-high, begin adding granulated sugar one tablespoon at a time
- Allow each spoonful to fully dissolve before adding the next — this should take about 20–30 seconds per addition
- Continue whipping until the mixture becomes even glossier and thicker
Don’t rush this process. Slow sugar incorporation means a stable meringue, a smoother finish, and a better final texture.
Test for readiness
Once all the sugar is in, stop and check the mixture:
- Rub a tiny bit of the meringue between your fingers — it should feel smooth, not gritty
- The mixture should form very stiff peaks that don’t budge when the whisk is lifted
- It should be bright white, shiny, and dense — almost marshmallow-like
If the meringue still feels grainy, continue whipping for another minute or two. Patience here will reward you later with cloud-like cookies that hold their shape and bake evenly.
Fold in peppermint extract gently
Once the sugar is fully incorporated, it’s time for the star of the show: peppermint extract. But don’t mix it in like you’re making pancake batter — this part requires a delicate touch.
- Add ¼ to ½ teaspoon of pure peppermint extract
- Use a spatula, not a mixer, to gently fold it into the meringue
- Turn the bowl with each fold, sweeping from the bottom to the top to avoid deflating the foam
You want to mix just enough to distribute the flavor — no more. Overmixing at this stage can undo all your hard work from Step 1.
Optional: add food coloring or crushed peppermint
For a fun, festive twist, now’s the perfect time to add a swirl of natural food coloring or a sprinkle of crushed peppermint candies.
- Add 1–2 drops of red food coloring and fold just once or twice for a marbled effect
- For crunch, gently fold in 1–2 tablespoons of crushed peppermint candy
- Don’t overmix, or you’ll deflate the meringue and lose the visual swirl
These additions are completely optional, but they add visual appeal — especially if you’re gifting the cookies or sharing them on social media.
What to avoid during this step
Even though this part seems simple, it’s surprisingly easy to make mistakes that affect the final texture. Watch out for:
- Dumping in sugar all at once — this will flatten your peaks and ruin the structure
- Using a heavy hand when folding in flavor — stir gently, and only as much as needed
- Adding peppermint extract too early — it should go in only after the sugar is fully whipped in
Once your mixture is stiff, sweet, and minty — and still full of air — you’re ready to move on to the fun part: Step 3: Pipe or spoon onto baking sheet & bake low and slow.
Shape and bake your 3 ingredient peppermint cloud cookies
Your meringue is ready. It’s thick, glossy, and infused with peppermint — now it’s time to shape it, slow-bake it, and bring your peppermint cloud cookies to life. This step is all about gentle handling and low, consistent heat.
While the prep up to this point has focused on technique, this part leans into presentation and patience. And trust me — the payoff is absolutely worth it.
Line your baking sheet properly
Before you begin piping or spooning the meringue, prepare your baking surface carefully. These cookies are delicate and tend to stick if the surface isn’t properly lined.
- Use parchment paper — not wax paper — to prevent sticking and promote even drying
- Avoid silicone baking mats, as they can hold too much moisture and reduce crispness
- If needed, add a tiny dab of meringue to the corners to “glue” the parchment down
This simple step ensures your cookies lift cleanly after baking and keeps the bottoms from overbaking.
Choose your shape: piped or spooned
The beauty of this recipe? It’s versatile. Whether you want bakery-style swirls or rustic little clouds, there’s no wrong approach — just two easy paths to perfection.
Option 1: Pipe for elegance
- Transfer the meringue to a piping bag fitted with a star or round tip
- Pipe small swirls or mounds, about 1½ to 2 inches wide, spaced an inch apart
- Keep your pressure steady for consistent shapes
Option 2: Spoon for simplicity
- Use two teaspoons to gently scoop and drop mounds of meringue onto the parchment
- Smooth the tops lightly for a more uniform look
- This method is faster and just as tasty — great for casual bakes or baking with kids
Either way, consistency matters. Try to keep all cookies roughly the same size so they bake evenly.
Bake low and slow for cloud-like results
Now, here’s where patience comes in. These aren’t drop-and-go cookies. They require a slow, low-temperature bake to gently dry out and set the meringue without browning or cracking.
- Preheat your oven to 225°F (110°C) — no hotter
- Bake for 60 to 75 minutes, depending on size and humidity
- Do not open the oven door — fluctuations in temperature can cause cracks
- Once the baking time is up, turn off the oven and let the cookies sit inside for an additional 30 minutes to 1 hour
This gradual cooling prevents sudden temperature shock, which is a common cause of cracking. The result? Cookies that hold their shape, stay pristine, and have that perfect crisp-meets-soft texture.
Know when they’re done
Because meringue cookies don’t brown like other baked goods, it can be tricky to tell when they’re done. Here’s what to look for:
- The cookies should feel dry to the touch and lift easily off the parchment
- They should be crisp on the outside, but still have a slight chew inside
- There should be no visible moisture or wet spots underneath
If they’re still sticky, let them sit in the warm oven a bit longer. You can also pop them back in for 10-minute increments at 200°F if needed.
Cool completely before storing
Once out of the oven, let the cookies cool fully on the tray. This final cooldown helps set the texture and prevents cracking from movement or sudden air exposure.
To store:
- Place in an airtight container with wax paper between layers
- Store at room temperature in a cool, dry place
- Avoid the fridge — moisture will soften the crisp shells
Properly baked and stored, your peppermint cloud cookies will stay light, crisp, and irresistible for up to 5 days — if they last that long.
Tips to prevent flat peppermint cookies (and keep them cloud-like)
At first glance, these peppermint cloud cookies might seem foolproof — just three ingredients, minimal prep, and no chilling time. However, even the simplest recipes come with their quirks. If you want your cookies to turn out light, crisp, and cloudlike every single time, there are two non-negotiable tips to remember: don’t overmix and pay attention to humidity.
These small but mighty details can mean the difference between perfect meringue magic and sad, sticky flops.
Don’t overmix your meringue — here’s why it matters
Once your egg whites reach stiff peaks and your sugar is fully incorporated, the hard part is over — but many bakers slip up right here. It’s tempting to keep folding or stirring, especially when adding flavor or color. Unfortunately, every extra mix knocks precious air out of your batter.
Overmixing can lead to:
- Flat, spread-out cookies that bake up dense instead of airy
- Cracked surfaces from deflated meringue
- Loss of volume, resulting in smaller, dull-looking clouds
To avoid this, switch to a spatula as soon as you’ve added sugar and peppermint. Fold gently and stop mixing the second your ingredients are combined. When in doubt, less is more.
Spotting the signs of overmixed batter
If your meringue loses its shine and begins to look soupy or runny, it’s been overmixed. Similarly, if the peaks no longer hold and the batter pools when piped or spooned, you’ve gone too far.
While it’s tempting to try and save it by re-whipping — don’t. Unfortunately, once the foam has collapsed, the air bubbles are gone, and the structure can’t be rebuilt. Better to start fresh and whip a new batch.
How to fold gently without deflating
If you’re incorporating add-ins like crushed peppermint or food coloring, use a light touch:
- Use a wide spatula, sweeping from the bottom and folding up over the top
- Turn the bowl as you fold, rather than stirring in circles
- Fold no more than 3 to 5 times — the goal is streaks of color or evenly distributed candy, not total uniformity
The goal is to keep as much of the air inside the batter as possible. Think of folding as nudging the ingredients together — not blending them into oblivion.
Watch out for humidity — the silent meringue killer
Here’s a secret most cookie blogs don’t mention: humidity is the enemy of meringue. Because these cookies rely on moisture evaporation to set properly, excess humidity in the air can prevent them from drying out during baking.
The result? Sticky, soft cookies that never quite form that crisp shell. They may look done, but they’ll collapse or absorb moisture from the air within hours.
How to bake on humid days (yes, it’s possible)
If you live in a humid climate or it’s raining out, don’t panic. You can still bake beautiful meringue cookies — you just need to adjust.
- Bake them a little longer — add 10–15 minutes to your baking time
- After baking, leave them in the oven with the door slightly cracked as it cools
- Consider using a dehumidifier in the kitchen during baking, if possible
- Store cookies immediately in airtight containers once cooled — and include a dry paper towel or food-safe silica packet to absorb moisture
Humidity-proof storage tips
Even the best cookies will lose their crunch in a humid kitchen. Here’s how to preserve your hard work:
- Let cookies cool completely on the baking tray
- Stack with wax or parchment paper between layers
- Store in an airtight container at room temperature
- Avoid refrigerating — that only makes the situation worse by introducing condensation
For gifting or long-term storage, consider individually wrapping cookies in cellophane to prevent air exposure.

Pro Tips, Variations, and Common Mistakes to Avoid
For an in-depth look at meringue techniques and troubleshooting, check out this meringue cookie guide by Epicurious. It offers valuable insights into achieving the perfect texture and avoiding common pitfalls.
Make it festive: Add food coloring or crushed candy canes
Your peppermint cloud cookies are already light, fluffy, and full of minty magic — but why stop there? With just a few simple add-ins, you can turn them into holiday showpieces that look as joyful as they taste. Whether you’re baking for a cookie swap, wrapping gifts, or styling your dessert table, these festive flourishes turn a minimalist cookie into a winter wonder.
They’re optional, of course. But once you see how easy it is to upgrade your cookies with a pop of color or a sprinkle of crunch, you may never go back to plain white meringue again.
Add food coloring for that candy cane swirl
One of the easiest ways to make these cookies look like Christmas is with a hint of red or pink coloring. That signature swirl? It’s the visual cue that says, “Yes, I brought the most festive cookies to the party.”
Here’s how to do it:
- Use gel or natural food coloring — they’re more vibrant and won’t water down your meringue
- Add just 1 to 2 drops after the sugar and peppermint extract are fully incorporated
- Fold gently with a spatula — just 2 to 4 times — to create a marbled swirl
- Avoid overmixing, or you’ll lose the swirl and deflate the meringue
If you’re using a piping bag, you can also paint a thin stripe of red gel food coloring along the inside of the bag before filling it with meringue. As you pipe, the color creates gorgeous candy-cane ribbons — no mixing required.
Color ideas beyond red
While red is classic, don’t be afraid to experiment with:
- Soft pink for a peppermint pastel theme
- Green for a mint chocolate look (especially paired with chocolate drizzle)
- White with edible glitter for a snowflake vibe
- Two-tone piping using red and white meringue side by side
Color adds personality, so match it to your occasion — cozy, classy, or whimsical.
Food coloring dos and don’ts
To keep your cookies light and airy, follow these guidelines:
- DO use gel or natural-based colors — a little goes a long way
- DO NOT use liquid food coloring in large amounts — it can thin your meringue
- DO test a small batch first if using a new brand
- DO NOT add coloring before stiff peaks form — wait until you’re folding
Remember, color is for style — not structure. Keep it subtle, and let the meringue shine.
Crushed candy canes for sparkle and crunch
Now let’s talk texture. Adding crushed candy canes gives these cookies an irresistible crunch and that iconic peppermint sparkle. It’s like adding tinsel to a tree — completely optional, but undeniably festive.
Here’s how to do it right:
- Place candy canes or peppermint discs in a zip-top bag
- Crush with a rolling pin or kitchen mallet until you have a mix of fine dust and small shards
- Sprinkle lightly over each cookie just before baking to allow them to melt slightly into the surface
- Alternatively, add after baking for a crisp texture and more vibrant color
The heat from the oven causes the candy to melt slightly, embedding it into the meringue for a stained-glass effect.
Troubleshooting candy toppings
Candy canes are fun — but they can be finicky. Here’s how to handle common issues:
- Sticky candy after baking? Add it post-bake instead
- Candy melting too much? Use slightly larger pieces and reduce oven temp by 10°F
- Colors bleeding? Stick with classic red-and-white canes and avoid ones with artificial dyes that run
Other festive topping ideas
Want to go even bigger? Try mixing and matching:
- Crushed chocolate-covered peppermint bark for flavor and contrast
- Mini chocolate chips or cocoa nibs for texture
- Edible glitter or gold dust for a luxe, snow-globe vibe
- Holiday sprinkles for a kid-friendly, party-ready look
The possibilities are endless — and that’s what makes this recipe so fun. With just a few tweaks, you can personalize your peppermint cloud cookies for any holiday event, from casual cookie parties to elegant dessert spreads.
Common fail: Flat cookies = not enough whipping
Let’s be real — flat peppermint cloud cookies are a heartbreak. You followed the recipe, measured everything perfectly, and maybe even added festive flair. But when the cookies came out of the oven, they spread out like sad little puddles instead of puffing into dreamy clouds.
Don’t panic — this is a common mistake, and thankfully, it’s easy to fix once you understand what’s going on. The likely culprit? Under-whipped egg whites. If you don’t build enough volume and structure during whipping, the cookies won’t have the strength to hold their shape.
Why under-whipped egg whites = flat, lifeless cookies
Egg whites are responsible for the rise, shape, and interior airiness of these cookies. When you whip them, you’re essentially trapping thousands of tiny air bubbles in a delicate protein web. If that web isn’t fully developed, the meringue will collapse under the heat of the oven — and the cookies will go flat instead of fluffy.
Here’s what happens when you stop whipping too early:
- The meringue looks foamy, but isn’t stiff enough to pipe or hold peaks
- Sugar doesn’t fully dissolve, leaving a gritty or weeping texture
- Cookies spread out instead of rising because there’s no internal structure
- They bake unevenly, with cracked tops or gooey, sunken centers
In short, without enough whipping, the meringue just can’t do its job.
How to spot under-whipped meringue before it’s too late
Luckily, the signs are easy to recognize if you know what to look for:
- Peaks that droop instead of standing tall
- A mixture that still looks bubbly or dull rather than glossy and thick
- Batter that spreads quickly when spooned onto parchment
- Meringue that slides off the whisk instead of clinging to it
If you see these symptoms, don’t move on to the next step — just keep whipping. It’s better to wait a few extra minutes now than to pull a flat batch from the oven later.
How to fix it — and prevent it from happening again
First and foremost, go back to basics:
- Start on medium speed, then gradually increase to high once soft peaks form
- Whip until stiff peaks hold their shape — the tips should stand straight without curling
- Use a clean, dry bowl and beaters — any grease or yolk can sabotage your peaks
- Check texture with a spoon and finger test — it should be thick and glossy, not loose or bubbly
If your meringue still isn’t stiff after several minutes, pause and double-check:
- Was your bowl completely grease-free?
- Are you using fresh egg whites, not from a carton that doesn’t whip well?
- Did you wait to add sugar until soft peaks formed?
Sometimes, it’s not your technique — it’s the tools or ingredients. But with a few adjustments, you’ll get it right.
Can flat cookies still taste good?
Honestly… yes. Even flat peppermint meringue cookies can taste great — they’ll just lack that signature lightness and cloudlike presentation. They may be chewier, more like peppermint bark or brittle than a classic cloud cookie.
So if a batch flattens out? Don’t toss it. Crumble the cookies over hot chocolate, ice cream, or a peppermint sundae. Then try again — next time, with fully whipped whites and the confidence that comes from knowing exactly what went wrong.
Add-ins to try: Chocolate chips, cocoa powder, or almond extract
While the original recipe is built on simplicity, there’s plenty of room to customize your peppermint cloud cookies with bold, creative, and complementary flavors. Whether you’re a die-hard chocolate lover or looking to add a nutty twist, a few small tweaks can give these airy bites a whole new personality — without weighing them down.
These add-ins won’t just add dimension; they’ll also make your cookies stand out at cookie swaps, parties, or on Pinterest feeds full of sugar cookies and gingerbread.
Chocolate chips: rich contrast meets cloud-like texture
There’s a reason peppermint and chocolate are a classic duo — they balance each other out perfectly. Cool and bright meets warm and deep. If you want your cookies to feel more indulgent while keeping their signature lightness, mini chocolate chips are the way to go.
- Use mini semi-sweet or dark chocolate chips — their small size blends seamlessly into the meringue
- Add no more than ¼ cup per batch, folding in gently after the peppermint extract
- For best results, freeze the chips beforehand so they don’t melt during baking
These chips give little bursts of richness throughout the cookie, without overpowering the peppermint. It’s like a bite-sized peppermint bark cloud — and who could say no to that?
Optional twist: drizzle with chocolate post-bake
Not ready to add chips into the mix? No problem. You can drizzle melted chocolate over cooled cookies instead. This creates an elegant finish and keeps the base recipe intact.
Best chocolate for drizzling
- Use dark or bittersweet chocolate for intensity
- Melt with a tiny bit of coconut oil to keep the drizzle smooth and shiny
- Use a spoon, piping bag, or fork to create ribbons, swirls, or zig-zags
Let the chocolate set completely before storing. Bonus: add a sprinkle of crushed candy cane over the drizzle while it’s still wet for a show-stopping finish.
Cocoa powder: add depth and a chocolate-mint vibe
If you want to introduce chocolate flavor without any chunks, unsweetened cocoa powder is your friend. It brings a rich, slightly bitter contrast to the sugary sweetness and pairs beautifully with peppermint.
- Add 1 to 1½ tablespoons of unsweetened cocoa powder after the sugar is fully incorporated
- Sift it first to avoid lumps and fold it in gently with a spatula
- The result? Cookies that taste like peppermint hot cocoa in meringue form
You’ll notice the color deepens to a mocha tone, and the peppermint becomes even more refreshing by contrast. It’s still airy, still light — just with a slightly darker edge.
Bonus idea: mocha peppermint cloud cookies
To take it up a notch, add ½ teaspoon of espresso powder along with the cocoa. This deepens the chocolate flavor and gives your cookies a sophisticated coffeehouse twist — perfect for pairing with lattes or gifting to grown-up friends.
Almond extract: nutty, nostalgic, and subtly sweet
If you’re not in the mood for chocolate, try a splash of almond extract for something unexpected. It has a warm, sweet aroma that contrasts beautifully with the cool sharpness of peppermint.
- Replace half the peppermint extract with ¼ teaspoon of almond extract
- Almond is powerful — a little goes a long way
- Fold it in at the same stage as you would the peppermint, just before piping or scooping
The result? A more nuanced cookie with depth and complexity. It’s still minty, but with a soft, nutty backbone that lingers on the palate.
Other flavor pairings to explore
The flexibility of this base recipe means you can experiment endlessly. Here are a few more flavor combinations that work well:
- Vanilla + peppermint: for a candy cane cookie with a creamy edge
- Lemon zest + peppermint: bright, tangy, and totally refreshing
- Coconut extract + chocolate chips: like a peppermint macaroon cloud
- Hazelnut extract + cocoa powder: Nutella-inspired meringue magic
Just remember — keep the additions minimal. The strength of this cookie lies in its airiness, and too many mix-ins can weigh it down.
Storage tips: How to keep meringue cookies crisp
You nailed the meringue, baked them to airy perfection, and even added a swirl of peppermint or chocolate drizzle. But here’s the truth no one tells you upfront: meringue cookies are crisp now… and dangerously fragile tomorrow if you store them the wrong way.
Because meringue is made mostly of sugar and air, it’s highly sensitive to moisture. A little humidity? Boom — soggy, sticky, chewy cookies that lose their signature snap. But don’t worry. With a few simple storage techniques, you can lock in that crisp exterior and enjoy your peppermint clouds for days.
Let cookies cool completely before storing
First things first: never store meringue cookies while they’re still warm. Even the slightest residual heat will create condensation in your container — and that moisture is the fast track to ruin.
- Let cookies cool on the baking tray for at least 1 hour after baking
- They should feel dry to the touch and lift easily from the parchment
- If your kitchen is humid, let them cool in the oven with the door cracked open
Patience here is your friend. Rushing this step guarantees a short cookie shelf life.
Use an airtight container — and layer carefully
Once cooled, transfer the cookies to an airtight container. This keeps out air and humidity, which are the main enemies of crispness.
- Use a container that just fits the number of cookies — too much empty space allows air to circulate
- Layer cookies between sheets of parchment or wax paper to prevent sticking and breakage
- Avoid metal tins for long-term storage — they can trap residual humidity and dull the texture
If you’re packaging these for gifting, line your gift box with parchment and wrap the entire stack in plastic wrap before sealing. That extra layer goes a long way.
Add a moisture absorber for extra protection
Here’s a pro tip most home bakers don’t know: include something to absorb humidity inside the container.
- Add a small food-safe silica gel packet (like the kind found in packaged snacks)
- Or place a piece of dry paper towel folded in the corner of the container
- Replace every 2–3 days if you’re storing cookies long-term
This small step can help your cookies stay crisp for up to 5 days — even in less-than-ideal kitchen climates.
Avoid the fridge — and other rookie mistakes
It may be tempting to store cookies in the fridge or freezer, especially if you’re baking ahead. But for meringue? Cold storage = disaster.
- Do not refrigerate — the high moisture content inside fridges will instantly soften your cookies
- If you must freeze, do so before baking (pipe the meringue and freeze unbaked)
- Avoid opening and closing the storage container frequently — every time you expose the cookies to air, they absorb a bit more moisture
If cookies do start to soften slightly, you can re-crisp them by placing them in a 200°F (93°C) oven for 10–15 minutes, then letting them cool in the oven with the door cracked.
Best practices for long-term success
To keep your meringue cookies crisp and cloudlike until the very last bite:
- Always store at room temperature in a cool, dry place
- Use airtight containers sized appropriately to reduce air pockets
- Add a drying agent like silica or paper towel
- Never refrigerate baked meringue
- Bake in low humidity, or store immediately in ideal conditions
With proper storage, your peppermint cloud cookies will maintain their dreamy texture and festive flavor — ready to impress guests, gift recipients, or your future self with every bite.
More Quick Holiday Cookie Recipes to Try
No-Bake Peppermint Cookies (Bonus Recipe!)
Running low on time but still craving that crisp peppermint snap? Don’t worry — we’ve got you. These no-bake peppermint cookies are fast, festive, and fabulously easy. They require zero oven time, minimal cleanup, and still deliver the holiday spirit in every bite.
Whether you’re prepping last-minute treats or looking for something fun to make with kids, this no-bake twist on peppermint cookies is here to save your season.
Ingredients you’ll need
This recipe skips the egg whites and leans into quick-set ingredients that hold together with a chill rather than a bake. Here’s what to grab:
- 1½ cups crushed graham crackers or chocolate cookie crumbs
- ½ cup sweetened condensed milk
- 1 teaspoon pure peppermint extract
- ½ cup crushed candy canes or peppermint discs
- ½ cup mini chocolate chips or white chocolate chips (optional)
- Powdered sugar or cocoa powder for rolling (optional)
You probably have most of these on hand already. And if not? A single grocery run and five ingredients later, you’re in cookie business.
Optional ingredient swaps
- Swap cookie crumbs for crushed Oreos for a darker, richer base
- Use gluten-free graham crackers if needed
- Try vegan condensed coconut milk for a dairy-free option
- Add finely shredded coconut to the dough for added texture
These cookies are flexible — so let your pantry inspire your twist.
How to make them
The process is ridiculously simple — no mixers, no fancy tools, no baking sheets.
- In a large bowl, combine the crushed cookies, peppermint extract, and sweetened condensed milk
- Stir until the mixture becomes thick and sticky
- Fold in crushed candy canes and chocolate chips, if using
- Roll into 1-inch balls and coat in powdered sugar or cocoa powder
- Chill on a tray for at least 30 minutes before serving
That’s it. Seriously. You can make a batch in under 10 minutes and have them ready before your guests even arrive.
Make it holiday-party ready
If you’re bringing these to a gathering or gifting them:
- Arrange in mini cupcake liners for a clean, festive presentation
- Drizzle with melted white chocolate and sprinkle with crushed candy
- Wrap in cellophane bags tied with ribbon for instant edible gifts
These no-bake cookies offer a nostalgic, peppermint bark vibe — chewy, minty, and full of crunch. No oven. No stress. All joy.
3-Ingredient Christmas Cookie Roundup
When December hits and the kitchen counter’s already crowded with gift wrap, ribbon, and cocoa mugs, the last thing you want is a complicated recipe with a mile-long ingredient list. That’s where 3-ingredient Christmas cookies come in. These recipes offer a rare combination: effortless prep, dependable results, and crowd-pleasing flavor — all while keeping your grocery list beautifully short.
Each cookie here can be made with just three ingredients, but don’t let the simplicity fool you. With the right combination of pantry staples and seasonal flair, these recipes rival their more complex cousins in taste, texture, and presentation. Whether you’re short on time, ingredients, or patience, these are the cookies you’ll bake on repeat.
Peppermint Cloud Cookies
These are the stars of the show — light, ethereal, and brimming with bright peppermint flavor. Made from whipped egg whites, sugar, and peppermint extract, these cloud cookies are meringue-based, meaning they’re naturally gluten-free and incredibly low-effort once you master the method.
To make them holiday-ready, add a touch of red gel food coloring, crushed peppermint candy, or a thin ribbon of melted chocolate across the top. Their crisp shell and marshmallow-soft center make them one of the most satisfying bites on any holiday cookie tray.
Storage tip: Keep them in an airtight container with a paper towel or silica pack to preserve that signature crispness for days.
Peanut Butter Blossoms
Classic, nostalgic, and shockingly simple. These flourless peanut butter cookies require just peanut butter, sugar, and an egg. After baking, each one is crowned with a chocolate kiss, which slowly melts into the warm center and sets with a perfect bite.
They’re soft, rich, and protein-packed — and a great option for gluten-free guests. You can even swap the chocolate kiss for a peanut butter cup or a square of dark chocolate for a more elevated version.
Baking tip: Don’t overbake. These cookies continue to set as they cool, so pull them just as the edges firm up.
Buttery Shortbread Discs
Shortbread is one of the most ancient and beloved holiday cookies for a reason: it relies on good ingredients and proper ratios. In this 3-ingredient version, all you need is butter, sugar, and flour. The secret to success? Use salted European-style butter, which has a higher fat content and imparts a deeper flavor.
The dough is simple enough to mix by hand, then shaped into a log, chilled, and sliced. The result is a cookie that crumbles delicately, melts on the tongue, and pairs beautifully with coffee, cocoa, or a dollop of jam.
Presentation tip: Dip one half in white chocolate and sprinkle with crushed pistachios or edible glitter for a modern twist.
Nutella Thumbprints
This one’s for the chocoholics. With a texture that mimics brownies and a richness that belies its simplicity, these Nutella-based cookies are a must-bake. Simply mix Nutella, one egg, and flour. After baking, add a spoonful of Nutella or a raspberry jam center for an irresistible thumbprint effect.
These cookies are especially popular with kids and teens, but don’t underestimate their grown-up appeal — the deep hazelnut flavor and soft center make them a sophisticated treat with very little effort.
Optional upgrade: Add a sprinkle of sea salt flakes before baking to balance the sweetness and enhance flavor complexity.
Coconut Macaroon Mounds
Naturally gluten-free and chewy on the inside with a golden, toasty exterior, these coconut macaroons are as easy as they are addictive. Blend shredded coconut, sweetened condensed milk, and a splash of vanilla or almond extract. Scoop, bake, and cool. That’s it.
To keep them from becoming too dense, make sure not to compact the coconut too tightly when scooping. These store well, travel beautifully, and have a texture that’s satisfyingly chewy without being sticky.
Flavor tip: Drizzle with melted dark chocolate and dust lightly with cinnamon for a Mexican hot chocolate spin.
No-Bake Pretzel Rolo Bites
This one isn’t quite a cookie, but it deserves a place on any 3-ingredient list. Layer mini pretzels on a tray, top each with a Rolo candy, and bake just until the chocolate softens. Press a pecan half into the top and let them cool until set.
They’re salty, sweet, chewy, crunchy — basically everything a holiday snack should be. And since they require no mixers or measuring, they’re perfect for assembling with kids or making in bulk for gifting.
Storage tip: These can be made up to a week in advance and stored in a tin lined with wax paper between layers.
Easy Egg-White Desserts for Leftover Whites
If you’ve ever made a custard, lemon curd, or yolk-heavy holiday cake, you’ve likely found yourself with a bowl of leftover egg whites and no clue what to do with them. Don’t toss them — egg whites are dessert gold. They whip into glossy peaks, lighten dense batters, and transform simple ingredients into airy, elegant sweets.
Whether you’ve got one white or half a dozen, these easy desserts give those leftovers a second life — and a very delicious one at that.
Classic Meringue Cookies
Let’s start with the obvious — meringue cookies. Whether flavored with peppermint, lemon, cocoa, or vanilla, these cloudlike cookies are one of the simplest ways to use egg whites. With just sugar and flavoring, you can bake them into crisp shells that melt in your mouth.
They’re naturally gluten-free, low-fat, and endlessly customizable. Add-ins like chocolate chips, food coloring, or crushed nuts give them personality without ruining the delicate structure.
Storage tip: Keep meringues in an airtight container with a silica pack to prevent softening.
Pavlova: A Showstopper with a Crisp Shell and Marshmallow Center
If you want drama with minimal effort, pavlova is the answer. This large-format meringue dessert bakes into a crisp shell with a soft, marshmallowy interior, then gets topped with whipped cream and fruit.
All you need is egg whites, sugar, and a splash of vinegar or lemon juice for structure. From there, let the topping do the work — fresh berries, citrus curd, or chocolate shavings are all fair game.
Presentation tip: Shape into a wreath or nest and top with pomegranate seeds and mint for a holiday-ready pavlova.
French Macarons (For the Brave and the Bold)
Macarons are more technical, but they’re one of the most rewarding ways to use leftover whites. These delicate sandwich cookies use whipped egg whites folded with almond flour and powdered sugar to create chewy, crisp, colorful shells.
While they require precision, you can make them easier by using templates, weighing ingredients, and sticking to basic fillings like ganache or buttercream.
Flavor ideas: peppermint white chocolate, espresso, pistachio-raspberry, or classic vanilla bean.
Angel Food Cupcakes
If you want a dessert that’s light, fluffy, and perfect for portioning, turn your egg whites into mini angel food cakes. These cupcakes rely on a high ratio of whipped whites to flour, making them low-fat and airy with a slightly chewy bite.
Because the flavor is subtle, they’re a perfect base for glazes, berries, citrus zest, or drizzled chocolate.
Baking tip: Use parchment or unlined cupcake tins to help the batter cling and rise properly without collapsing.
Almond Tuiles (Crisp and Elegant)
These whisper-thin cookies are crisp, curved, and ideal for serving with ice cream, custard, or mousse. They use egg whites, powdered sugar, butter, and a small amount of flour to create a spreadable batter that bakes into lacy wafers.
For added flair, shape them over a rolling pin while warm or dip one edge in dark chocolate once cooled.
Flavor variations: add orange zest, vanilla, or a splash of almond extract to the batter for depth.
Other Egg-White-Friendly Ideas
If you’re short on time or ingredients, these ultra-easy recipes are worth bookmarking:
- Chocolate mousse (uses whites for lift and lightness)
- Homemade marshmallows (whipped whites set with gelatin and sugar syrup)
- Swiss meringue buttercream (a luxe frosting made with cooked whites and sugar)
- Soufflés (sweet or savory — whip whites and fold into a flavored base)
Bottom line? Egg whites are one of the most versatile ingredients in baking. Whether you want a delicate cookie, a dramatic showstopper, or a fast frosting fix, these ideas give your leftovers purpose — no waste, just wow.
Fluffy Cloud Cookie Variations with Lemon or Vanilla
While peppermint may be the star of the season, the base of your cloud cookie — those glossy, whipped egg whites and sweet, airy meringue — is a blank canvas just waiting to be flavored. Two of the easiest and most crowd-pleasing twists? Lemon and vanilla. Both offer delicate, fragrant alternatives to mint, creating cookies that feel classic, comforting, and timeless.
Whether you’re baking for someone who prefers citrus to mint or just want to switch things up without reinventing the wheel, these variations offer simple elegance with the same dreamy texture.
Lemon Cloud Cookies
Lemon is bright, refreshing, and slightly tart — the perfect foil for sweet meringue. When added thoughtfully, it transforms the cookie into something fresh and light, like sunshine in edible form.
To achieve this variation, use fresh lemon zest for aroma and natural oils, and a small amount of lemon juice or lemon extract for concentrated flavor.
Here’s how to do it:
- Use ½ to 1 teaspoon of lemon zest, finely grated and folded into the meringue after stiff peaks form
- Add ¼ teaspoon of lemon extract or a few drops of lemon juice — be cautious, as too much acid can affect the structure
- Optional: fold in a few drops of natural yellow food coloring for a soft pastel finish
Flavor tip: Add a pinch of salt to balance the tartness and heighten the citrus note without overpowering the delicate texture.
Best pairings for lemon meringue cookies
Lemon cloud cookies pair beautifully with a number of add-ons that enhance their bright profile:
- Lavender sugar dusted over the top before baking
- White chocolate drizzle post-bake
- A thin layer of lemon curd piped inside two cookies to make sandwich clouds
- Crushed freeze-dried raspberries folded into the batter for a berry-citrus fusion
Each of these combinations keeps the cookies light and airy while offering visual interest and balanced flavor.
Texture tips for citrus-based meringues
Because citrus juice contains water and acid, it can slightly loosen your meringue. To keep the structure intact:
- Always fold in lemon flavoring after the sugar is fully incorporated
- Avoid using more than ¼ teaspoon lemon juice unless offset by extra sugar
- Consider adding 1–2 teaspoons of cornstarch to the sugar if humidity is high or if you’re using more juice than extract
This helps stabilize the foam without compromising the fluff.
Vanilla Cloud Cookies
Vanilla is far from boring when done right. In fact, it’s one of the most beloved and versatile flavors for a reason — it pairs with everything, and it enhances the natural sweetness of meringue without being cloying.
To create vanilla cloud cookies, swap the peppermint extract for pure vanilla extract or vanilla bean paste.
- Add ½ to 1 teaspoon of pure vanilla extract after stiff peaks form
- For a luxe upgrade, use vanilla bean paste with visible specks — it adds both aroma and visual texture
- Optionally, fold in a tiny pinch of cinnamon or nutmeg for a warm, spiced undertone
Flavor tip: Vanilla meringue pairs exceptionally well with toasted coconut, crushed nuts, or dark chocolate drizzle.
Variations on vanilla that feel holiday-ready
Want to dress up vanilla cloud cookies for the season without peppermint?
- Add orange zest and vanilla for a creamsicle-inspired twist
- Mix in crushed toffee bits or chopped candied pecans
- Swirl in caramel drizzle post-bake and top with sea salt
- Pipe them as sandwich cookies with cinnamon buttercream
These small enhancements keep the simplicity of vanilla intact while adding seasonal charm.
When to use vanilla over other flavors
Choose vanilla when you:
- Want a crowd-pleasing base with wide appeal
- Are making cookie platters with bolder flavors and need a neutral option
- Plan to pair the cookies with tea, cocoa, or eggnog
- Want to decorate with sprinkles, edible glitter, or gold leaf for a refined look
Vanilla gives you space to play — both in flavor and in presentation. It’s the “little black dress” of the meringue world: understated, adaptable, and always in style.
The Final Whisk: Why 3-Ingredient Peppermint Cloud Cookies Deserve a Spot in Your Holiday Baking Lineup
In a season filled with decadent desserts and over-the-top baking projects, there’s something quietly powerful about a cookie that keeps it simple — no flour, no butter, no chaos. Just egg whites, sugar, and peppermint, whipped into something impossibly light, crisp, and unforgettable.
Peppermint cloud cookies aren’t just easy — they’re elegant. They prove that you don’t need a pantry full of ingredients or a culinary degree to make something that feels magical. With the right technique and a few thoughtful tweaks, you can create holiday cookies that look beautiful, taste like nostalgia, and leave everyone asking for the recipe.
Better yet, they’re flexible. Whether you’re swirling in lemon zest, adding vanilla, drizzling with dark chocolate, or crushing candy canes like snowflakes, these cookies are a blank canvas for whatever joy you want to bake into them.
So this season, embrace the less-is-more magic. Whip up a batch (or three), store them like a pro, and savor every crisp, minty, melt-in-your-mouth bite. Because the holidays aren’t about perfection — they’re about sweetness, simplicity, and sharing something homemade.
From cloud to crowd, your cookies are ready.