
A backyard cookout is more than just a meal—it’s a time-honored tradition that brings family and friends together over great food and good times. Whether you’re celebrating a special occasion or simply enjoying a warm summer afternoon, The Ultimate Cook Out Menu can take your gathering to the next level. From sizzling grilled meats to mouthwatering side dishes, refreshing drinks, and decadent desserts, having a well-balanced menu ensures there’s something for everyone.
In this guide, we’ll share 15 must-try recipes that will wow your guests and make your next cookout unforgettable. Whether you’re a seasoned grill master or a first-time host, these dishes are easy to prepare and packed with flavor. Fire up the grill, grab your favorite ingredients, and let’s dive into the ultimate cookout menu that will have everyone coming back for seconds!

Grilled Mains: The Star of the Cookout | The Ultimate Cook Out Menu
If you’re looking to master the art of grilling and take your cookout skills to the next level, there are plenty of expert resources available. Weber’s 10 Useful Grilling Tips provides essential techniques, including preheating the grill, maintaining cleanliness, and understanding direct vs. indirect heat for perfectly cooked meats. Another great resource is Whitney Bond’s Top 10 Grilling Tips and Tricks, which covers the importance of a hot grill, proper cleaning practices, oiling grates, and using a meat thermometer to ensure your food is grilled to perfection. For beginners, Feel Good Foodie’s Guide on How to Grill is a fantastic step-by-step guide that explains how to properly preheat, grill, and clean up after cooking on various grill types. If you prefer a visual demonstration, check out this informative Top 10 Grilling Tips video to get even more flavor-packed techniques for your next cookout. These expert-approved tips and tricks will help you achieve juicy, flavorful grilled mains that will impress your guests every time!
Classic Juicy Burgers: The Ultimate Cookout Staple | The Ultimate Cook Out Menu
No cookout is complete without a perfectly grilled, juicy burger. It’s the ultimate American classic that appeals to all ages and tastes. A well-made burger is more than just ground beef between a bun—it’s about the right seasoning, the perfect sear, and a variety of toppings that take it to the next level. Here’s how to create restaurant-quality burgers at home for your next cookout.
1. Choosing the Best Meat for Juicy Burgers
The secret to a flavorful, juicy burger starts with the right kind of ground beef.
- 80/20 Ground Beef: This blend (80% lean meat, 20% fat) is ideal for juicy burgers. The fat content ensures a rich flavor and prevents the patties from drying out.
- Ground Chuck vs. Ground Sirloin: Ground chuck (from the shoulder) has a great balance of fat and meat, making it ideal for burgers. Ground sirloin (leaner) can be used but may need added fat, like a pat of butter or an egg yolk, to keep it juicy.
- Alternative Options: Turkey, chicken, or even plant-based patties can be used for guests who prefer leaner or vegetarian alternatives.
2. Perfectly Seasoning Your Burger Patties
While some prefer to let the beef’s natural flavor shine, adding seasoning enhances the taste. Here’s what works best:
- Basic Seasoning: Salt and black pepper are all you need for a simple, classic burger. Season the outside just before grilling to prevent drawing out moisture too early.
- Enhanced Flavor: Mix in garlic powder, onion powder, Worcestershire sauce, smoked paprika, or a dash of soy sauce for deeper umami flavor.
- Pro Tip: Avoid over-mixing the beef when seasoning, as it can make the patties dense and tough.
3. Forming and Cooking the Perfect Patties
- Shape Matters: Divide the meat into equal portions (about 5-6 ounces each). Gently shape into a round patty about ¾-inch thick.
- Make a Thumbprint: Press a small indent in the center of each patty with your thumb. This prevents the burger from puffing up while grilling and ensures even cooking.
- Grill or Stovetop?:
- Grilling: Cook over medium-high heat for 3-4 minutes per side for medium doneness.
- Stovetop: Use a cast-iron skillet with a bit of oil for a crispy crust.
- Avoid Pressing Down on the Patties: Many people make the mistake of pressing burgers down with a spatula while they cook. This squeezes out all the flavorful juices, making the burger dry.
4. Choosing the Right Buns and Toasting Them to Perfection
The bun is just as important as the burger itself. Choose a soft yet sturdy bun that complements the patty.
- Best Bun Choices:
- Brioche Buns: Slightly sweet and soft, yet holds up well with juicy patties.
- Potato Buns: Buttery, fluffy, and perfect for absorbing burger juices.
- Sesame Seed Buns: A classic option with a slight crunch on the outside.
- Toasting the Buns:
- Lightly butter the cut sides of the buns and toast them on the grill for 30-60 seconds until golden brown.
- Toasting prevents sogginess from the patty juices and adds a slight crunch for texture.
5. Must-Have Burger Toppings and Variations
Customize your burgers with a variety of toppings to satisfy every guest’s preferences.
Classic Toppings:
- Crisp lettuce, juicy tomato slices, and thinly sliced onions.
- Pickles for a tangy crunch.
- Ketchup, mustard, and mayo for the traditional burger experience.
Gourmet Additions:
- Cheese Options: Cheddar, American, Swiss, pepper jack, or blue cheese for an extra punch.
- Bacon Lovers: Crispy bacon strips add smoky richness.
- Caramelized Onions: Slow-cooked onions enhance the sweetness of the burger.
- Avocado or Guacamole: Adds creaminess and a fresh contrast to the meat.
- Fried Egg: A runny yolk takes the burger to a whole new level of indulgence.
Regional and International Twists:
- Texas BBQ Burger: Smothered in barbecue sauce, topped with crispy onion rings.
- California-Style Burger: Stacked with fresh avocado, sprouts, and a zesty aioli.
- Spicy Jalapeño Burger: Loaded with spicy jalapeños, pepper jack cheese, and chipotle mayo.
- Mushroom Swiss Burger: Sautéed mushrooms paired with melted Swiss cheese for a rich, savory taste.
6. Pairing Burgers with the Perfect Sides
A burger is even better when served with classic cookout side dishes. Consider these delicious options:
- Crispy French Fries or Sweet Potato Fries – Classic and always a hit.
- Grilled Corn on the Cob – Adds a smoky, buttery flavor that pairs well with burgers.
- Potato Salad or Coleslaw – A creamy, refreshing contrast to a juicy burger.
- Baked Beans – Sweet and smoky flavors that enhance the BBQ vibe.
7. Pro Tips for Hosting a Burger Cookout
Make your cookout a seamless experience with these expert tips:
Prep Ahead: Shape and season the burger patties in advance, keeping them chilled until ready to grill.
Offer a Topping Bar: Let guests customize their own burgers with various toppings and condiments.
Have Veggie and Gluten-Free Options: Cater to dietary restrictions by offering veggie patties and lettuce wraps as bun alternatives.
Keep It Hot: Serve burgers fresh off the grill or keep them warm in a low-temperature oven to maintain juiciness.
Conclusion
Mastering the classic juicy burger is the key to a successful cookout. With the right meat, seasonings, toppings, and sides, you can create a burger that’s flavorful, juicy, and tailored to everyone’s taste. Whether you go for the traditional cheeseburger, a spicy jalapeño kick, or a BBQ-loaded masterpiece, your guests will love every bite.
So fire up the grill, grab your ingredients, and get ready to impress your guests with the ultimate cookout burger! 🍔🔥
BBQ Chicken Wings: A Cookout Favorite | The Ultimate Cook Out Menu
No cookout menu is complete without BBQ chicken wings—crispy on the outside, juicy on the inside, and coated in a smoky, tangy sauce that leaves guests licking their fingers. Whether you’re hosting a backyard barbecue or a casual summer gathering, grilled BBQ wings are a must-have dish that delivers bold flavors and crowd-pleasing satisfaction.
From choosing the best wings to perfecting the grilling process, this guide will help you make restaurant-quality BBQ chicken wings at home.
1. Choosing the Right Wings
When making BBQ chicken wings, selecting the best type of wings is essential for achieving the perfect texture and flavor.
- Whole Wings vs. Cut Wings:
- Whole wings include the drumette, flat, and tip in one piece. They can be left whole or cut for easier eating.
- Cut wings (party wings) are pre-separated into drumettes and flats, making them more manageable and ideal for cookouts.
- Fresh vs. Frozen:
- Fresh wings are best for maximum juiciness, but frozen wings work well if thawed completely before cooking.
- If using frozen wings, pat them dry thoroughly before seasoning to prevent steaming instead of crisping.
2. Marinating for Maximum Flavor
Marinating the wings enhances their flavor and keeps them juicy while grilling. A good marinade will balance sweet, smoky, tangy, and spicy flavors.
Basic BBQ Marinade Recipe:
Mix the following ingredients and marinate wings for at least 1-2 hours (overnight is best for deeper flavor).
- ½ cup BBQ sauce (homemade or store-bought)
- 2 tbsp olive oil
- 1 tbsp apple cider vinegar
- 1 tbsp honey or brown sugar
- 1 tsp smoked paprika
- 1 tsp garlic powder
- 1 tsp onion powder
- ½ tsp black pepper
- ½ tsp cayenne pepper (optional for heat)
- Pro Tip: If you’re short on time, season the wings generously with a dry rub and let them sit for at least 30 minutes before grilling.
3. Prepping the Grill for Perfect Wings
Grilling is the best way to achieve that crispy skin and smoky BBQ flavor. Follow these steps for perfect results:
- Preheat the Grill:
- Heat the grill to medium heat (350°F-375°F) to prevent burning the wings before they cook through.
- Oil the Grill Grates:
- Lightly oil the grates with a paper towel dipped in oil to prevent sticking.
- Direct vs. Indirect Heat Cooking:
- Start wings over indirect heat (away from the flame) for 15-20 minutes, flipping occasionally.
- Move them over direct heat for the last 5-7 minutes to crisp the skin and develop charred edges.
- Internal Temperature:
- Always use a meat thermometer to ensure wings are cooked to at least 165°F internally. For extra tenderness, aim for 175°F-180°F.
4. Best BBQ Sauce for Chicken Wings
The sauce is what sets BBQ chicken wings apart, adding layers of sweetness, smokiness, and tang. Here are some great options:
- Classic Sweet & Smoky BBQ Sauce: A blend of ketchup, brown sugar, Worcestershire sauce, and liquid smoke.
- Spicy Honey BBQ Sauce: Adds honey and a touch of hot sauce or cayenne for a fiery kick.
- Tangy Carolina-Style BBQ Sauce: Vinegar-based for a punchy, tangy flavor that cuts through the richness.
- Korean BBQ Wings: Use a sauce made with soy sauce, gochujang (Korean chili paste), ginger, and sesame oil for a unique twist.
- Pro Tip: Always sauce the wings during the last 5 minutes of grilling. Adding sauce too early causes it to burn due to the sugar content.
5. How to Get That Sticky, Glazed Finish
For glossy, caramelized BBQ wings, follow these steps:
- Baste with Sauce: During the last 5 minutes of grilling, brush a generous amount of BBQ sauce on the wings.
- Flip and Repeat: Turn the wings every 1-2 minutes, basting again for an even coating.
- Let the Sauce Set: Once removed from the grill, allow the wings to rest for 5 minutes, letting the sauce thicken and set before serving.
6. Serving Ideas and Perfect Pairings
BBQ wings are great on their own but shine even more with the right sides and dips.
Classic Sides:
- Crispy French Fries – Perfect for dipping in extra BBQ sauce.
- Cornbread or Biscuits – A soft, buttery contrast to the smoky wings.
- Coleslaw – The tangy crunch balances out the rich, saucy wings.
- Grilled Corn on the Cob – Complements the smoky flavors with natural sweetness.
Dipping Sauces:
- Ranch Dressing – A creamy, cooling contrast to spicy wings.
- Blue Cheese Dip – Classic for buffalo-style wings but pairs well with BBQ too.
- Honey Mustard – Sweet and tangy, great for dipping crispy wings.
7. Pro Tips for the Best BBQ Chicken Wings
Dry Before Cooking: Pat wings dry before seasoning for a crispier texture.
Don’t Crowd the Grill: Too many wings in one spot will steam them instead of crisping.
Cook Low and Slow First: Indirect heat prevents burning while cooking the wings evenly.
Use a Meat Thermometer: Ensures they’re fully cooked without drying out.
Let Wings Rest: Allowing them to sit for a few minutes helps the juices redistribute for ultimate tenderness.
Conclusion
BBQ chicken wings are a must-have dish for any cookout, delivering big flavors with minimal effort. With the right marinade, grilling technique, and finishing sauce, you’ll achieve crispy, smoky, finger-licking good wings that your guests will love.
So fire up the grill, grab your BBQ sauce, and get ready to enjoy some of the best homemade BBQ chicken wings ever! 🍗🔥
Smoky Baby Back Ribs: Fall-Off-The-Bone Perfection | The Ultimate Cook Out Menu
No cookout menu is complete without a rack of smoky baby back ribs. These tender, flavorful ribs are a staple at backyard BBQs, bringing that rich, smoky, slow-cooked taste that guests crave. Whether you’re grilling for a summer cookout or a weekend get-together, mastering the art of baby back ribs will take your BBQ skills to the next level.
In this guide, we’ll cover everything you need to know about making perfectly smoked baby back ribs—from choosing the right cut to seasoning, slow-cooking, and achieving that irresistible caramelized BBQ finish.
1. Choosing the Best Baby Back Ribs
Before you start cooking, selecting high-quality ribs is crucial for juiciness and tenderness.
- What Are Baby Back Ribs?
- Cut from the upper part of the ribcage near the backbone, baby back ribs are leaner, more tender, and slightly curved compared to spare ribs.
- They typically have less fat than spare ribs, which makes them great for fast grilling or slow smoking.
- What to Look for When Buying Ribs:
✔ Choose meaty racks with even marbling.
✔ Avoid ribs with excessive fat or exposed bones (known as “shiners”).
✔ Opt for fresh over frozen for better texture and flavor.
2. Preparing the Ribs for Maximum Flavor
Before seasoning, properly preparing your ribs makes a huge difference in texture and tenderness.
- Remove the Membrane:
- Flip the ribs over and look for the thin, white membrane (silver skin) covering the bone side.
- Use a butter knife to lift an edge of the membrane, then grab it with a paper towel and peel it off completely.
- Removing the membrane allows flavors to penetrate better and makes the ribs more tender.
- Trim Excess Fat:
- Trim any thick sections of fat, but leave some for added juiciness.
3. Seasoning: Dry Rub vs. Marinade
Baby back ribs shine with the right balance of sweet, smoky, and savory flavors. You can choose between a dry rub or a marinade, or combine both for maximum flavor.
Classic BBQ Dry Rub for Ribs
Mix these spices and coat both sides of the ribs generously:
- ¼ cup brown sugar (adds a caramelized crust)
- 2 tbsp smoked paprika (enhances smokiness)
- 1 tbsp salt
- 1 tbsp black pepper
- 1 tbsp garlic powder
- 1 tbsp onion powder
- 1 tsp cayenne pepper (optional for heat)
- 1 tsp mustard powder
- 1 tsp cumin
- Pro Tip: Let the dry rub sit for at least 1 hour (or overnight) in the fridge to deepen the flavor.
Tangy BBQ Marinade (Alternative to Dry Rub)
For those who prefer a marinated rib, mix the following ingredients and let the ribs soak for 2-4 hours:
- ½ cup apple cider vinegar (tenderizes the meat)
- ¼ cup Worcestershire sauce
- ¼ cup soy sauce
- ¼ cup honey or maple syrup
- 1 tbsp Dijon mustard
- 2 cloves minced garlic
4. The Best Cooking Methods for Baby Back Ribs
Baby back ribs should be cooked low and slow to allow the connective tissue to break down, making them tender and juicy.
Method 1: Grilling with Indirect Heat (Gas or Charcoal Grill)
Preheat the grill to 225°F-250°F (low heat).
Set up a two-zone fire: Place ribs on the cooler side to prevent burning.
Cook for 2-3 hours, flipping occasionally.
Wrap in foil with a splash of apple juice or butter for extra tenderness during the last hour.
Method 2: Smoking for Authentic BBQ Flavor
Use a smoker or charcoal grill with wood chips (hickory, apple, or mesquite).
Maintain a temperature of 225°F.
Smoke the ribs for 5-6 hours, spritzing with apple cider vinegar or apple juice every hour to keep them moist.
Wrap in foil (Texas Crutch) after 3 hours for extra juicy meat.
Method 3: Oven-Baked Ribs (Easy, No-Grill Option)
Preheat oven to 275°F.
Wrap the ribs in foil and place them on a baking sheet.
Bake for 2.5-3 hours until fork-tender.
Broil for 5-10 minutes after adding BBQ sauce for caramelization.
5. The Secret to Sticky, Glazed BBQ Ribs
To get that perfect sticky, caramelized finish, apply BBQ sauce during the last 10-15 minutes of cooking.
Best BBQ Sauces for Baby Back Ribs:
Classic Sweet & Smoky: Ketchup, brown sugar, apple cider vinegar, and Worcestershire sauce.
Spicy Honey BBQ: Adds a kick with hot sauce and honey for balance.
Tangy Carolina Mustard Sauce: Uses yellow mustard for a sharp, zesty flavor.
Korean-Style Sticky Ribs: A mix of gochujang (Korean chili paste), soy sauce, and sesame oil for a unique twist.
- How to Glaze the Ribs:
- Brush BBQ sauce onto the ribs generously during the last 10-15 minutes of grilling or baking.
- Turn up the heat slightly to help caramelize the sauce.
- Let them rest for 10 minutes before slicing to allow the juices to redistribute.
6. Best Side Dishes to Serve with Baby Back Ribs
Pair your smoky ribs with classic BBQ sides for a well-rounded meal:
- Creamy Mac & Cheese – A rich, cheesy side to balance the smoky ribs.
- Southern Baked Beans – Slow-cooked with bacon and brown sugar for extra depth.
- Cornbread or Biscuits – Buttery and slightly sweet to complement the smoky flavor.
- Grilled Corn on the Cob – A charred, buttery addition to any cookout.
- Coleslaw – A refreshing, crunchy side that adds contrast.
7. Pro Tips for the Best Baby Back Ribs
✔ Use the Bend Test: If the ribs bend and crack slightly when picked up with tongs, they’re ready.
✔ Don’t Over-Sauce Early: BBQ sauce contains sugar that can burn easily. Apply it at the end for the best glaze.
✔ Spritz Every Hour: Keep the ribs moist by spraying with apple juice, apple cider vinegar, or beer.
✔ Rest Before Slicing: Let ribs rest for 10 minutes before cutting to lock in juices.
Conclusion
Smoky baby back ribs are the ultimate cookout dish, offering fall-off-the-bone tenderness, rich BBQ flavors, and a satisfying smoky finish. Whether you’re using a grill, smoker, or oven, these ribs will be a hit at any gathering.
Fire up the grill, get your favorite BBQ sauce ready, and treat your guests to the best homemade baby back ribs they’ve ever had! 🔥🍖😋
Grilled Veggie Skewers (Healthy Option): A Colorful & Flavorful Cookout Favorite | The Ultimate Cook Out Menu
Grilled veggie skewers are a must-have side dish for any cookout. They add vibrant colors, fresh flavors, and a healthy balance to an otherwise meat-heavy BBQ menu. Plus, they cater to vegetarians, vegans, and anyone looking for a lighter, nutrient-packed alternative to grilled meats.
These skewers are versatile, easy to make, and packed with smoky, charred goodness, making them just as delicious as they are nutritious. Let’s dive into how to prepare the best grilled vegetable skewers for your next cookout.
1. Choosing the Best Vegetables for Grilling
The key to perfect veggie skewers is using vegetables that hold up well on the grill and develop a sweet, smoky flavor as they cook.
Best Vegetables for Skewers:
Bell Peppers – Red, yellow, and green peppers add a pop of color and a slightly sweet crunch.
Zucchini & Yellow Squash – Mild in flavor, but their texture makes them ideal for grilling.
Mushrooms – Portobello, cremini, or button mushrooms add a meaty, umami flavor.
Cherry Tomatoes – Juicy, slightly charred, and bursting with natural sweetness.
Red Onions – Caramelize beautifully on the grill, adding a subtle sweetness.
Eggplant – Absorbs flavors well and develops a rich, smoky taste.Brussels Sprouts (Halved) – Crisp on the outside and tender inside when grilled.
- Pro Tip: Stick with firm vegetables that won’t fall apart or turn mushy when grilled. Avoid watery veggies like cucumbers and lettuce.
2. Prepping the Veggies for Maximum Flavor
Properly preparing your veggies ensures they cook evenly and absorb as much flavor as possible.
- Cut Evenly:
- Slice vegetables into similar-sized pieces so they cook evenly.
- Keep them large enough to stay on skewers without falling apart.
- Marinate for Extra Flavor:
- While veggies taste great on their own, marinating them enhances their smoky, charred flavors.
- Let them marinate for at least 30 minutes (or overnight for deeper flavor).
Simple Garlic Herb Marinade Recipe:
Mix the following ingredients and toss the veggies in it before skewering:
- ¼ cup olive oil
- 2 tbsp balsamic vinegar or lemon juice
- 2 cloves minced garlic
- 1 tsp dried oregano
- 1 tsp dried basil
- 1 tsp smoked paprika
- Salt & black pepper to taste
- Pro Tip: If using wooden skewers, soak them in water for 30 minutes before grilling to prevent burning.
3. Assembling the Skewers
Properly assembling your veggie skewers ensures even cooking and an appealing presentation.
- Alternate Colors & Textures:
- Create a visually appealing skewer by alternating different-colored vegetables.
- Mix firm veggies (peppers, onions) with softer ones (tomatoes, mushrooms) for a balanced bite.
- Leave Space Between Pieces:
- Avoid overcrowding vegetables on the skewers to allow heat to circulate and cook them evenly.
- Lightly brush the skewers with extra marinade before placing them on the grill.
4. Grilling Veggie Skewers to Perfection
The key to grilling vegetables perfectly is medium-high heat and a short cook time to retain their crisp-tender texture.
How to Grill Veggie Skewers:
Preheat the Grill: Heat to medium-high (375°F-400°F) to ensure a good char without burning.
Cook Time: Grill skewers for 10-12 minutes, turning every 3-4 minutes to ensure even cooking.
Check for Doneness: Veggies should be slightly charred and tender but not mushy.
- Pro Tip: Use a grill basket instead of skewers for a quicker, easier method while still getting that delicious grilled flavor.
5. Delicious Variations & Seasoning Ideas
Take your grilled veggie skewers to the next level by experimenting with different flavors and seasonings.
Flavor Variations:
🌿 Mediterranean Style: Add feta cheese crumbles and drizzle with tzatziki sauce after grilling.
🌶️ Spicy Kick: Toss veggies in chili flakes, sriracha, or cayenne before grilling.
🍍 Sweet & Savory: Add pineapple chunks for a tropical, caramelized sweetness.
🍋 Lemon Herb: Drizzle with fresh lemon juice and sprinkle with fresh parsley before serving.
Dipping Sauces & Toppings:
🥑 Avocado Lime Sauce – Creamy, tangy, and refreshing.
🧄 Garlic Yogurt Dip – Pairs well with Mediterranean-style skewers.
🌶️ Spicy Chimichurri – Adds a bold, herby kick.
🍯 Honey Balsamic Glaze – A sweet and tangy drizzle over the top.
6. Serving Suggestions & Best Pairings
Grilled veggie skewers are super versatile and pair well with grilled meats, seafood, or other plant-based dishes.
What to Serve with Veggie Skewers:
🥩 Grilled Steak, Chicken, or Ribs – Adds balance to a hearty meal.
🍚 Quinoa or Rice Pilaf – Light yet filling grain-based sides.
🥖 Toasted Pita Bread or Garlic Bread – Complements Mediterranean flavors.
🥗 Greek Salad or Hummus – A refreshing, Mediterranean-inspired side.
- Pro Tip: Serve veggie skewers directly off the skewer or remove them and toss them in pasta, wraps, or grain bowls.
7. Pro Tips for the Best Grilled Veggie Skewers
Use Metal Skewers: They conduct heat better and don’t burn like wooden skewers.
Don’t Overcook: Remove skewers as soon as veggies are tender to keep them crisp.
Rotate for Even Cooking: Turn skewers every few minutes for an even char.
Experiment with Marinades: Switch up flavors with teriyaki, lemon-garlic, or Italian dressing.
Add Protein: Thread in halloumi cheese, tofu, or paneer for a vegetarian-friendly protein boost.
Conclusion
Grilled veggie skewers are a healthy, colorful, and flavorful addition to any cookout menu. They’re easy to prepare, packed with nutrients, and perfect for guests who want a lighter, plant-based option. With endless customization possibilities, these skewers will become a staple at your next BBQ.
So fire up the grill, skewer up some vibrant veggies, and enjoy a smoky, charred, and delicious side dish that pairs perfectly with any summer feast! 🌿🔥🍢
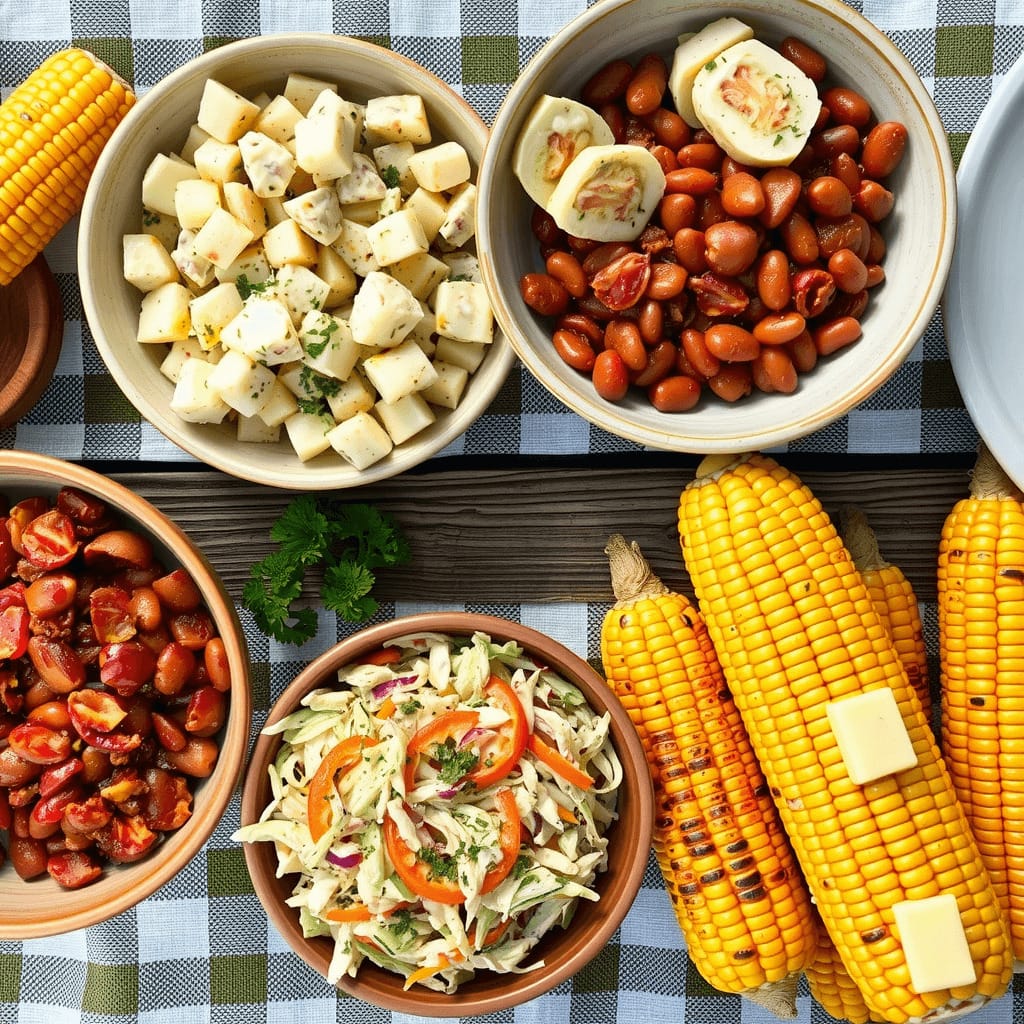
Tasty Side Dishes to Complete Your Cook Out Menu | The Ultimate Cook Out Menu
Classic Potato Salad: A Must-Have Side Dish for Every Cookout | The Ultimate Cook Out Menu
No cookout menu is complete without a creamy, flavorful, and comforting potato salad. It’s a staple at BBQs, family gatherings, and summer parties because it pairs perfectly with grilled meats, adds a refreshing contrast to smoky flavors, and is easy to make in large batches. Whether you prefer a Southern-style potato salad with a hint of sweetness or a tangy, mustard-based version, this dish is guaranteed to be a crowd-pleaser.
Let’s dive into how to make the perfect classic potato salad, from choosing the right potatoes to seasoning, mix-ins, and serving suggestions.
1. Choosing the Best Potatoes for Potato Salad
The key to a great potato salad starts with selecting the right type of potatoes.
Best Potatoes for Creamy & Flavorful Potato Salad:
🥔 Yukon Gold Potatoes – Slightly waxy with a buttery texture, perfect for a soft yet firm bite.
🥔 Red Potatoes – Hold their shape well and have a slightly firmer texture. Great for a chunkier salad.
🥔 Russet Potatoes – Starchy and soft, ideal for a fluffy, mash-like potato salad.
- Pro Tip: If you want a smooth, creamy texture, opt for Russet or Yukon Gold potatoes. If you prefer a firmer, chunkier salad, use Red Potatoes.
2. Cooking the Potatoes to Perfection
To avoid mushy or undercooked potatoes, follow these steps:
🔥 Peel or Leave Skin On?
- For a classic, smooth salad, peel the potatoes before boiling.
- For a more rustic, chunky texture, leave the skins on.
🔥 How to Boil Potatoes for Potato Salad:
Cut potatoes into bite-sized chunks for even cooking.
Place in a pot of cold, salted water (this ensures even cooking).
Bring to a boil, then simmer for 12-15 minutes until fork-tender but not falling apart.
Drain and rinse with cold water to stop the cooking process.
- Pro Tip: Let the potatoes cool slightly before mixing with the dressing. Warm potatoes absorb the flavors better!
3. Classic Potato Salad Dressing (Creamy & Tangy)
The dressing is what makes or breaks a classic potato salad. It should be creamy, tangy, and well-seasoned to complement the mild potatoes.
Best Ingredients for a Classic Dressing:
Mayonnaise – The base of the dressing, making it rich and creamy.
Dijon or Yellow Mustard – Adds tanginess and depth of flavor.
Apple Cider Vinegar or Pickle Juice – Balances the richness with a little acidity.
Sweet Relish or Chopped Pickles – Adds a touch of sweetness and crunch.
Celery Salt & Paprika – Gives the salad its classic Southern-style seasoning.
Creamy Potato Salad Dressing Recipe:
- 1 cup mayonnaise
- 2 tbsp yellow or Dijon mustard
- 2 tbsp apple cider vinegar or pickle juice
- 1 tbsp sweet relish (optional)
- ½ tsp salt
- ½ tsp black pepper
- ½ tsp celery salt
- ½ tsp smoked paprika
Mix all ingredients in a separate bowl before adding them to the potatoes to ensure even coating.
- Pro Tip: For a lighter version, swap half the mayo for Greek yogurt or sour cream.
4. Must-Have Mix-Ins for Classic Potato Salad
Adding the right mix-ins gives your potato salad texture, crunch, and bursts of flavor.
🥚 Hard-Boiled Eggs – Classic addition for creaminess and protein.
🧅 Red or Green Onions – Adds a mild oniony bite.
🌿 Fresh Dill or Parsley – Brightens up the salad with fresh, herby flavors.
🥒 Chopped Pickles or Relish – Gives a sweet and tangy kick.
🥓 Bacon Crumbles – A salty, smoky upgrade to classic potato salad.
🌶️ Diced Jalapeños or Hot Sauce – Adds a slight heat for spice lovers.
- Pro Tip: Mix the dressing and add-ins while the potatoes are still slightly warm so they soak up the flavors better.
5. Potato Salad Variations & Regional Styles
Depending on where you’re from, potato salad can have different flavors and ingredients. Here are some popular styles:
Southern-Style Potato Salad:
- Includes sweet relish, mustard, and a bit of sugar for a slightly sweet flavor.
- Often made with hard-boiled eggs and paprika.
German Potato Salad (Warm & Tangy):
- Made with vinegar-based dressing instead of mayo.
- Includes crispy bacon, onions, and fresh parsley.
Loaded Baked Potato Salad:
- Uses sour cream instead of mayo and includes cheddar cheese, bacon, and green onions.
Herbed Ranch Potato Salad:
- Uses ranch dressing instead of mayo, plus fresh dill and chives.
6. How to Serve & Store Potato Salad
🥄 Best Temperature for Serving:
- Serve chilled or at room temperature for the best flavor.
- Let it sit for at least 30 minutes in the fridge before serving to allow flavors to meld.
❄️ Storage Tips:
- Store in an airtight container in the fridge for up to 4 days.
- Avoid leaving potato salad out for more than 2 hours at room temperature.
7. Best Dishes to Pair with Classic Potato Salad
Potato salad is a versatile side that complements almost any BBQ or grilled dish.
🔥 Pair it with:
🥩 Grilled Steaks or BBQ Ribs – The creaminess balances smoky, rich meats.
🍔 Burgers or Hot Dogs – A cookout classic side for any sandwich.
🍗 BBQ Chicken or Wings – The tangy dressing pairs perfectly with smoky grilled chicken.
🌽 Grilled Corn on the Cob – A sweet, charred addition to round out the meal.
8. Pro Tips for the Perfect Potato Salad Every Time
Use the Right Potatoes: Waxy potatoes like Yukon Golds hold their shape better than starchy ones.
Season While Warm: Toss warm potatoes in vinegar or pickle juice for extra flavor absorption.
Chill Before Serving: Let the salad sit for at least 30 minutes before serving for the best taste.
Don’t Overcook Potatoes: They should be fork-tender but not mushy.
Adjust for Taste: Taste your salad before serving and tweak the salt, vinegar, or mayo balance if needed.
Conclusion
A classic potato salad is the ultimate comfort food at any BBQ or cookout. Its creamy, tangy, and slightly crunchy texture makes it the perfect side dish for everything from grilled burgers to BBQ ribs. With a simple dressing, fresh mix-ins, and the right balance of flavors, you can create a homemade potato salad that’s always a hit.
So, next time you fire up the grill, make sure you have a big bowl of this creamy, flavorful potato salad on the table—it’s guaranteed to disappear fast! 🥔🔥🍽️
Grilled Corn on the Cob: A Cookout Classic with Endless Flavor Options | The Ultimate Cook Out Menu
No cookout menu is complete without grilled corn on the cob. Sweet, juicy, and slightly smoky, grilled corn brings the perfect balance of crunch and char, making it one of the most loved side dishes at any backyard BBQ. Whether you serve it plain with butter or loaded with toppings, grilled corn is easy to prepare and always a crowd-pleaser.
This guide covers everything you need to know to make perfectly grilled corn on the cob, from choosing the best corn to seasoning ideas and serving suggestions.
1. Choosing the Best Corn for Grilling
The fresher the corn, the sweeter and juicier it will be after grilling.
How to Pick Fresh Corn on the Cob:
✔ Look for Bright Green Husks: The husks should be tightly wrapped and slightly moist. Avoid dry or brown husks.
✔ Check the Tassels: The silk (tassels at the top) should be golden brown and slightly sticky, not dry or black.
✔ Feel the Kernels: Gently squeeze the cob to check for plump, evenly spaced kernels.
- Pro Tip: If possible, buy corn from a local farmers’ market for the freshest and sweetest flavor.
2. Prepping the Corn for Grilling
Before placing the corn on the grill, there are a few different ways to prepare it.
Three Ways to Prepare Corn for Grilling:
🔥 1. Grilling with Husks On (Steamy & Smoky)
- Peel back the husk without removing it completely. Remove the silk strands.
- Soak the corn in water for 15-30 minutes to prevent burning.
- Pull the husks back over the kernels and grill.
✔ Pros: Naturally steams the corn while grilling, keeping it moist.
❌ Cons: Less charred flavor compared to direct grilling.
🔥 2. Grilling with Husks Off (Charred & Smoky)
- Remove the husk and silk completely before grilling.
- Brush the corn lightly with oil or butter.
✔ Pros: Direct contact with the grill creates a delicious charred, smoky flavor.
❌ Cons: Requires more attention to avoid drying out.
🔥 3. Foil-Wrapped Corn (Tender & Juicy)
- Remove husks and silk, then wrap the corn in aluminum foil with butter, salt, and seasonings.
- Grill over medium heat for 15-20 minutes, turning occasionally.
✔ Pros: Keeps the corn tender and locks in flavors.
❌ Cons: No smoky char from direct flame.
3. Grilling the Corn to Perfection
🔥 How to Grill Corn on the Cob:
1️⃣ Preheat the Grill to medium-high heat (375-400°F).
2️⃣ Place the corn directly on the grill grates or wrapped in foil.
3️⃣ Turn every 3-5 minutes until evenly charred (total cook time: 12-15 minutes).
4️⃣ Brush with butter or oil while grilling for extra flavor and moisture.
Remove from the grill and let it rest for a minute before serving.
- Pro Tip: Use tongs to rotate the corn every few minutes to get an even char.
4. Best Seasonings & Toppings for Grilled Corn
While classic butter and salt are delicious, adding extra seasonings takes grilled corn to the next level.
Classic Corn on the Cob Toppings:
🧈 Butter & Salt – The traditional and timeless way to enjoy grilled corn.
🧄 Garlic Butter – Mix melted butter with minced garlic, salt, and parsley.
🧂 Parmesan & Herbs – Sprinkle grated Parmesan cheese with fresh basil or cilantro.
🔥 Smoky Paprika & Lime – Adds a tangy and smoky kick.
Gourmet & International Corn Toppings:
🌶️ Mexican Street Corn (Elote) 🇲🇽
- Slather grilled corn with mayo, sour cream, lime juice, and chili powder.
- Sprinkle with cotija cheese and chopped cilantro.
🧀 Cheesy Garlic Ranch Corn 🧄
- Brush with melted garlic butter and sprinkle with shredded cheddar cheese and ranch seasoning.
🍯 Honey Butter Corn 🍯
- Mix butter with honey and cinnamon for a sweet twist.
🍋 Lemon Herb Corn 🍋
- Toss grilled corn with olive oil, lemon zest, and fresh thyme.
🥓 Bacon-Wrapped Corn 🥓
- Wrap each cob with crispy bacon slices before grilling.
🔥 Spicy Cajun Corn 🔥
- Sprinkle with Cajun seasoning, smoked paprika, and hot sauce for a bold Southern flavor.
- Pro Tip: Brushing butter or oil on the corn while grilling helps seasonings stick better.
5. Best Dishes to Serve with Grilled Corn
Grilled corn pairs beautifully with a variety of BBQ dishes.
🥩 BBQ Ribs or Grilled Steak – Corn’s sweetness balances the rich, smoky flavors of ribs and steak.
🍔 Burgers & Hot Dogs – A classic side for any cookout meal.
🍗 BBQ Chicken Wings – The smoky flavor of grilled corn complements BBQ sauce perfectly.
🥗 Potato Salad or Coleslaw – A creamy, refreshing contrast to charred corn.
- Pro Tip: Cut grilled corn off the cob and toss it into salads, tacos, or pasta for extra smoky flavor.
6. Storing & Reheating Grilled Corn
If you have leftover grilled corn, don’t let it go to waste!
🌽 Storage:
- Wrap leftover grilled corn in foil or an airtight container and refrigerate for up to 4 days.
🔥 Reheating Methods:
1️⃣ Grill: Reheat for 2-3 minutes over medium heat.
2️⃣ Oven: Wrap in foil and bake at 350°F for 10 minutes.
3️⃣ Microwave: Wrap in a damp paper towel and heat for 30-45 seconds.
- Pro Tip: Use leftover corn for salsa, soups, or cornbread! 🌽
7. Pro Tips for the Best Grilled Corn Every Time
Don’t Overcook: Overcooking makes corn dry and tough. Remove once kernels are tender and slightly charred.
Baste While Grilling: Brushing with butter, olive oil, or a sauce keeps the corn moist.
Use Fresh Corn: The fresher the corn, the juicier and sweeter it will taste.
Grill Over Medium Heat: Prevents burning while still achieving a good char.
Experiment with Toppings: Don’t be afraid to mix up flavors and try new seasonings.
Conclusion
Grilled corn on the cob is one of the easiest and most flavorful side dishes you can make for a cookout or BBQ. With a slightly smoky char, juicy kernels, and customizable toppings, this classic dish is guaranteed to be a hit at your next backyard gathering.
Whether you keep it simple with butter and salt or go bold with Mexican elote or Cajun spice, grilled corn is the perfect complement to burgers, ribs, chicken, and more.
So fire up the grill, grab some fresh sweet corn, and get ready to enjoy the best grilled corn on the cob ever! 🌽🔥😋
Southern-Style Baked Beans: A Rich, Smoky, and Sweet Cookout Staple | The Ultimate Cook Out Menu
No cookout menu is complete without a warm, comforting side dish like Southern-style baked beans. This classic BBQ side dish is sweet, smoky, tangy, and hearty, making it the perfect complement to grilled meats, burgers, ribs, and hot dogs. Unlike plain canned baked beans, Southern-style baked beans are slow-cooked with bacon, molasses, brown sugar, and BBQ sauce, giving them a rich, caramelized flavor that enhances any barbecue spread.
In this guide, we’ll go over how to make the best homemade baked beans, including key ingredients, cooking methods, and pro tips for achieving the perfect balance of sweet, smoky, and savory flavors.
1. The Secret to Southern-Style Baked Beans
What makes Southern-style baked beans different from traditional baked beans?
🔥 Slow-Cooked & Thick: Southern baked beans are slow-cooked to develop a deep, rich flavor and thick, caramelized sauce.
🥓 Bacon or Smoked Meat: The addition of crispy bacon or smoked sausage gives the beans a savory, smoky depth of flavor.
🍯 Sweet & Tangy Balance: Molasses, brown sugar, and BBQ sauce provide a sweet base, while mustard and vinegar add a tangy contrast.
Southern-style baked beans aren’t just a side dish; they’re a comforting, hearty, and flavorful addition to any backyard BBQ.
2. Choosing the Best Beans for Baked Beans
While many recipes use canned baked beans as a shortcut, traditional Southern-style baked beans use dry beans that are slow-cooked for the best flavor and texture.
Best Beans for Baked Beans:
Navy Beans: The classic choice, small and creamy, perfect for absorbing flavors.
Great Northern Beans: A bit larger than navy beans but still creamy and mild.
Pinto Beans: Slightly firmer and heartier, great for a more rustic texture.
Canned vs. Dry Beans:
- Canned Beans: Convenient and quick, but rinse them first to remove excess salt.
- Dry Beans: Need to be soaked overnight and slow-cooked, but develop a deeper flavor and better texture.
- Pro Tip: If using dry beans, soak them overnight, then simmer them until tender before adding them to the sauce.
3. The Best Ingredients for Authentic Southern Baked Beans
To achieve the best balance of sweet, smoky, and tangy flavors, here’s what you’ll need:
Key Ingredients for Southern-Style Baked Beans:
🥓 Bacon (or Smoked Sausage) – Adds a deep, smoky richness.
🧅 Onions & Garlic – Enhances the flavor with a savory base.
🍯 Molasses & Brown Sugar – Provides classic Southern sweetness and caramelization.
🔥 BBQ Sauce – Gives a tangy, smoky kick (use homemade or store-bought).
🌭 Mustard & Apple Cider Vinegar – Balances the sweetness with acidity.
🌶️ Smoked Paprika & Cayenne (Optional) – Adds a hint of spice and smoky depth.
Optional Add-Ins:
🍻 Beer: Adds a malty depth of flavor to the sauce.
🥤 Cola or Dr. Pepper: For an extra sweet and tangy kick.
🌶️ Jalapeños: If you like it spicy, diced jalapeños add heat.
4. How to Make the Best Southern-Style Baked Beans
1: Cook the Bacon & Onions
- In a large skillet or Dutch oven, cook chopped bacon over medium heat until crispy.
- Remove some bacon pieces for garnish, leaving the bacon fat in the pan.
- Add diced onions and garlic to the bacon fat and cook until soft and fragrant.
2: Prepare the Sauce
- In the same pan, add:
✔ ½ cup BBQ sauce
✔ ¼ cup molasses
✔ ¼ cup brown sugar
✔ 2 tbsp mustard
✔ 2 tbsp apple cider vinegar
✔ 1 tsp smoked paprika (optional) - Stir everything together and simmer for 5 minutes to develop the flavors.
3: Add the Beans
- Drain and rinse canned beans (or use pre-cooked dry beans).
- Stir beans into the sauce until well coated.
4: Bake Low & Slow for Maximum Flavor
- Oven Method: Bake uncovered at 325°F (160°C) for 1.5-2 hours, stirring occasionally.
- Slow Cooker Method: Cook on low for 4-6 hours for a rich, thick sauce.
- Stovetop Method: Simmer on low heat for 30-45 minutes, stirring frequently.
5: Let Them Rest & Serve
- Once thick and caramelized, let the beans sit for 10 minutes before serving.
- Sprinkle reserved crispy bacon on top for extra crunch.
- Pro Tip: Baked beans taste even better the next day as the flavors meld. Store leftovers in the fridge and reheat before serving.
5. How to Serve Southern Baked Beans
Southern-style baked beans pair well with all your grilled favorites.
🔥 Best Dishes to Serve with Baked Beans:
🍔 Burgers & Hot Dogs – A cookout classic side.
🥩 BBQ Ribs & Brisket – The sweet sauce complements smoky meats.
🍗 BBQ Chicken or Pulled Pork – Adds richness to any BBQ plate.
🌽 Grilled Corn on the Cob – A sweet and smoky side dish match.
🥗 Coleslaw & Potato Salad – A creamy, refreshing contrast to rich beans.
- Pro Tip: Serve baked beans in a cast-iron skillet or Dutch oven for a rustic, Southern-style presentation.
6. Storing & Reheating Baked Beans
If you have leftovers, baked beans store and reheat well, making them a great make-ahead dish.
🧊 Storage Tips:
- Store in an airtight container in the fridge for up to 4 days.
- Freeze in portions for up to 3 months (thaw overnight before reheating).
🔥 Best Ways to Reheat Baked Beans:
- Oven: Reheat in a covered dish at 300°F for 20 minutes.
- Stovetop: Simmer on low heat, adding a splash of water if needed.
- Microwave: Heat in 30-second intervals, stirring between each.
- Pro Tip: If the beans thicken too much after refrigerating, add a splash of water or broth when reheating.
7. Pro Tips for the Best Southern Baked Beans
Use Thick-Cut Bacon – Adds extra smokiness and texture.
Cook Low & Slow – Develops deeper flavors and thickens the sauce.
Balance Sweet & Tangy – Adjust sugar and vinegar to taste.
Don’t Over-Stir – Stir occasionally but let the beans cook undisturbed to develop a caramelized top layer.
Make Ahead for More Flavor – Let the beans sit overnight for even richer taste.
Conclusion
Southern-style baked beans are a must-have BBQ side dish that brings bold, smoky, sweet, and tangy flavors to any cookout. Whether you bake them low and slow in the oven, in a Dutch oven over a fire, or in a slow cooker, these beans will always be thick, rich, and full of deep Southern flavor.
So next time you fire up the grill, don’t forget to add a pot of slow-cooked, smoky, and hearty Southern-style baked beans to your menu—it’s a dish that will have everyone coming back for seconds! 🍲🔥😋
Refreshing Drinks to Keep Your Guests Cool | The Ultimate Cook Out Menu
A cookout menu isn’t complete without a bowl of refreshing coleslaw. This crisp, tangy, and slightly sweet salad is the perfect complement to rich, smoky barbecue flavors. Whether served as a side dish or as a topping for burgers, pulled pork, or tacos, coleslaw adds a crunchy contrast that balances out the meal.
Not only is coleslaw easy to make, but it can also be customized to match different flavor profiles. From classic creamy coleslaw to light and tangy vinegar-based slaws, there’s a version for every taste. In this guide, we’ll go over how to make the best homemade coleslaw, different variations, and expert tips for getting the perfect texture and flavor.
1. Choosing the Best Ingredients for Crisp & Flavorful Coleslaw
Coleslaw is all about fresh, crunchy vegetables tossed in a flavorful dressing. Here’s what you’ll need:
Vegetables for the Base
🥬 Green Cabbage – The traditional choice, mild in flavor with a crunchy bite.
🟣 Red (Purple) Cabbage – Adds color and a slightly peppery taste.
🥕 Carrots – Sweet and vibrant, balancing the tangy dressing.
🧅 Red or Green Onions – Adds a mild oniony bite without overpowering the slaw.
- Pro Tip: Use a mix of green and red cabbage for a more colorful and visually appealing coleslaw.
Optional Add-Ins for Extra Flavor & Texture
🍏 Shredded Apple – Adds a touch of sweetness.
🥒 Thinly Sliced Cucumbers – Light and refreshing.
🥭 Diced Mango or Pineapple – A tropical twist for fruitier coleslaw.
🌿 Chopped Cilantro or Dill – Fresh herbs elevate the flavor.
🌰 Toasted Almonds or Sunflower Seeds – Adds a nutty crunch.
- Pro Tip: If using cabbage from a bag, check that it’s fresh and crisp. Avoid pre-shredded cabbage that looks dry or wilted.
2. Classic Creamy Coleslaw Dressing Recipe
The dressing is what brings coleslaw to life, coating each bite with a tangy, slightly sweet, and creamy texture.
Classic Creamy Dressing Ingredients:
½ cup Mayonnaise (or Greek yogurt for a lighter version)
2 tbsp Apple Cider Vinegar (for tanginess)
1 tbsp Dijon or Yellow Mustard (adds depth of flavor)
1 tbsp Honey or Sugar (balances acidity)
½ tsp Celery Seed (for classic coleslaw flavor)
Salt & Black Pepper (to taste)
How to Make It:
1️⃣ Whisk together all the dressing ingredients in a bowl until smooth.
2️⃣ Pour over the shredded cabbage and carrots.
3️⃣ Toss everything together until evenly coated.
4️⃣ Cover and chill for at least 30 minutes before serving (to let the flavors meld).
- Pro Tip: For a tangier slaw, increase the vinegar slightly. For a sweeter slaw, add more honey or sugar.
3. Tangy Vinegar-Based Coleslaw (Mayo-Free Option)
If you prefer a lighter coleslaw or want a dairy-free version, try a vinegar-based slaw that’s zesty and refreshing.
Vinegar Dressing Ingredients:
¼ cup Apple Cider Vinegar or White Vinegar
2 tbsp Olive Oil
1 tbsp Honey or Sugar
1 tsp Dijon Mustard
½ tsp Celery Seed
Salt & Black Pepper (to taste)
How to Make It:
1️⃣ In a small bowl, whisk together vinegar, oil, honey, mustard, and seasonings.
2️⃣ Pour over shredded cabbage and carrots.
3️⃣ Toss well and let it sit for at least 20 minutes before serving.
- Pro Tip: Vinegar-based coleslaw gets better over time, making it a great make-ahead dish.
4. Fun & Flavorful Coleslaw Variations
Coleslaw is super versatile and can be customized to match different cuisines and meals.
Southern-Style Coleslaw
🔥 Extra creamy with more mayo and a touch of sugar.
🔥 Great for pairing with fried chicken, BBQ ribs, or pulled pork sandwiches.
Mexican Coleslaw
Swap mayo for lime juice and olive oil.
Add chopped cilantro, jalapeños, and cumin.
Best served with tacos, fajitas, or grilled fish.
Asian-Inspired Coleslaw
Use sesame oil, rice vinegar, and soy sauce instead of mayo.
Add shredded napa cabbage, sliced almonds, and sesame seeds.
Pairs well with grilled teriyaki chicken or shrimp.
Tropical Slaw
Use coconut milk and lime juice for the dressing.
Add pineapple chunks, mango, and shredded coconut.
Perfect with grilled seafood or jerk chicken.
- Pro Tip: Try different flavor combinations depending on what you’re serving!
5. Best Ways to Serve Coleslaw
Coleslaw is one of the most versatile cookout sides—it’s great on its own or as a topping.
Classic Side Dish:
🥩 BBQ Ribs or Pulled Pork – The cool crunch balances smoky meats.
🍔 Burgers & Hot Dogs – A refreshing contrast to grilled meat.
🍗 Fried Chicken or BBQ Wings – A creamy slaw pairs perfectly with crispy, spicy chicken.
🌽 Grilled Corn on the Cob – A fresh and light companion to charred corn.
As a Topping:
🌮 Tacos: Adds crunch to fish or shrimp tacos.
🥪 Pulled Pork or Brisket Sandwiches: A tangy slaw balances out rich BBQ meats.
🌭 Hot Dogs: Adds texture and flavor to classic grilled hot dogs.
🥙 Wraps & Pitas: Use it as a filling for veggie wraps or sandwiches.
- Pro Tip: Drain excess dressing before using coleslaw as a topping to avoid soggy sandwiches.
6. Storing & Making Ahead Tips
Coleslaw gets better as it sits, making it a perfect make-ahead dish.
🧊 Storage:
- Keep in an airtight container in the fridge for up to 3 days.
- Stir before serving, as the dressing may settle at the bottom.
❄️ Can You Freeze Coleslaw?
- Mayo-based coleslaw does NOT freeze well (it will turn watery).
- Vinegar-based slaw CAN be frozen for up to 2 months in a sealed container.
- Pro Tip: If making coleslaw ahead of time, store the dressing separately and mix it just before serving to keep it fresh and crisp.
7. Pro Tips for the Best Coleslaw Every Time
Use Fresh Cabbage: Freshly shredded cabbage is crisper and more flavorful than pre-bagged slaw mix.
Let It Sit: Coleslaw tastes best after chilling for at least 30 minutes.
Adjust Sweetness & Tang: Balance vinegar and sugar to match your taste preferences.
Keep It Crunchy: Avoid making coleslaw too far in advance to prevent sogginess.
Experiment with Flavors: Try different dressings and add-ins to customize your coleslaw.
Conclusion
A refreshing coleslaw is the perfect side dish for any BBQ, picnic, or summer cookout. Whether you prefer a classic creamy coleslaw or a lighter vinegar-based version, this dish adds crunch, tang, and flavor to any meal.
So grab some fresh cabbage, mix up your favorite dressing, and enjoy a crisp, refreshing coleslaw that will be the highlight of your cookout! 🥗🔥😋

Refreshing Drinks to Keep Your Guests Cool
Homemade Lemonade: The Ultimate Refreshing Drink for Your Cookout | The Ultimate Cook Out Menu
No cookout menu is complete without a cool, refreshing drink to wash down all the delicious barbecue flavors. One of the best and most classic options? Homemade lemonade. 🍋 Whether you like it sweet, tangy, sparkling, or infused with fresh fruit and herbs, lemonade is the perfect summer drink to keep your guests cool and satisfied.
Unlike store-bought versions, homemade lemonade has pure, fresh flavors with real lemon juice, natural sweeteners, and no artificial preservatives. It’s easy to make and customizable, so you can adjust the sweetness and tartness to your liking.
In this guide, we’ll cover everything from the best lemons to use to fun flavor variations and serving ideas that will make your homemade lemonade the star of your summer cookout!
1. Why Homemade Lemonade is Better Than Store-Bought
Many store-bought lemonades contain artificial flavors, high-fructose corn syrup, and preservatives that dull the fresh citrus taste.
Fresh & Natural Ingredients: Real lemon juice, pure cane sugar or honey, and fresh water make all the difference.
Adjustable Sweetness & Tartness: Control the balance between tangy and sweet to suit your preference.
No Artificial Additives: Just pure, refreshing flavor with no unnecessary chemicals.
Endless Variations: From herb-infused lemonade to sparkling citrus coolers, homemade lemonade is highly customizable.
- Pro Tip: Using freshly squeezed lemons is the key to great lemonade—bottled lemon juice lacks the bright, fresh citrus flavor.
2. Choosing the Best Lemons for Lemonade 🍋
Not all lemons are created equal! For the best homemade lemonade, pick the right variety.
Best Lemons for Fresh Lemonade:
Eureka Lemons – The most common, bright yellow with a balanced sweet-tart flavor.
Meyer Lemons – Naturally sweeter, with floral and orange-like undertones (great for mild, less tart lemonade).
Lisbon Lemons – A slightly tangier option, great if you like bold citrus flavors.
- Pro Tip: To get the most juice out of your lemons, roll them on a hard surface before cutting. This helps break down the juice sacs inside.
3. Classic Homemade Lemonade Recipe
This classic lemonade recipe makes the perfect balance between sweet, tart, and refreshing.
Ingredients:
- 🍋 1 cup fresh lemon juice (from about 4-6 lemons)
- 🥄 ½ to ¾ cup sugar or honey (adjust to taste)
- 💧 4 cups cold water
- ❄️ Ice cubes for serving
- 🍋 Lemon slices for garnish
How to Make It:
1️⃣ Juice the Lemons: Roll the lemons on a countertop, then cut and squeeze them using a citrus juicer. Strain out seeds and pulp.
2️⃣ Dissolve the Sugar: Combine sugar and 1 cup of warm water, stirring until fully dissolved. This creates a simple syrup that blends better than adding sugar directly.
3️⃣ Mix & Chill: In a large pitcher, combine lemon juice, simple syrup, and 3 cups of cold water. Stir well and refrigerate for at least 30 minutes.
4️⃣ Serve Over Ice: Pour over ice cubes, garnish with lemon slices, and enjoy!
- Pro Tip: Adjust the sweetness or tartness by adding more sugar or lemon juice to taste.
4. Fun Lemonade Variations & Flavor Upgrades
Take your homemade lemonade to the next level with fun flavor twists!
1. Strawberry Lemonade 🍓
- Blend ½ cup fresh strawberries with lemon juice before mixing.
- Strain for a smooth drink or leave it pulpy for extra texture.
2. Mint Lemonade 🌿
- Muddle fresh mint leaves with sugar before mixing with lemon juice.
- Adds a cool, refreshing twist to the drink!
3. Sparkling Lemonade 🥂
- Replace 2 cups of water with sparkling water for a fizzy lemonade.
- Serve immediately to preserve the carbonation.
4. Lavender Lemonade 🌸
- Infuse the simple syrup with 1 tbsp dried lavender for a floral touch.
- Great for garden parties or elegant summer gatherings.
5. Honey Lemonade 🍯 (Healthier Version)
- Swap sugar for ½ cup honey and stir into warm water to dissolve.
- Bonus: Honey has antioxidants and a richer depth of flavor.
- Pro Tip: Mix and match these flavors to create your own signature lemonade blend!
5. How to Serve Homemade Lemonade
Great lemonade isn’t just about flavor—it’s about presentation, too!
Serving Ideas:
Chill the Glasses: Serve in frosted or chilled glasses for an extra-refreshing effect.
Use Fun Garnishes: Add lemon slices, fresh berries, mint sprigs, or edible flowers.
Make Lemonade Ice Cubes: Freeze lemonade with berries or mint in ice cube trays for a fun twist that doesn’t dilute the drink.
Best Food Pairings with Lemonade:
🍔 Burgers & BBQ Ribs – The citrusy brightness cuts through smoky flavors.
🌽 Grilled Corn on the Cob – A refreshing contrast to buttery, charred corn.
🥗 Coleslaw & Potato Salad – Lemonade enhances creamy, tangy side dishes.
🍗 Fried Chicken or Wings – The crispiness of fried food pairs perfectly with sweet-tart lemonade.
- Pro Tip: Make a big batch in a beverage dispenser for easy self-serving at cookouts!
6. Storing & Making Ahead Tips
Homemade lemonade can be made ahead for convenience and stored for several days.
🧊 Storage:
- Keep in a sealed pitcher in the fridge for up to 5 days.
- Stir before serving, as lemon juice may separate over time.
🍹 Freeze for Later:
- Pour into ice cube trays and freeze for easy single servings.
- Make lemonade concentrate by reducing the water and freezing in portions.
- Pro Tip: If making a large batch for a party, consider serving half the lemonade over ice and keeping the rest chilled separately to prevent dilution.
7. Pro Tips for the Best Lemonade Every Time
Use Fresh Lemons: Always use fresh juice—never bottled lemon juice, which tastes artificial.
Adjust to Taste: Start with less sugar and add more as needed.
Dissolve Sugar First: Making simple syrup ensures smooth sweetness without gritty sugar.
Experiment with Flavors: Try different fruit purées, herbs, or flavored syrups.
Chill Before Serving: Lemonade tastes best cold, so refrigerate for at least 30 minutes before serving.
Conclusion
Homemade lemonade is the ultimate summer drink—cool, refreshing, and easy to make with just a few simple ingredients. Whether you keep it classic, add fresh fruit, or go for a sparkling version, this drink will be a hit at any cookout.
So grab some fresh lemons, mix up a pitcher, and enjoy the perfect thirst-quencher for your next barbecue or backyard gathering! 🍋🥤🔥
Iced Sweet Tea: The Quintessential Southern Refreshment ☀️🍹
No cookout menu is complete without a tall glass of iced sweet tea. This Southern classic is refreshing, slightly sweet, and perfectly balanced—making it the ideal drink to cool down on a hot summer day. Whether served plain, with lemon, or infused with fruity and herbal flavors, iced sweet tea is the ultimate thirst-quencher at any barbecue, picnic, or outdoor gathering.
Homemade Southern-style sweet tea is simple to make, requiring just a few basic ingredients. However, achieving the perfect balance of tea strength, sweetness, and smoothness takes a little know-how. In this guide, we’ll walk you through the secrets to making the best homemade sweet tea, including variations and pro tips for achieving that signature smooth, flavorful taste.
1. Why Iced Sweet Tea is a Cookout Essential
🌞 Naturally Refreshing: Served over ice, sweet tea is cool and hydrating on a hot day.
🍋 Pairs Well with BBQ: The sweetness and tannins from the tea complement smoky grilled meats.
🍶 Easy to Make in Large Batches: Perfect for serving a crowd at summer cookouts.
🌿 Highly Customizable: Enjoy it classic, fruity, herbal, or even sparkling.
- Pro Tip: The key to great sweet tea is using high-quality tea bags and properly steeping them to avoid bitterness.
2. Choosing the Right Tea for the Best Flavor
The base of any great iced tea is choosing the right type of tea leaves.
Best Tea for Sweet Tea:
Black Tea (Traditional Choice): Strong, bold, and slightly malty. Popular brands include Lipton, Luzianne, and Tetley.
Ceylon or Assam Tea: If you want a richer, smoother tea flavor.
English Breakfast Tea: Great for a more robust, full-bodied iced tea.
Decaf Black Tea: If you want the same great flavor but caffeine-free.
Other Tea Options for Variations:
🌿 Green Tea: Lighter, fresher flavor with less bitterness.
🍓 Herbal Tea (Hibiscus, Berry, or Peach): Naturally caffeine-free and fruity.
🌸 Earl Grey Tea: Adds a slight citrusy bergamot note.
- Pro Tip: Avoid using flavored teas with artificial additives, as they can overpower the clean, smooth taste of classic sweet tea.
3. Classic Southern-Style Iced Sweet Tea Recipe
This classic recipe makes a smooth, sweet, and perfectly balanced iced tea that’s not too bitter or too sugary.
Ingredients:
🥄 6-8 black tea bags (or 3 family-sized tea bags)
💧 8 cups water (divided)
🍚 ¾ to 1 cup granulated sugar (adjust to taste)
🍋 Lemon slices (for garnish, optional)
❄️ Ice cubes for serving
How to Make It:
1️⃣ Boil the Water:
- In a medium saucepan, bring 4 cups of water to a gentle boil, then remove from heat.
2️⃣ Steep the Tea Bags:
- Add tea bags to the hot water and let steep for 5-7 minutes.
- Avoid steeping too long, or the tea may become bitter.
3️⃣ Sweeten the Tea (While Warm):
- Remove tea bags and stir in sugar until fully dissolved.
- This creates a simple syrup effect, preventing gritty sugar at the bottom of the pitcher.
4️⃣ Dilute & Chill:
- Pour the tea concentrate into a pitcher and add 4 cups of cold water.
- Refrigerate for at least 1-2 hours (or until fully chilled).
5️⃣ Serve Over Ice:
- Fill glasses with ice cubes, pour in the sweet tea, and garnish with lemon slices or fresh mint.
- Pro Tip: If you want extra-strong tea, reduce the water to 6 cups total instead of 8.
4. Fun Variations & Flavor Infusions
Take your iced sweet tea to the next level with flavorful add-ins!
1. Lemon Sweet Tea 🍋
- Add ¼ cup fresh lemon juice to the tea before chilling.
- Garnish with thin lemon slices for extra citrusy brightness.
2. Peach Sweet Tea 🍑
- Stir in ½ cup peach puree or peach nectar before serving.
- Garnish with fresh peach slices.
3. Mint Sweet Tea 🌿
- Add 5-6 fresh mint leaves while steeping the tea.
- Strain out the mint before chilling for a subtle herbal note.
4. Arnold Palmer (Half Tea, Half Lemonade) 🏌️♂️
- Mix equal parts iced tea and lemonade for a refreshing citrusy twist.
- Perfect for those who like their tea slightly less sweet.
5. Honey Sweet Tea 🍯
- Replace sugar with ½ cup honey for a natural, richer sweetness.
- Adds depth of flavor and pairs well with citrus flavors.
- Pro Tip: To avoid bitterness in flavored teas, always add fruit or herbs after steeping, not during.
5. How to Serve & Pair Iced Sweet Tea
🍹 Best Ways to Serve Sweet Tea:
In a Mason Jar: For a rustic Southern feel.
With Lemon Wedges & Mint: Classic garnish for extra freshness.
Over Crushed Ice: Keeps the tea extra cold and refreshing.
With a Fun Rim: Dip the glass rim in honey and sugar for a sweet touch.
🍽 Best Food Pairings with Iced Sweet Tea:
🔥 BBQ Ribs & Smoked Meats – The sweetness balances savory, smoky flavors.
🍗 Fried Chicken & Wings – A Southern classic combo.
🍔 Burgers & Hot Dogs – Adds a refreshing contrast to grilled meats.
🥗 Coleslaw & Potato Salad – Complements creamy, tangy sides.
- Pro Tip: Serve sweet tea in a beverage dispenser for self-serve convenience at cookouts.
6. Storing & Make-Ahead Tips
Homemade sweet tea tastes best when chilled for a few hours, making it a great make-ahead drink.
🧊 Storage:
- Store in a sealed pitcher in the fridge for up to 5 days.
- Stir before serving, as the sugar may settle at the bottom.
❄️ Can You Freeze Sweet Tea?
- Yes! Pour into ice cube trays and freeze for sweet tea ice cubes (prevents dilution).
- Or, freeze in a large container for instant iced tea when thawed.
- Pro Tip: Avoid leaving tea in direct sunlight or at room temperature for too long, as it may develop a bitter taste.
7. Pro Tips for Perfect Sweet Tea Every Time
Steep Tea Correctly: Over-steeping = bitter tea. Stick to 5-7 minutes max.
Sweeten While Warm: Dissolving sugar in warm tea prevents grainy texture.
Use Fresh Lemons & Mint: Adds brightness & natural aroma.
Chill Before Serving: Iced tea tastes best when well-chilled for a few hours.
Adjust Sweetness to Taste: Start with less sugar and add more if needed.
Conclusion
Iced sweet tea is the ultimate summer refreshment, offering a smooth, sweet, and cooling experience that perfectly complements smoky BBQ flavors. Whether you enjoy it plain, infused with fruit, or mixed with lemonade, this classic Southern drink is easy to make and always a crowd-pleaser.
So grab your tea bags, some fresh lemons, and plenty of ice—and enjoy a glass of perfectly brewed homemade sweet tea at your next cookout! 🍹☀️🔥
Watermelon Coolers: The Ultimate Refreshing Summer Drink 🍉❄️
When the sun is shining and the grill is sizzling, nothing beats a cold, hydrating drink to keep you refreshed at a summer cookout. Enter Watermelon Coolers—a deliciously light, fruity, and thirst-quenching drink made with fresh watermelon juice, citrus, and ice. This naturally sweet, vitamin-packed beverage is the perfect way to cool down on a hot day while enjoying a burst of flavor.
Best of all, watermelon coolers are easy to make, require just a few ingredients, and can be customized with herbs, sparkling water, or even a splash of alcohol for a cocktail version. Let’s dive into how to make the perfect watermelon cooler, along with fun variations and serving tips!
1. Why Watermelon Coolers Are the Perfect Cookout Drink
🍉 Naturally Hydrating: Watermelon is 92% water, making it the ultimate thirst-quencher.
🍯 Naturally Sweet: No need for extra sugar—watermelon is naturally delicious!
🌿 Refreshing & Light: Unlike soda or sugary drinks, watermelon coolers are light and easy to sip.
🍹 Alcohol-Friendly: Easily transforms into a summer cocktail with rum, vodka, or tequila.
🥶 Ice-Cold & Slushy: Blending the ingredients with ice creates a cool, slushy texture.
- Pro Tip: Watermelon coolers help balance out smoky BBQ flavors, making them a great pairing for grilled meats and spicy foods.
2. Choosing the Best Watermelon for Maximum Sweetness
For the best-tasting watermelon cooler, pick a ripe, juicy watermelon with the perfect balance of sweetness and juiciness.
How to Pick a Ripe Watermelon:
Check the Field Spot: Look for a yellow or creamy white patch (indicates ripeness).
Knock on It: A hollow sound means the watermelon is juicy and fully ripe.
Look for a Uniform Shape: Avoid watermelons with dents or irregular bumps.
Check the Webbing: Dark, sugar-like webbing on the rind means extra sweetness.
- Pro Tip: If your watermelon isn’t super sweet, add a teaspoon of honey or agave to enhance the flavor.
3. Classic Watermelon Cooler Recipe
This simple, refreshing drink highlights the natural sweetness of watermelon, with a hint of citrus for balance.
Ingredients:
🍉 4 cups fresh watermelon, cubed & chilled
🍋 2 tbsp fresh lime juice (or lemon juice)
💧 ½ cup cold water or coconut water
❄️ Ice cubes (as needed)
🌿 Mint leaves (for garnish, optional)
How to Make It:
1️⃣ Blend the Watermelon:
- Add watermelon cubes and lime juice to a blender.
- Blend until completely smooth.
2️⃣ Strain (Optional):
- If you prefer a smooth juice, strain the mixture through a fine mesh sieve.
- If you like a thicker texture, skip this step!
3️⃣ Add Water & Ice:
- Stir in cold water or coconut water for extra hydration.
- Fill glasses with ice cubes, then pour the mixture over the ice.
4️⃣ Garnish & Serve:
- Garnish with fresh mint leaves or lime slices for a fresh, aromatic touch.
- Serve immediately and enjoy ice-cold!
- Pro Tip: Chill the watermelon before blending for an extra-cold drink without needing too much ice.
4. Fun Variations to Customize Your Watermelon Cooler
Take your watermelon cooler to the next level by adding extra flavors and textures.
1. Sparkling Watermelon Cooler (Fizzy & Refreshing)
🥤 Swap regular water for sparkling water or club soda.
🥤 Add a splash of ginger ale or lemon-lime soda for a fun twist.
2. Coconut Watermelon Cooler (Tropical Vibes)
🥥 Replace regular water with coconut water for extra hydration.
🥥 Blend in a splash of coconut milk for a creamy, tropical flavor.
3. Watermelon Slushie (Frozen & Thick)
❄️ Blend the watermelon with frozen strawberries or frozen watermelon cubes for a slushy texture.
❄️ Serve with a spoon for a refreshing frozen treat.
4. Spicy Watermelon Cooler (Sweet & Spicy)
🔥 Add a pinch of chili powder or Tajín to give the drink a spicy kick.
🔥 Rim the glass with salt and cayenne for a Mexican-inspired twist.
5. Boozy Watermelon Cooler (Cocktail Version) 🍹
🍸 Add 1-2 oz of vodka, rum, or tequila per serving for a summery cocktail.
🍸 Garnish with a lime wedge and a sugared rim for a party-ready drink!
- Pro Tip: Watermelon pairs especially well with tequila or rum for a refreshing summer cocktail.
5. Best Ways to Serve & Garnish Watermelon Coolers
Presentation makes a big difference when serving a refreshing summer drink.
🍹 Serve in Fun Glasses: Use mason jars, tall glasses, or even hollowed-out mini watermelons for a fun presentation.
🌿 Garnish with Fresh Herbs: Mint, basil, or rosemary add a fresh, herbal aroma.
🍋 Rim the Glass: Dip the rim in lime juice and sugar for a sweet twist, or use Tajín for a spicy kick.
🍉 Freeze for Later: Make watermelon ice cubes and add them to drinks instead of regular ice!
- Pro Tip: For a party-sized batch, blend everything in advance and store in a large pitcher in the fridge. Stir before serving!
6. Best Food Pairings with Watermelon Coolers
A light, hydrating drink like watermelon cooler pairs well with grilled foods, spicy dishes, and fresh salads.
🔥 Best Dishes to Serve with Watermelon Coolers:
🥩 BBQ Ribs & Pulled Pork: The cool sweetness balances out smoky, savory flavors.
🌽 Grilled Corn on the Cob: A natural pairing with summery flavors.
🍗 Spicy Grilled Chicken or Wings: The fresh watermelon juice cools down the heat.
🥗 Crisp Summer Salads: Complements fresh greens, feta, and citrusy dressings.
- Pro Tip: Watermelon coolers also work great as a brunch drink, especially with eggs, toast, and fresh fruit!
7. Storing & Make-Ahead Tips
Watermelon coolers taste best fresh, but you can prep ahead to save time.
🧊 Storage Tips:
- Store in an airtight pitcher in the fridge for up to 24 hours.
- Stir before serving, as natural separation occurs.
❄️ Freezing Tips:
- Freeze into popsicle molds for a healthy frozen treat.
- Pour into ice cube trays and blend for a slushy later.
- Pro Tip: For best flavor, avoid keeping watermelon juice for more than 1-2 days, as it loses freshness.
8. Pro Tips for the Best Watermelon Cooler Every Time
Use Cold Watermelon: Pre-chilled watermelon makes the drink extra cold without excess ice.
Strain for a Smooth Drink: If you don’t like pulp, strain the juice after blending.
Adjust Sweetness: Taste before serving—if needed, add honey, agave, or a splash of orange juice.
Use Fresh Citrus: Lime or lemon juice enhances the natural sweetness of the watermelon.
Experiment with Flavors: Try adding berries, herbs, or tropical juices for variety!
Conclusion
Watermelon coolers are the perfect summer drink—cool, hydrating, and bursting with fresh fruit flavor. Whether you enjoy it plain, sparkling, spicy, or boozy, this easy-to-make beverage is guaranteed to keep your guests refreshed at any cookout.
So grab a juicy watermelon, blend up a batch, and sip on summer in a glass! 🍉❄️🍹🔥

Crowd-Pleasing Desserts to End on a Sweet Note
Grilled Peaches with Ice Cream: A Sweet & Smoky Summer Dessert 🍑🔥🍨
When it comes to the perfect cookout dessert, grilled peaches with ice cream check all the boxes. They are easy to make, naturally sweet, and packed with smoky, caramelized flavors that complement any BBQ feast. The heat from the grill intensifies the natural sugars in the peaches, creating a warm, juicy, slightly charred treat that pairs beautifully with a scoop of cold, creamy ice cream.
This simple yet elegant dessert is perfect for backyard BBQs, summer parties, and family gatherings. Whether you go classic with vanilla ice cream, add a drizzle of honey or caramel, or experiment with different toppings, grilled peaches are a delicious and light way to end any cookout meal.
1. Why Grilled Peaches Are a Must-Try Dessert
🍑 Naturally Sweet & Flavorful – Peaches are already sweet, and grilling enhances their juicy, caramelized taste.
🔥 Quick & Easy to Make – Requires only a few ingredients and less than 10 minutes on the grill.
❄️ Perfect Hot & Cold Contrast – The warm, smoky peaches paired with cold, creamy ice cream is an irresistible combination.
🌿 Customizable – Works with different spices, sauces, nuts, and ice cream flavors.
🥗 Healthier Dessert Option – Lower in sugar than many desserts, and you can make it even healthier by using Greek yogurt instead of ice cream.
- Pro Tip: Freestone peaches (rather than clingstone) are the best choice for grilling because they are easier to cut and pit.
2. Choosing the Best Peaches for Grilling
The key to perfect grilled peaches is selecting ripe but firm peaches that will hold their shape on the grill.
How to Pick the Best Peaches for Grilling:
Go for Firm, Ripe Peaches – Too soft? They’ll turn mushy on the grill. Too hard? They won’t be sweet enough.
Freestone Peaches Are Best – Easier to remove the pit, making grilling and serving easier.
Check for Fragrance – A ripe peach should smell sweet and fruity.
Avoid Overly Bruised Peaches – Choose smooth, blemish-free peaches for the best texture.
- Pro Tip: If your peaches aren’t quite ripe, leave them at room temperature for 1-2 days before grilling.
3. Classic Grilled Peaches with Ice Cream Recipe
This simple recipe brings out the natural juiciness and caramelized flavor of peaches while pairing them with cold, creamy ice cream for the ultimate summer dessert.
Ingredients:
🍑 4 ripe but firm peaches (halved and pitted)
🧈 2 tbsp melted butter (or coconut oil for a vegan option)
🍯 1 tbsp honey or maple syrup (for extra caramelization)
🧂 ½ tsp cinnamon (optional but recommended)
🍨 Vanilla ice cream (or any preferred flavor)
🌿 Fresh mint leaves (for garnish, optional)
How to Make It:
1️⃣ Preheat the Grill: Heat your grill to medium-high heat (350-400°F). Lightly oil the grates to prevent sticking.
2️⃣ Prepare the Peaches:
- Cut the peaches in half and remove the pits.
- Brush both sides of the peaches with melted butter or coconut oil to prevent sticking and enhance the caramelization.
- Drizzle with honey or maple syrup and sprinkle with a touch of cinnamon for extra warmth and depth of flavor.
3️⃣ Grill the Peaches:
- Place the peaches cut-side down on the hot grill grates.
- Grill for 3-4 minutes until charred grill marks appear and the peaches begin to caramelize.
- Flip and grill for another 2-3 minutes on the skin side.
4️⃣ Remove & Serve:
- Transfer the grilled peaches to a plate.
- Top each peach half with a generous scoop of vanilla ice cream.
- Garnish with fresh mint, crushed nuts, or a drizzle of caramel sauce.
- Pro Tip: Let the peaches cool for 1-2 minutes before adding ice cream so the heat doesn’t melt it too quickly.
4. Flavor Variations & Topping Ideas
While classic grilled peaches with vanilla ice cream are amazing, you can customize this dessert with different flavors and toppings.
1. Caramelized Brown Sugar Peaches 🍯
🥄 Sprinkle peaches with brown sugar and cinnamon before grilling.
🥄 The sugar melts into a thick, caramel-like glaze that coats the peaches beautifully.
2. Honey-Balsamic Glazed Peaches 🍷
🥄 Drizzle with honey and balsamic vinegar before serving.
🥄 Adds a slight tangy contrast to the sweetness.
3. Peach Cobbler-Inspired Dessert 🍪
🥄 Crumble graham crackers or shortbread cookies over the top for extra crunch.
🥄 Serve with whipped cream instead of ice cream for a lighter option.
4. Boozy Bourbon Peaches 🥃
🥄 Soak peaches in a splash of bourbon before grilling for a smoky, deep flavor.
🥄 Pair with butter pecan or salted caramel ice cream for extra richness.
5. Nutty Delight 🍯🥜
🥄 Top with toasted almonds, pecans, or walnuts for a crunchy texture.
🥄 Drizzle with almond butter or peanut butter sauce for extra indulgence.
- Pro Tip: Pair grilled peaches with Greek yogurt instead of ice cream for a healthier, protein-packed alternative.
5. Best Dishes to Pair with Grilled Peaches
🍖 BBQ Ribs or Smoked Meats – The sweet fruitiness balances out the smoky, savory flavors.
🍗 Grilled Chicken or Pork Chops – Works as both a side and a dessert!
🌽 Grilled Corn on the Cob – A fantastic sweet-and-savory pairing.
🥗 Fresh Summer Salads – Adds a light, refreshing contrast.
- Pro Tip: If serving grilled peaches as a side dish, skip the ice cream and top with goat cheese or feta for a savory-sweet twist.
6. Storing & Reheating Grilled Peaches
🥡 Storage:
- Store leftover grilled peaches in an airtight container in the fridge for up to 3 days.
🔥 Reheating:
- Reheat on a warm grill for 1-2 minutes or in the microwave for 20-30 seconds.
❄️ Can You Freeze Grilled Peaches?
- Yes! Slice the peaches and freeze them for up to 2 months.
- Use them later in smoothies, oatmeal, or baked goods.
- Pro Tip: If using frozen grilled peaches, let them thaw slightly before reheating for the best texture.
7. Pro Tips for the Best Grilled Peaches Every Time
Use Firm, Ripe Peaches: Too soft? They’ll turn mushy on the grill.
Preheat the Grill: A hot grill sears the peaches quickly without drying them out.
Oil the Grill Grates: Prevents sticking and gives peaches perfect grill marks.
Don’t Over-Grill: 3-4 minutes per side is enough—too long, and they’ll get mushy.
Let Them Cool Before Adding Ice Cream: Prevents the ice cream from melting too fast.
Conclusion
Grilled peaches with ice cream are the perfect summer dessert—sweet, smoky, and incredibly easy to make. Whether you keep it classic with vanilla ice cream or try new flavor variations, this dish is guaranteed to impress at your next cookout.
So fire up the grill, grab some fresh peaches, and enjoy a warm, caramelized, and creamy treat that will have everyone coming back for seconds! 🍑🔥🍨
Classic S’mores: The Ultimate Campfire & Cookout Treat 🍫🔥🍪
No cookout menu is truly complete without classic s’mores. These crispy, gooey, and chocolatey treats bring nostalgia, fun, and sweetness to any BBQ, picnic, or outdoor gathering. Whether you’re roasting marshmallows over a campfire, a grill, or even using an oven or stovetop, s’mores are a simple yet irresistible dessert that guests of all ages love.
The combination of toasty marshmallows, melty chocolate, and crunchy graham crackers is iconic, but s’mores can also be customized in endless ways to create unique flavor variations. In this guide, we’ll explore the best methods for making classic s’mores, fun variations, and expert tips for achieving the perfect melt and crunch every time.
1. Why S’mores Are the Perfect Cookout Dessert
🔥 Quick & Easy: Requires only three ingredients and takes just minutes to make.
🍫 Fun & Interactive: Guests can roast their own marshmallows, making it a hands-on treat.
🍪 Perfect Balance of Textures & Flavors: Crunchy, gooey, melty, and sweet!
🌟 Customizable: Can be made traditional or upgraded with gourmet ingredients.
🌞 No Mess & No Plates Needed: Just grab, eat, and enjoy!
- Pro Tip: Use large, high-quality marshmallows for the best gooey texture.
2. The Classic S’mores Ingredients
The traditional s’mores recipe only requires three simple ingredients:
🍪 Graham Crackers – The crunchy, slightly sweet foundation.
🍫 Chocolate Bars – Hershey’s milk chocolate is the classic choice, but any chocolate works.
🔥 Marshmallows – Toasted until golden and gooey inside.
- Pro Tip: Want a more intense chocolate flavor? Use dark chocolate instead of milk chocolate for a richer taste.
3. How to Make Classic S’mores (3 Easy Methods)
You don’t need a campfire to enjoy delicious s’mores! Here are three foolproof ways to make them.
Method 1: Campfire or Grill (The Traditional Way) 🔥
1️⃣ Skewer the Marshmallow: Place a large marshmallow on a roasting stick.
2️⃣ Toast Over an Open Flame: Hold the marshmallow a few inches above the flame, turning it slowly for even browning.
3️⃣ Assemble the S’more: Place a piece of chocolate on a graham cracker, top with the toasted marshmallow, and sandwich it with another graham cracker.
4️⃣ Let the Chocolate Melt: Allow the heat from the marshmallow to slightly melt the chocolate before taking a bite!
- Pro Tip: Want extra melty chocolate? Place the chocolate on the graham cracker near the fire or grill for 30 seconds before assembling.
Method 2: Oven-Baked S’mores (For Indoor Enjoyment) 🔥
1️⃣ Preheat the Oven to 400°F (200°C).
2️⃣ Arrange Graham Crackers & Chocolate: Place half of the graham crackers on a baking sheet, topping them with chocolate squares.
3️⃣ Broil the Marshmallows: Place one marshmallow on each cracker and bake for 2-3 minutes until golden brown.
4️⃣ Assemble & Serve: Remove from the oven, top with another graham cracker, and gently press down.
- Pro Tip: Keep a close eye on the marshmallows under the broiler—they brown very quickly!
Method 3: Stovetop S’mores (No Fire? No Problem!)
1️⃣ Heat a Nonstick Pan or Cast-Iron Skillet Over Medium Heat.
2️⃣ Toast the Marshmallows: Place them directly in the pan for 30 seconds per side, using tongs to turn.
3️⃣ Melt the Chocolate: In the same pan, warm the chocolate on a graham cracker for 15-20 seconds.
4️⃣ Assemble the S’more: Place the toasted marshmallow on the melted chocolate, top with another graham cracker, and press gently.
- Pro Tip: Using a kitchen torch also works to toast marshmallows quickly!
4. Fun S’mores Variations & Flavor Twists
While classic s’mores are always delicious, you can also elevate them with fun variations!
1. Peanut Butter S’mores 🥜
- Spread peanut butter on the graham cracker before assembling.
- Use Reese’s Peanut Butter Cups instead of chocolate bars.
2. Salted Caramel S’mores 🍯
- Drizzle caramel sauce over the chocolate before adding the marshmallow.
- Sprinkle sea salt on top for a sweet-savory twist.
3. Chocolate Chip Cookie S’mores 🍪
- Use chocolate chip cookies instead of graham crackers for a softer texture.
- Add extra chocolate chips for double the chocolate flavor.
4. S’mores with Fruit 🍓
- Add sliced strawberries, raspberries, or banana slices for a fruity twist.
- Pro Tip: Grilled pineapple slices pair beautifully with s’mores!
5. S’mores with Nutella 🍫
- Swap chocolate bars for Nutella or melted hazelnut spread for a rich, creamy flavor.
- Pro Tip: Want extra crunch? Sprinkle crushed pretzels or nuts inside the s’mores!
5. How to Serve S’mores at a Cookout
S’mores can be served in a fun, interactive way at any cookout or BBQ.
S’mores Bar: Set up a DIY s’mores station with different chocolates, graham crackers, and toppings.
Grill S’mores Packets: Wrap assembled s’mores in foil and heat on the grill for 2-3 minutes.
Skillet S’mores Dip: Melt chocolate and marshmallows in a cast-iron skillet, then serve with graham crackers for dipping!
- Pro Tip: Use colorful skewers or roasting sticks to make s’mores roasting extra fun for kids!
6. Best Drinks to Pair with S’mores
🍷 Red Wine or Port: Complements the rich chocolate flavors in s’mores.
🥛 Cold Milk: The classic pairing that balances the sweetness of the marshmallow and chocolate.
☕ Hot Cocoa or Coffee: Perfect for cozy, cool evenings around the fire.
🥃 Bourbon or Whiskey: Adds a smoky contrast to the sweet flavors.
- Pro Tip: Try a milkshake or root beer float alongside s’mores for an extra-indulgent treat!
7. Storing & Making S’mores Ahead of Time
🥡 Storage Tips:
- Unassembled ingredients last for weeks in the pantry.
- Store leftover roasted marshmallows in an airtight container for up to 2 days.
🔥 Make-Ahead Tips:
8. Pro Tips for the Best S’mores Every Time
Use Jumbo Marshmallows – They toast better and give maximum gooeyness.
Let the Marshmallow Melt the Chocolate – Place chocolate near the fire before assembling for better melting.
Experiment with Chocolates – Try white chocolate, dark chocolate, or caramel-filled chocolate bars.
Don’t Over-Roast – Toast marshmallows slowly to avoid burning the outside before the inside melts.
Get Creative! – Add peanut butter, caramel, cookies, or fruit for new flavors.
Conclusion
Classic s’mores are the ultimate cookout dessert—easy to make, fun to roast, and always delicious. Whether you keep it traditional or try new variations, these gooey, chocolatey treats are guaranteed to be a hit at any summer BBQ, bonfire, or family gathering.
So grab your marshmallows, chocolate, and graham crackers, fire up the grill, and enjoy the magic of homemade s’mores! 🔥🍫🍪😋
Berry Trifle: A Light, Layered, and Irresistible Cookout Dessert 🍓🍰🍇
When it comes to refreshing, no-bake desserts, few treats can compete with a berry trifle. This elegant yet easy dessert is perfect for summer cookouts, featuring layers of fluffy cake, fresh berries, and rich, creamy filling. With its vibrant colors and balanced sweetness, a berry trifle is not only delicious but also visually stunning, making it an ideal centerpiece for any BBQ or backyard gathering.
Trifles are versatile, customizable, and easy to prepare ahead of time, making them a stress-free dessert option for hosting. Whether you stick with classic strawberries and blueberries or get creative with seasonal fruits and flavored creams, this light and luscious dessert will be a crowd favorite at your next cookout!
1. Why a Berry Trifle is the Perfect Cookout Dessert
🍓 No Baking Required – Perfect for hot summer days when you don’t want to turn on the oven.
🍰 Easy to Assemble – Simply layer ingredients and chill—no special skills needed!
🌟 Beautiful Presentation – The colorful layers of cake, berries, and cream make it visually appealing.
❄️ Cool & Refreshing – A chilled dessert that provides a light and airy contrast to grilled meats and BBQ dishes.
🍇 Endless Customization – Change up the cake, cream, or fruit to match your preference.
- Pro Tip: Use a clear glass trifle bowl or mason jars to showcase the beautiful layers of the dessert.
2. Choosing the Best Ingredients for a Flavorful Berry Trifle
A great trifle is all about high-quality ingredients that bring out the fresh, natural sweetness of the dish.
1. Cake Base
Angel Food Cake – Light, airy, and soaks up the fruit juices beautifully.
Pound Cake – A richer, buttery option that holds its structure well.
Vanilla Sponge Cake – A classic choice that absorbs flavors without becoming soggy.
🍪 Ladyfingers – Gives the trifle a slightly firmer, biscuit-like texture.
- Pro Tip: Use store-bought cake to save time or bake your own if you prefer homemade flavors!
2. Creamy Filling
Whipped Cream – Light and airy, keeps the dessert from feeling too heavy.
Vanilla Pudding or Custard – Adds a silky, creamy texture.
Mascarpone or Cream Cheese – Makes the filling richer and adds a slight tang.
Greek Yogurt or Lemon Curd – A tangy alternative for a healthier and lighter trifle.
- Pro Tip: If using whipped cream, stabilize it with powdered sugar or a little cream cheese so it holds up longer.
3. Fresh Berries
🍓 Strawberries – Sweet, juicy, and the perfect base fruit.
🫐 Blueberries – Adds a pop of color and tartness.
🍇 Blackberries & Raspberries – Brings a mix of sweet and tangy flavors.
🥭 Mango or Peaches (Optional) – For a tropical twist.
- Pro Tip: Use fresh, ripe berries for the best flavor, but frozen berries can work too—just thaw and drain them before layering.
4. Flavor Enhancers & Extras
🍯 Honey or Maple Syrup – Drizzle over the berries for extra sweetness.
🍋 Lemon Zest – Adds a bright, citrusy contrast.
🥜 Toasted Nuts or Granola – Provides a crunchy topping.
🍫 Chocolate Shavings or Coconut Flakes – For extra indulgence.
- Pro Tip: A splash of liqueur (Grand Marnier, Amaretto, or Rum) adds a sophisticated, boozy touch!
3. How to Assemble a Classic Berry Trifle (Step-by-Step Guide)
Prepare the Cake:
- Cut the cake into bite-sized cubes.
- If using pound cake or sponge cake, lightly brush with fruit juice or liqueur for extra moisture.
Make the Creamy Layer:
- Whip together whipping cream, sugar, and vanilla extract until fluffy.
- If using pudding, custard, or mascarpone, mix until smooth.
Prepare the Berries:
- Wash and slice strawberries.
- Toss all the berries in a little sugar and lemon juice to enhance their natural sweetness.
Layer the Ingredients:
- Start with a layer of cake cubes at the bottom of the trifle dish.
- Add a layer of creamy filling, smoothing it out with a spoon.
- Sprinkle a layer of fresh berries on top.
- Repeat the layers until the bowl is full, finishing with berries on top.
Chill & Serve:
- Cover and refrigerate for at least 1 hour (or up to 4 hours) before serving.
- Garnish with mint leaves, toasted nuts, or a dusting of powdered sugar before serving.
- Pro Tip: Letting the trifle sit for a few hours allows the flavors to meld together, making it even more delicious!
4. Fun Variations & Flavor Twists
A berry trifle is incredibly versatile, allowing you to get creative with different flavors.
1. Chocolate Berry Trifle 🍫
- Use chocolate cake or brownies instead of vanilla cake.
- Layer with chocolate pudding or Nutella-infused whipped cream.
- Top with chocolate shavings and raspberries.
2. Lemon Berry Trifle 🍋
- Swap the creamy layer for lemon curd and Greek yogurt.
- Add crushed lemon cookies for extra crunch.
3. Boozy Berry Trifle 🍷
- Soak the cake cubes in rum, brandy, or Grand Marnier for a grown-up twist.
- Serve in individual glasses for a fancy dessert option.
4. Keto or Low-Carb Berry Trifle 🥑
- Use almond flour cake or keto-friendly vanilla sponge.
- Sweeten with stevia or monk fruit sweetener.
5. Dairy-Free Berry Trifle 🌱
- Use coconut whipped cream or dairy-free yogurt instead of heavy cream.
- Opt for gluten-free cake or almond flour biscuits.
- Pro Tip: Mini trifles served in mason jars or individual glasses make for a beautiful presentation!
5. Best Pairings & Drinks to Serve with Berry Trifle
🍹 Pair with Light, Refreshing Drinks:
Homemade Lemonade – Bright, citrusy, and refreshing.
Iced Sweet Tea – A classic Southern pairing.
Prosecco or Champagne – Elevates the dessert with a bubbly touch.
🍽 Pair with Other Cookout Dishes:
BBQ Chicken or Ribs – The sweetness of the trifle balances smoky meats.
Grilled Peaches or Watermelon – A fresh, fruity contrast.
Vanilla Ice Cream or Whipped Cream on the Side – For extra creaminess.
- Pro Tip: If serving after a heavy BBQ meal, keep portions small to avoid overwhelming your guests.
6. Storing & Make-Ahead Tips
🧊 Storage:
- Trifle is best enjoyed fresh, but can be stored in the fridge for up to 2 days.
- Cover tightly to prevent drying out or absorbing fridge odors.
🍰 Make-Ahead Tips:
- Prepare cake, berries, and cream separately, then assemble just before serving.
- If assembling ahead, add the top berry layer right before serving for the freshest look.
- Pro Tip: Avoid freezing trifle, as the texture will become watery once thawed.
Conclusion
A berry trifle is the perfect summer dessert—light, fruity, creamy, and stunningly beautiful. Whether you’re making it for a cookout, picnic, or holiday gathering, this easy-to-make yet elegant dessert will always impress.
So grab your fresh berries, fluffy cake, and creamy layers, and whip up the ultimate berry trifle for your next BBQ! 🍓🍰🍇🔥
Ice Cream Sandwiches: The Ultimate Cool & Creamy Cookout Treat 🍪🍦
When it comes to summer desserts, nothing beats the classic combination of creamy ice cream and soft, chewy cookies in an ice cream sandwich. Perfect for cookouts, BBQs, and backyard parties, homemade ice cream sandwiches are a fun, customizable, and refreshing treat that both kids and adults love.
Whether you stick to the traditional chocolate chip cookie and vanilla ice cream combo or experiment with different cookie flavors, ice cream varieties, and mix-ins, these handheld frozen delights are the perfect balance of soft, crunchy, creamy, and sweet.
Let’s dive into everything you need to know to make the best homemade ice cream sandwiches, from choosing the perfect cookie base to fun flavor variations and serving tips that will wow your guests at your next cookout!
1. Why Ice Cream Sandwiches Are the Perfect Summer Dessert
🍪 Easy to Make in Advance – Assemble and freeze ahead for a stress-free dessert.
🍦 No Plates or Forks Needed – A handheld treat that’s easy to eat.
🌟 Completely Customizable – Mix and match cookie and ice cream flavors for unique combinations.
❄️ Cool & Refreshing – The perfect cold dessert to enjoy on a hot summer day.
🎉 Fun for All Ages – Both kids and adults love the nostalgic, creamy, and chewy texture.
- Pro Tip: Make mini ice cream sandwiches for a bite-sized, easy-to-eat option!
2. Choosing the Best Cookie Base for Ice Cream Sandwiches
The cookies are just as important as the ice cream when it comes to making the perfect ice cream sandwich. You need a cookie that’s sturdy enough to hold the ice cream but still soft enough to bite into when frozen.
Best Cookies for Ice Cream Sandwiches:
🍪 Chocolate Chip Cookies – The classic choice, slightly chewy with a rich, buttery flavor.
🍫 Brownie Cookies – Soft and fudgy, perfect for chocolate lovers.
🍪 Sugar Cookies – A neutral, buttery base that pairs well with fruity or vanilla ice cream.
🍦 Oatmeal Cookies – Adds texture and a slightly nutty flavor, great with caramel or cinnamon ice cream.
🍪 Peanut Butter Cookies – A sweet and salty combo, perfect with chocolate or banana ice cream.
🍪 Snickerdoodle Cookies – A cinnamon-spiced cookie that pairs beautifully with vanilla bean or caramel ice cream.
🌈 Funfetti Cookies – Colorful and sweet, great for birthday parties and kids’ events.
- Pro Tip: Use slightly underbaked cookies so they remain chewy when frozen instead of getting too hard.
3. Best Ice Cream Flavors for Ice Cream Sandwiches
While vanilla ice cream is the traditional choice, there are endless options to get creative!
Classic Ice Cream Flavors:
🍦 Vanilla Bean – Pairs well with almost any cookie.
🍫 Chocolate Fudge – Rich and decadent.
🥜 Peanut Butter Swirl – Great with chocolate chip or oatmeal cookies.
🍓 Strawberry – A fruity, refreshing choice.
🍪 Cookies & Cream – A double-cookie delight!
Unique Ice Cream Flavors to Try:
🥥 Coconut Ice Cream – Pairs well with chocolate or macadamia nut cookies.
🍯 Salted Caramel – The sweet and salty balance is perfect with snickerdoodles or sugar cookies.
🍵 Matcha Green Tea – A slightly earthy flavor that complements white chocolate or shortbread cookies.
🥜 Butter Pecan – Adds a nutty richness, great with oatmeal or peanut butter cookies.
🔥 Spiced Chai or Cinnamon Ice Cream – Works well with ginger cookies or snickerdoodles.
- Pro Tip: Use slightly softened ice cream (but not melted) for easy spreading when assembling your sandwiches.
4. How to Make Perfect Homemade Ice Cream Sandwiches
Follow these simple steps to make thick, creamy, and delicious ice cream sandwiches that hold their shape.
Step-by-Step Instructions:
Bake & Cool the Cookies:
- Make sure cookies are fully cooled before assembling, or they will melt the ice cream.
Soften the Ice Cream:
- Let the ice cream sit at room temperature for 5-10 minutes to make it easier to spread.
Assemble the Sandwiches:
- Scoop about ⅓ cup of ice cream onto the flat side of one cookie.
- Gently press another cookie on top, applying light pressure to spread the ice cream evenly.
Freeze for a Firm Texture:
- Place assembled sandwiches on a baking sheet lined with parchment paper and freeze for at least 1-2 hours before serving.
Serve & Enjoy!
- Let sit at room temperature for a few minutes before eating for the perfect soft-but-firm texture.
- Pro Tip: Use a spatula or knife to smooth the edges of the ice cream for a professional look.
5. Fun Ways to Customize Ice Cream Sandwiches
Make your ice cream sandwiches extra special with fun mix-ins and toppings!
1. Roll in Toppings for Extra Texture 🎉
After assembling, roll the sides of the ice cream in fun toppings:
🍫 Mini Chocolate Chips – Adds extra crunch.
🥜 Chopped Nuts – Great with caramel or peanut butter ice cream.
🌈 Sprinkles or Crushed Candy – Makes them more festive.
🥥 Toasted Coconut – Adds a tropical flair.
🍪 Crushed Oreos or Graham Crackers – Enhances the cookie flavor.
2. Dip in Chocolate for an Indulgent Touch 🍫
- Melt dark, milk, or white chocolate and dip half of each ice cream sandwich.
- Sprinkle with sea salt, nuts, or sprinkles before the chocolate hardens.
3. Make a Giant Ice Cream Sandwich Cake 🎂
- Use a large brownie or cookie slab as the base.
- Layer with softened ice cream, add another cookie slab on top, and freeze.
- Slice into individual servings for an easy make-ahead dessert.
- Pro Tip: Use waffles or brownies instead of cookies for a unique twist!
6. How to Store Ice Cream Sandwiches for Maximum Freshness
Since ice cream sandwiches are best enjoyed frozen, storing them properly ensures they stay fresh and firm.
🧊 Freezing Instructions:
- Wrap each sandwich individually in plastic wrap or parchment paper.
- Store in an airtight container or freezer bag for up to 2 weeks.
- For best texture, let the sandwich sit at room temperature for 3-5 minutes before eating.
- Pro Tip: Label your homemade ice cream sandwiches with the flavor combinations to make it easy to grab your favorite!
7. Best Pairings & Drinks to Serve with Ice Cream Sandwiches
Pair your ice cream sandwiches with cool drinks and complementary desserts for the ultimate cookout spread.
🥤 Perfect Drink Pairings:
Cold Brew Coffee or Iced Espresso – Balances the sweetness.
Milkshakes – Try a vanilla or chocolate shake with a cookie sandwich.
Iced Lemonade or Sweet Tea – Refreshing and light.
🍰 Other Desserts to Serve Alongside:
Berry Trifle – A fruity contrast to creamy ice cream.
Grilled Peaches – Pairs beautifully with vanilla ice cream sandwiches.
S’mores – A classic pairing for summer cookouts.
Conclusion
Homemade ice cream sandwiches are a fun, customizable, and refreshing dessert perfect for summer cookouts, BBQs, or any warm-weather gathering. Whether you stick to classic flavors or get creative with unique cookies, toppings, and fillings, these creamy, chewy treats are guaranteed to impress.
So grab your favorite cookies and ice cream, assemble a batch, and enjoy the ultimate frozen summer indulgence! 🍪🍦🔥🎉

Conclusion
Hosting the ultimate cookout is all about great food, good company, and a well-balanced menu that keeps everyone satisfied. From sizzling grilled mains like juicy burgers, smoky baby back ribs, and flavorful veggie skewers to classic side dishes like creamy potato salad and grilled corn on the cob, every bite adds to the perfect outdoor feast. Refreshing drinks like homemade lemonade and iced sweet tea keep your guests cool, while crowd-pleasing desserts like s’mores, berry trifle, and ice cream sandwiches end the meal on a sweet note.
With these 15 must-try recipes, your cookout is guaranteed to be a hit, whether you’re celebrating a special occasion or simply enjoying a warm summer evening with friends and family. Fire up the grill, set the table, and get ready to wow your guests with the ultimate cookout menu! 🍔🔥🥗🍹
1 thought on “The Ultimate Cook Out Menu: 15 Recipes to Wow Your Guests”