
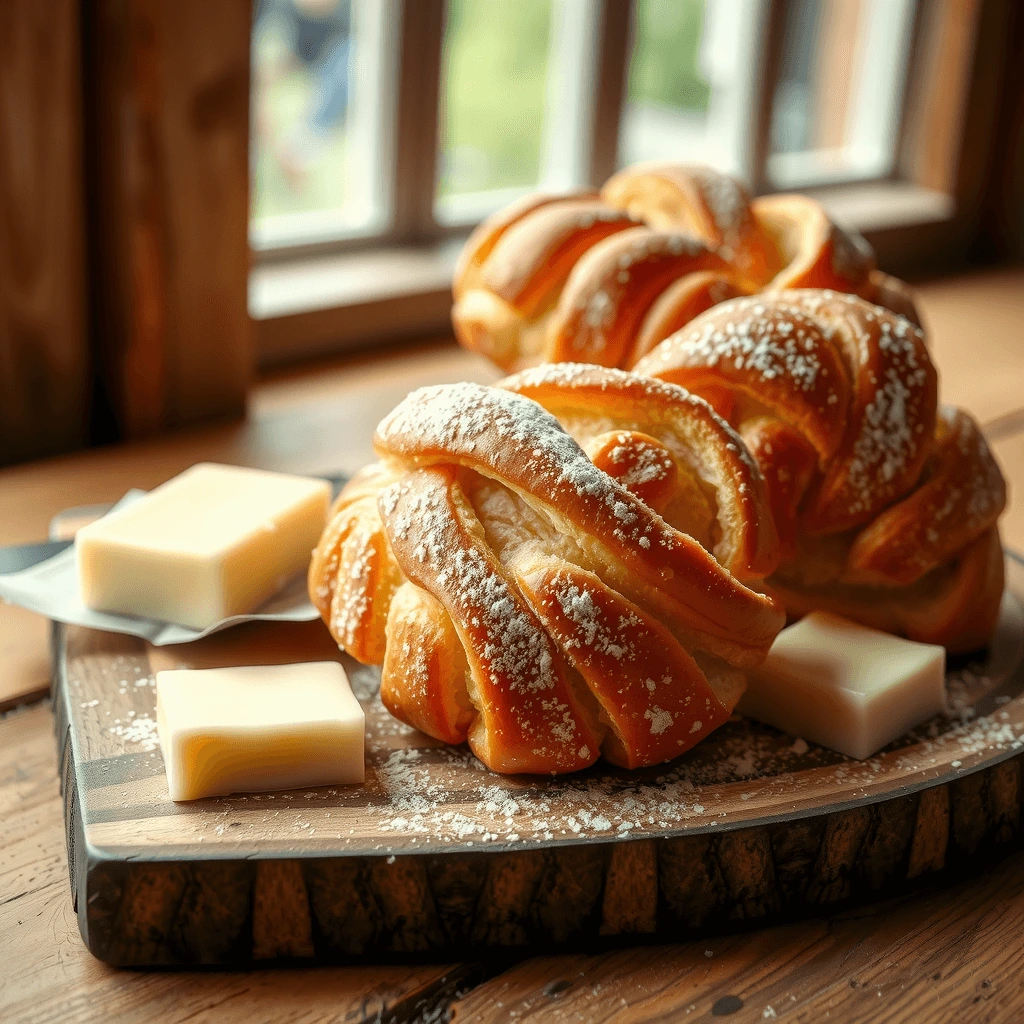
If you’ve ever strolled through a Swiss bakery, you’ve likely spotted golden, flaky Gipfeli Recipe lined up in the display case. Often mistaken for croissants, the Gipfeli Recipe is Switzerland’s take on this classic breakfast pastry—but with a unique twist. Unlike their French counterpart, the Gipfeli Recipe is less buttery, slightly denser, and has a subtle sweetness, making it a staple in Swiss homes and cafés.
In this easy Gipfeli recipe, we’ll show you how to make these light and airy pastries at home—no professional baking skills required! With just a few simple ingredients and step-by-step guidance, you’ll master the art of creating flaky layers, rich buttery flavor, and the perfect Swiss breakfast pastry right in your kitchen. Whether you’re a beginner or a seasoned baker, this recipe is designed to be foolproof. Ready to bake? Let’s dive in!
What Is a Gipfeli Recipe? The Swiss Pastry Explained
The Origins of the Gipfeli Recipe: A Staple in Swiss Bakeries
The Historical Roots of Gipfeli
The story of Gipfeli begins centuries ago with its ancestor, the Austrian Kipferl. These crescent-shaped pastries date back to at least the 13th century and were a staple in Austrian bakeries long before the French refined them into croissants. The Kipferl itself was inspired by even older Middle Eastern and Turkish pastries, particularly those brought to Europe through trade and cultural exchanges.
By the 19th century, Viennoiserie-style pastries had spread across Europe, and each country began developing its own version. The Swiss took inspiration from the Kipferl but modified the technique and ingredients to create what is now known as Gipfeli—a distinct pastry with a unique texture and slightly different flavor profile from its French counterpart.
How Gipfeli Became a Swiss Breakfast Tradition
In Switzerland, Gipfeli quickly became a breakfast staple, commonly paired with coffee or tea. Swiss bakeries began specializing in making Gipfeli with variations in texture and flavor. Unlike the highly laminated, ultra-buttery French croissant, Gipfeli has a more subtle richness, a firmer bite, and a slightly sweet undertone.
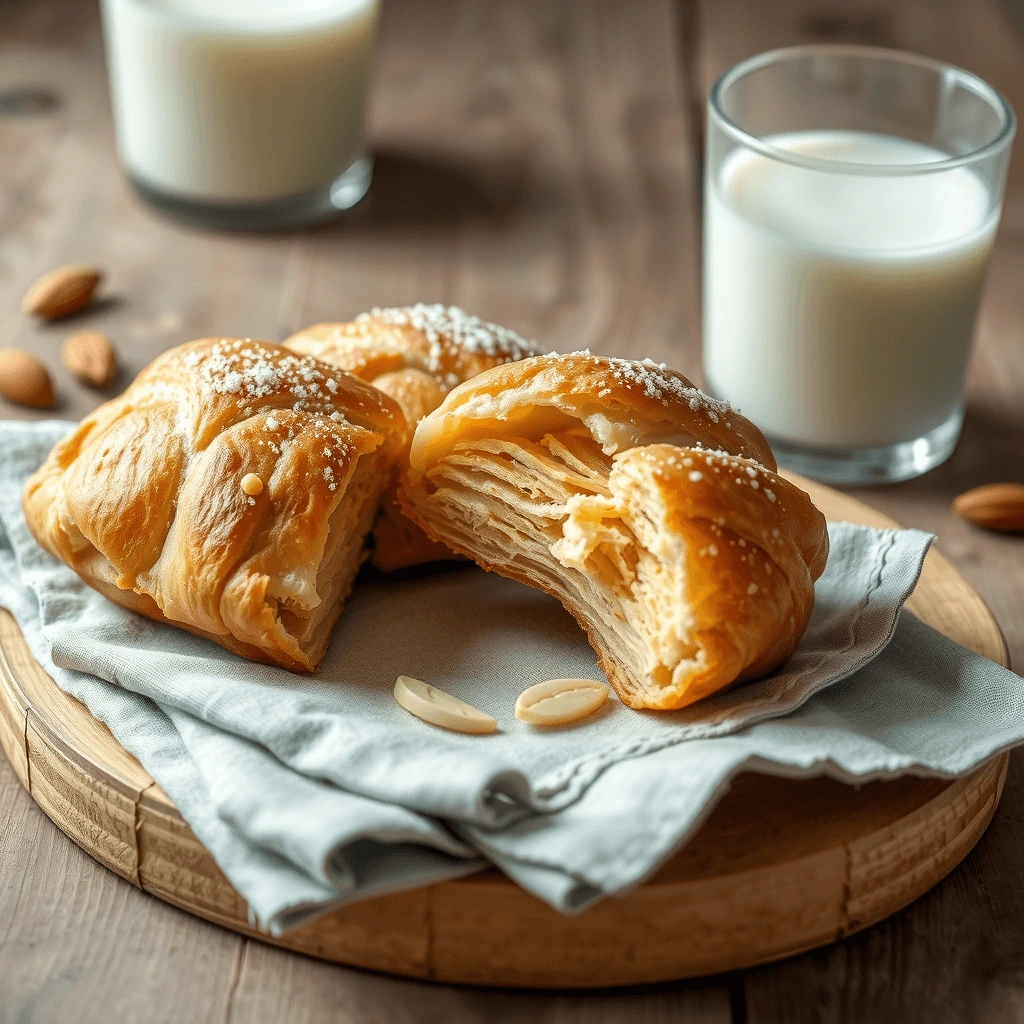
Swiss cafés and bakeries prepare fresh Gipfeli early in the morning, ensuring that by sunrise, customers can enjoy warm, golden-brown pastries straight from the oven. Whether enjoyed plain or filled with jam, chocolate, or almond paste, Gipfeli has become a beloved morning ritual for many Swiss families.
Gipfeli and Swiss Culinary Identity
While Swiss cuisine is often associated with cheese, chocolate, and hearty Alpine dishes, Gipfeli stands out as one of the country’s most beloved baked goods. The pastry represents Swiss precision and quality—simple ingredients crafted into something delicate and flavorful.
Swiss bakeries take pride in using locally sourced flour, Swiss Alpine butter (Alpenbutter), and fresh eggs, ensuring that every Gipfeli is made with high-quality ingredients. Unlike mass-produced croissants found in supermarkets, traditional Swiss Gipfeli are handcrafted, proofed for the perfect amount of time, and baked to perfection.
Gipfeli Variations Across Switzerland
Gipfeli is not a one-size-fits-all pastry. Depending on the region, there are slight variations in how it is prepared and enjoyed:
- Classic Butter Gipfeli – The most traditional version, made with flour, yeast, milk, butter, and a hint of sugar.
- Whole Wheat Gipfeli – A healthier variation using whole wheat flour, often found in bakeries that emphasize natural ingredients.
- Laugen-Gipfeli – A pretzel-inspired version that has a darker, slightly chewy crust due to the lye bath before baking.
- Filled Gipfeli – Some bakeries offer Gipfeli filled with chocolate, nuts, marzipan, or cheese, adding an extra layer of indulgence.
Swiss people take their Gipfeli preferences seriously, and each bakery often has a loyal following based on their specific recipe and baking techniques. The best Gipfeli is always freshly made, with a balance of crisp, flaky layers and a soft, airy interior.
Why Swiss Gipfeli Is Different from a Croissant
It’s easy to mistake Gipfeli for a croissant at first glance, but a closer look (and taste) reveals key differences.
Texture and Butter Content
Croissants are known for their rich, ultra-buttery flavor due to the high amount of butter layered into the dough. Gipfeli, on the other hand, contains less butter, resulting in a slightly firmer texture and a less oily feel. While croissants are extremely flaky and delicate, Gipfeli maintains a soft yet structured bite.
Dough and Proofing Process
Gipfeli dough is usually made with a combination of yeast and milk, whereas traditional croissants use laminated dough with butter layers that expand during baking. The proofing process for Gipfeli is also slightly different—Swiss bakers often allow a longer resting period for the dough, ensuring a more developed flavor and improved texture.
Taste and Sweetness
While French croissants have a neutral, buttery taste, Swiss Gipfeli often have a subtle sweetness due to the addition of sugar or honey in the dough. This makes Gipfeli perfect for enjoying with jam, butter, or even a slice of Swiss cheese.
Shape and Size
A classic croissant has a delicate crescent shape with sharp, tapered ends, while a Gipfeli is often more compact, slightly smaller, and has a rounder appearance. Some variations, such as Laugen-Gipfeli, even have a glossy, pretzel-like finish.
The Swiss Preference: Gipfeli Over Croissants?
In Switzerland, Gipfeli remains more popular than croissants for breakfast and casual snacking. Many locals prefer its milder flavor, slightly chewy texture, and versatility—it pairs just as well with a cappuccino as it does with a hearty slice of cheese.
Additionally, Swiss bakeries focus on quality over mass production, ensuring that even the simplest Gipfeli is crafted with precision. While French croissants have taken over global café culture, in Switzerland, nothing beats a freshly baked Gipfeli from a local Bäckerei (bakery).
The Evolution of Gipfeli in Modern Swiss Bakeries
Today, Swiss bakeries continue to innovate while respecting traditional techniques. Some of the most notable changes include:
- Health-conscious adaptations – Whole grain, spelt flour, and reduced-sugar Gipfeli cater to those seeking healthier alternatives.
- Gourmet fillings – High-end bakeries experiment with fillings like pistachio cream, Swiss honey, and even saffron-infused butter.
- Artisan baking techniques – More Swiss bakeries focus on hand-kneaded dough and extended fermentation times, creating superior texture and flavor.
As food trends evolve, Gipfeli remains a timeless favorite, balancing tradition with innovation. Whether you’re visiting Zürich, Geneva, or Lucerne, a freshly baked Gipfeli is a must-try for any foodie exploring Switzerland’s rich culinary scene.
Difference Between a Gipfeli Recipe and a Croissant
The Role of Butter in Texture and Flavor
Butter Content and Its Impact on Flakiness
One of the most significant distinctions between Gipfeli and croissants is their butter content. Traditional French croissants rely on lamination, a technique where layers of butter are folded into the dough multiple times, creating thin, delicate layers that separate during baking. This results in an ultra-flaky, melt-in-your-mouth texture.
Gipfeli, on the other hand, contains less butter in the dough and is not laminated as extensively. This difference gives Gipfeli a less oily, more structured texture. Instead of delicate, paper-thin layers, Gipfeli features a slightly denser crumb that holds its shape better.
The Science of Butter and Dough Interaction
Butter plays a key role in how a pastry rises and develops texture. In croissants, the high butter content helps create steam pockets as the layers bake, forcing them to separate and expand into the classic airy structure.
With Gipfeli, less butter means less steam production, leading to a more compact, chewy bite. While still light and airy, Gipfeli has a firmer texture with more substance compared to the ultra-delicate French croissant.
How Butter Affects Taste and Aroma
Another difference is the flavor profile. French croissants have a pure, rich butter taste, where the butter itself is the dominant note. This allows croissants to pair well with both sweet and savory fillings, from jam and chocolate to ham and cheese.
Gipfeli, in contrast, has a milder butter presence, often balanced with a subtle sweetness in the dough. This slight sweetness enhances its natural pairing with coffee, honey, and fruit preserves.
The Structural Differences Between Gipfeli and Croissants
The Role of Dough Composition
The base dough for croissants and Gipfeli differs in a few key ways:
- Croissants use a laminated dough, where butter is layered between sheets of dough. This technique creates air pockets that expand when baked, forming an open, honeycomb-like crumb.
- Gipfeli is made with yeast-based dough, sometimes enriched with milk and sugar. While some layering is involved, it is far less intensive than croissant dough. The result is a denser, breadier texture with a more uniform crumb.
Proofing and Rising Time
Croissants require a long proofing time to allow the yeast to develop the necessary rise before baking. This slow fermentation enhances both flavor complexity and structure.
Gipfeli also requires proofing but often for a shorter period, making it slightly more forgiving for home bakers. This results in a pastry that is softer on the inside with a crisp, golden crust but without the extreme puffiness of a croissant.
The Visual and Physical Differences
Though both pastries have a crescent shape, they look distinct when placed side by side.
- Croissants are large, elongated, and feature well-defined layers that flake apart when touched.
- Gipfeli is smaller, rounder, and more compact with a smoother, slightly firmer crust.
The golden-brown exterior of croissants is also shinier, often due to multiple layers of egg wash applied before baking. Gipfeli has a more matte surface, sometimes with a softer crust that develops slight crispiness when toasted.
Taste and Sweetness: A Subtle but Important Contrast
The Natural Sweetness of Gipfeli
One characteristic that sets Gipfeli apart is its slight sweetness. While French croissants are more neutral in taste, Gipfeli often contains a small amount of sugar or honey in the dough, giving it a naturally pleasant flavor that requires no additional toppings.
This makes Gipfeli a standalone breakfast item, whereas croissants often require fillings or spreads to bring out their full potential.
How Croissants Adapt to Fillings and Toppings
Because of their neutral butter flavor, croissants act as a blank canvas for a wide range of fillings. They are commonly stuffed with:
- Almond paste for almond croissants
- Dark chocolate for pain au chocolat
- Ham and cheese for a savory twist
Gipfeli, by contrast, is typically enjoyed plain or with light spreads, such as:
- Fruit preserves (apricot, raspberry, strawberry)
- Honey or butter for added richness
- Swiss cheese slices for a breakfast pairing
Some bakeries do offer filled Gipfeli, but they tend to have less filling than their French counterparts, maintaining their lighter, less indulgent nature.
Baking Methods and Techniques: A Side-by-Side Comparison
The Classic Croissant Baking Process
Making croissants from scratch involves multiple precise steps:
- Dough preparation – Mixing flour, yeast, salt, and a small amount of sugar.
- Butter layering (lamination) – Folding cold butter into the dough through multiple rolling and folding steps.
- Chilling and proofing – Letting the dough rest for hours to develop its structure.
- Shaping – Cutting into triangles and rolling into the signature crescent shape.
- Baking – A high-temperature bake that allows steam from the butter to create flaky layers.
How Gipfeli Is Made Differently
- Dough mixing – A yeast-based dough is made, often including milk and sugar.
- Minimal lamination – A few folds create gentle layers, but not to the extent of croissants.
- Shorter proofing time – Gipfeli can be prepared and baked in less time than croissants.
- Shaping and rolling – The dough is cut into triangles and rolled, but with a more compact, rounded shape.
- Baking – Gipfeli is baked at a slightly lower temperature, creating a softer crust.
Because Gipfeli doesn’t require as much precise lamination or proofing time, it is far easier for home bakers to master than croissants.
How Long Do Croissants and Gipfeli Stay Fresh?
Shelf Life and Storage
One advantage of Gipfeli is its longer shelf life.
- Croissants must be eaten the same day they are baked, as they lose their crisp texture quickly.
- Gipfeli retains freshness for a longer period, making it more practical for home storage.
Reheating for Best Texture
Both pastries can be reheated to regain some of their original texture:
- Croissants should be reheated in an oven at 180°C (350°F) for 5 minutes to restore flakiness.
- Gipfeli can be lightly toasted or warmed at 160°C (320°F) for a softer texture.
Because Gipfeli has a slightly denser dough, it holds up better to multiple reheatings, while croissants tend to dry out more quickly.
Which Pastry Is Better? The Final Verdict
Both Gipfeli and croissants have their place in European pastry culture. While croissants are famous for their delicate layers and ultra-buttery taste, Gipfeli offers a more balanced, subtly sweet, and practical alternative.
For those who love indulgent, flaky pastries, croissants remain unbeatable. But for a lighter, slightly sweet pastry that pairs well with coffee and preserves, Gipfeli is the perfect Swiss breakfast choice.
If you’re looking to try an authentic Swiss pastry at home, continue reading for the ultimate Gipfeli recipe, with step-by-step instructions for a perfectly flaky, golden-brown treat.
Traditional Ingredients in a Swiss Gipfeli Recipe
The Foundation of Gipfeli Dough
Swiss Gipfeli is known for its delicate texture, mild sweetness, and rich yet balanced flavor. Unlike French croissants, which rely heavily on butter for their signature flakiness, Gipfeli’s structure comes from a well-developed yeast dough that creates a light and slightly chewy crumb.
To achieve the perfect homemade Gipfeli, using high-quality ingredients is essential. Each component plays a crucial role in flavor, texture, and the final appearance of the pastry.
Flour: The Backbone of Gipfeli Dough
Choosing the Right Type of Flour
The type of flour used in Gipfeli dough affects both its texture and rise. Swiss bakers typically use:
- High-protein flour (bread flour) – This flour contains a higher percentage of gluten, giving Gipfeli its slight chewiness and structured layers. The added strength in the dough helps support the rise and shaping process.
- All-purpose flour – Some traditional recipes use a mix of all-purpose and bread flour for a balance between softness and structure.
- Whole wheat flour – Occasionally, Swiss bakeries create whole wheat Gipfeli for a heartier, more rustic variation.
Why Gluten Development Matters
Unlike croissants, which rely on butter layering for flakiness, Gipfeli’s texture comes from yeast fermentation and gluten formation. The kneading process allows gluten strands to develop, resulting in a dough that is:
- Elastic – Preventing excessive crumbling when shaped.
- Stretchy – Allowing the dough to hold air pockets for a light, airy interior.
- Firm enough to roll and fold – Creating subtle layers without excessive fragility.
For home bakers, sifting the flour before mixing ensures an even distribution of ingredients and prevents clumping in the dough.
Yeast: The Key to Light and Airy Gipfeli
Types of Yeast Used in Gipfeli
Yeast is essential for Gipfeli’s rise and texture. Traditional recipes use:
- Fresh yeast – Commonly used in Swiss bakeries, fresh yeast provides a mild, slightly sweet flavor and helps achieve a smooth, silky dough texture.
- Active dry yeast – A great alternative for home bakers, this yeast needs to be activated in warm milk before mixing into the dough.
- Instant yeast – A faster option that doesn’t require activation, making it ideal for quicker preparation.
Proper Proofing for the Best Texture
Gipfeli dough requires two proofing stages to develop the best structure:
- First proof (bulk fermentation): The dough is left to rise for 1-2 hours until it doubles in size, allowing yeast fermentation to create air pockets.
- Second proof (after shaping): Once the dough is rolled and shaped into its crescent form, it rests again for 30-45 minutes before baking. This ensures a light, airy interior without collapsing during baking.
Yeast is responsible for the slightly chewy, bread-like consistency of Gipfeli, which differentiates it from the delicate, crispy texture of a croissant.
Alpenbutter: The Secret to a Rich, Buttery Flavor
What Makes Alpenbutter Unique?
Alpenbutter, or Swiss Alpine butter, is a high-quality butter known for its rich, creamy flavor. It comes from cows grazing in Swiss mountain pastures, resulting in a slightly deeper, nuttier taste compared to standard supermarket butter.
This butter has a higher fat content (at least 82%), making it ideal for baking Gipfeli with a soft, flavorful crumb.
Using Butter in Gipfeli Dough
Unlike croissants, where butter is layered between the dough sheets, Gipfeli incorporates butter directly into the dough. This method results in:
- A more uniform richness instead of separate buttery layers.
- A softer texture without excessive flakiness.
- A slight crispiness on the exterior while maintaining moisture inside.
For best results, butter should be at room temperature when mixing into the dough. Too cold, and it won’t incorporate properly; too warm, and it may weaken the dough structure.
Milk: Enhancing Softness and Flavor
The Role of Milk in Gipfeli Dough
Milk is another essential ingredient that sets Gipfeli apart from croissants. While croissants rely mainly on water for hydration, Gipfeli dough typically includes warm milk, which contributes to:
- A softer, slightly richer dough texture.
- Improved browning due to natural sugars in the milk.
- A delicate crumb that is more structured than a croissant but still tender.
Whole Milk vs. Alternative Milks
- Whole milk is preferred for traditional Gipfeli, as it contains the perfect balance of fat, protein, and natural sugars for optimal dough conditioning.
- Low-fat or skim milk can be used, but they may result in a slightly drier texture.
- Plant-based milk alternatives (such as almond or oat milk) can work for dairy-free versions, though they may alter the flavor slightly.
Sugar: A Subtle Sweetness That Sets Gipfeli Apart
Why Gipfeli Dough Contains Sugar
Unlike French croissants, which are purely butter-based, Gipfeli often includes a small amount of sugar in the dough. This:
- Enhances natural sweetness without making the pastry overly sugary.
- Helps activate the yeast, improving the rise and proofing process.
- Contributes to a beautiful golden-brown crust when baked.
The Right Sugar for the Best Gipfeli
- Granulated sugar is the standard choice for a balanced sweetness.
- Honey or malt extract can be used in artisanal Gipfeli recipes for a richer, slightly caramelized flavor.
- Brown sugar is rarely used but can add a subtle depth to the dough.
Even with sugar in the dough, Gipfeli is not as sweet as a Danish pastry, making it a versatile option for both sweet and savory pairings.
Egg Wash: The Final Touch for a Golden-Brown Crust
Why Egg Wash Is Essential
One of the defining features of a well-made Gipfeli is its shiny, golden crust. This is achieved by brushing the shaped dough with egg wash before baking. The egg proteins and fats create:
- A rich, glossy surface that enhances the pastry’s appearance.
- A slightly crisp exterior that contrasts with the soft interior.
- An appealing golden-brown color through caramelization during baking.
How to Make the Perfect Egg Wash
The most common egg wash for Gipfeli includes:
- 1 whole egg, beaten for a balanced shine and deep color.
- 1 egg yolk + 1 tablespoon milk for a richer, darker glaze.
- A pinch of salt to break down proteins for a more even application.
Brushing the egg wash just before baking ensures that the pastry bakes evenly, with a professional-looking finish.
The Importance of High-Quality Ingredients in Swiss Gipfeli
How Ingredient Quality Affects the Final Product
The best Gipfeli comes down to the quality of ingredients. Using premium flour, fresh yeast, authentic Alpenbutter, and full-fat milk ensures:
- A soft, chewy crumb with a slightly flaky texture.
- A light, buttery taste without excessive oiliness.
- A balanced structure that holds up well to fillings and toppings.
Swiss bakers take pride in sourcing local, high-quality ingredients, which is why Gipfeli from a Swiss bakery always tastes superior to mass-produced versions.
For home bakers, selecting the best possible ingredients will make a noticeable difference in the taste, texture, and authenticity of homemade Gipfeli.

Essential Ingredients for the Perfect Gipfeli Recipe
Flour Selection: Choosing the Right Base for a Flaky Gipfeli Recipe
The Role of Flour in Gipfeli Dough
Flour serves as the structural foundation of Gipfeli dough. It determines texture, elasticity, and how well the pastry rises and bakes. Choosing the right type of flour is essential for achieving the perfect balance of flakiness, chewiness, and lightness in Gipfeli.
Unlike croissants, which rely heavily on butter lamination for flakiness, Gipfeli requires a stronger dough structure due to its yeast-based composition. This is why high-protein flour plays a crucial role in developing the right texture.
What Is High-Protein Flour?
Understanding Protein Content in Flour
Flour contains two primary proteins, glutenin and gliadin, which combine with water to form gluten. Gluten gives the dough its elasticity and strength, allowing it to trap air bubbles during proofing and baking.
High-protein flour, also known as bread flour, has a higher gluten content (12-14%) compared to all-purpose flour (9-11%). This additional protein provides better dough elasticity, structure, and stability, making it ideal for Gipfeli.
Types of High-Protein Flour Used for Gipfeli
- Bread Flour (12-14% protein): The best choice for achieving structured, flaky layers while maintaining a soft crumb.
- Swiss Zopf Flour: A traditional Swiss flour blend used in Gipfeli, containing a mix of high-protein wheat flour and soft flour to create an ideal balance of chewiness and fluffiness.
- Whole Wheat Flour (13-15% protein): Used in some variations of Gipfeli for a heartier texture, though it may require additional hydration to prevent excessive density.
How High-Protein Flour Affects Flakiness in Gipfeli
1. Stronger Gluten Development for Layer Formation
Flakiness in Gipfeli results from a combination of yeast fermentation and dough layering techniques. Using high-protein flour:
- Enhances gluten development, allowing the dough to stretch without tearing.
- Creates strong dough layers, which separate slightly during baking, leading to a delicate, crisp exterior while maintaining a chewy interior.
- Prevents excessive crumbling, ensuring that Gipfeli holds its shape during baking.
2. Improved Dough Elasticity for Rolling and Shaping
Shaping Gipfeli requires rolling the dough into thin, triangular pieces before folding them into a crescent shape. Weak dough can tear or lose structure, but high-protein flour:
- Allows the dough to stretch smoothly without breaking.
- Maintains firm edges for better definition in the final shape.
- Supports the dough’s ability to hold air pockets, leading to a lighter pastry.
3. Better Air Retention for a Light, Flaky Crumb
During proofing, yeast produces gas that expands within the dough. If the flour lacks protein strength, the dough may collapse or fail to trap air efficiently. High-protein flour:
- Supports fermentation, creating a well-aerated dough that leads to a fluffy yet structured crumb.
- Allows for better oven spring, meaning the dough rises properly when baked.
- Prevents excessive moisture loss, ensuring that the Gipfeli remains soft and flaky rather than dry and crumbly.
Comparing High-Protein Flour to Other Types
| Flour Type | Protein Content | Effect on Gipfeli Texture |
|---|---|---|
| Bread Flour | 12-14% | Ideal for flakiness and structure |
| All-Purpose Flour | 9-11% | Softer texture, less structure |
| Pastry Flour | 8-9% | Too weak, results in crumbly dough |
| Whole Wheat Flour | 13-15% | Denser texture, requires extra hydration |
Can You Use All-Purpose Flour Instead of High-Protein Flour?
Yes, all-purpose flour can work for Gipfeli, but it may not produce the same level of flakiness and structure as high-protein flour. If using all-purpose flour:
- Knead the dough slightly longer to develop adequate gluten strength.
- Reduce hydration slightly, as all-purpose flour absorbs less water than bread flour.
- Expect a softer, less defined texture with slightly reduced flakiness.
For the best results, mixing all-purpose flour with a small amount of bread flour can help improve structure while maintaining a tender crumb.
Final Tips for Using High-Protein Flour in Gipfeli
- Sift the flour before mixing to ensure even distribution and prevent clumping.
- Measure the flour accurately using a kitchen scale to prevent over-flouring, which can lead to a dense pastry.
- Avoid over-kneading, as excessive gluten development can make the dough tough rather than flaky.
By choosing high-protein flour, bakers can create light, airy, and slightly flaky Gipfeli with the perfect balance of crispness and softness.
The Role of Butter in a Gipfeli Recipe: Why Alpenbutter Makes a Difference
The Role of Butter in Gipfeli Dough
Butter plays a crucial role in determining the texture, flavor, and overall quality of Gipfeli. While croissants depend on heavy butter layering for flakiness, Gipfeli relies on butter incorporated into the dough to create a balanced structure with a slight flakiness and a soft, airy interior. The type of butter used significantly impacts the final result, making Alpenbutter (Swiss Alpine butter) the preferred choice for achieving the best Gipfeli texture.
What Is Alpenbutter?
A Unique Swiss Ingredient
Alpenbutter, or Swiss Alpine butter, comes from cows grazing in the high-altitude pastures of the Swiss Alps. Due to the cows’ diet of fresh Alpine grass and wildflowers, this butter:
- Contains a richer fat profile, which enhances flavor and dough consistency.
- Has a slightly nutty, sweet aroma that elevates the taste of Gipfeli.
- Provides a smooth, creamy texture, making it easier to incorporate into the dough.
High-Fat Content for Better Texture
Standard supermarket butter typically contains 80% fat, while Alpenbutter contains at least 82-85% fat. This slight increase in fat content:
- Produces a more tender, delicate crumb in Gipfeli.
- Improves butter distribution, allowing for even hydration and richness in the dough.
- Prevents the dough from becoming too oily or greasy, which can happen with lower-quality butter.
How Alpenbutter Enhances Gipfeli Texture
1. Creates a Balanced Flakiness Without Excess Greasiness
Unlike croissants, where laminated butter creates paper-thin layers, Gipfeli dough is kneaded with butter for a texture that is flaky yet structured. Alpenbutter, with its high-fat content and lower moisture percentage, allows for:
- A crisp outer crust that develops beautifully in the oven.
- A soft, light crumb inside that is not overly dry or heavy.
- A well-balanced bite—rich but not overwhelmingly greasy.
2. Ensures Proper Dough Hydration and Elasticity
The fat-to-water ratio in butter affects how the dough absorbs moisture. Low-quality butter, which contains more water, can lead to:
- Overhydrated dough, making it sticky and difficult to roll.
- Weakened gluten formation, resulting in a dough that lacks elasticity and structure.
Alpenbutter provides a more stable fat composition, ensuring that the dough maintains proper hydration levels without becoming too wet or too dry.
3. Enhances the Rise and Proofing Process
Yeast fermentation and butter content must be perfectly balanced to allow proper expansion during proofing. The high-fat composition of Alpenbutter:
- Strengthens the dough’s ability to trap air pockets, leading to a well-risen Gipfeli.
- Helps the layers expand slightly without collapsing, resulting in a light, airy structure.
- Creates a soft and tender bite while maintaining subtle flakiness.
4. Produces a Rich, Buttery Aroma and Taste
A key characteristic of authentic Gipfeli is its mild sweetness combined with rich buttery notes. Alpenbutter contributes to:
- A deep, full-bodied flavor that lingers with every bite.
- A creamy, slightly nutty aroma, which enhances the pastry’s overall appeal.
- A natural sweetness, reducing the need for excessive sugar in the dough.
Comparison: Alpenbutter vs. Regular Butter in Gipfeli Dough
| Feature | Alpenbutter (Swiss Alpine Butter) | Regular Butter |
|---|---|---|
| Fat Content | 82-85% | 80% |
| Moisture Content | Lower, ensuring better dough consistency | Higher, can cause soggy dough |
| Flavor Profile | Rich, creamy, slightly nutty | Mild butter flavor |
| Dough Texture | Creates a tender, airy crumb | Can lead to denser results |
| Flakiness | Balanced, crisp crust | Can be too greasy or too dry |
Can You Use Regular Butter Instead of Alpenbutter?
While regular unsalted butter works as a substitute, the final texture and taste may not be as refined. If Alpenbutter isn’t available, the best alternative is:
- European-style butter with at least 82% fat (such as French, Danish, or Irish butter).
- A mix of unsalted butter and a small amount of clarified butter to mimic the lower water content.
Using low-quality butter with higher moisture content can lead to:
- A greasier texture with less defined layers.
- A weaker rise during proofing, causing the Gipfeli to be denser.
- Less flavor complexity, making the pastry taste flat rather than rich.
How to Work with Alpenbutter in Gipfeli Dough
1. Use Softened Butter for Even Mixing
Butter should be soft but not melted before incorporating it into the dough. Softened butter ensures:
- Smooth distribution throughout the dough.
- A consistent fat-to-flour ratio, preventing dry patches.
- Better gluten formation, which is essential for structure and rise.
2. Maintain Proper Dough Temperature
Since butter is sensitive to heat, bakers should:
- Avoid over-kneading, which can cause the butter to overheat and break down.
- Chill the dough slightly before rolling to maintain butter stability.
- Keep a cool workspace to prevent butter from melting prematurely.
3. Brush Gipfeli with Melted Butter After Baking
For an extra layer of richness, some bakers brush freshly baked Gipfeli with a light coat of melted Alpenbutter. This step:
- Enhances flavor depth and aroma.
- Adds a beautiful sheen to the crust.
- Locks in moisture, keeping the pastry soft for longer.
Final Thoughts on Alpenbutter in Gipfeli
Using Alpenbutter elevates the quality of homemade Gipfeli, ensuring a delicate, flaky texture with a buttery richness that isn’t overwhelming. Its high-fat content, creamy consistency, and superior flavor profile make it the best choice for achieving an authentic Swiss Gipfeli experience.
For bakers seeking the perfect balance of crispness, airiness, and deep flavor, investing in high-quality butter like Alpenbutter will make a noticeable difference.
Using Yeast Dough for a Perfect Gipfeli Recipe: The Science Behind Proofing
Why Yeast Dough Is Essential for Gipfeli
Unlike croissants, which rely on butter lamination for structure, Gipfeli uses yeast-based dough to create a light, airy interior with a slightly chewy texture. The fermentation process allows the dough to develop flavor, elasticity, and the strength needed to hold its shape during baking.
Yeast dough in Gipfeli plays a key role in:
- Trapping gas bubbles, which expand to create a soft, layered crumb.
- Strengthening gluten networks, providing the necessary elasticity.
- Enhancing flavor, as fermentation produces subtle, complex notes that improve the overall taste.
The success of Gipfeli depends on proper dough proofing, which allows yeast to fully activate and structure to form before baking.
Understanding Yeast: The Key Ingredient in Dough Proofing
Types of Yeast Used in Gipfeli Dough
Choosing the right yeast ensures consistent rise, texture, and fermentation speed. The three main types used in Gipfeli recipes are:
- Fresh yeast – Preferred in Swiss bakeries, it activates quickly and produces a mild, slightly sweet flavor.
- Active dry yeast – A common home-baking option that requires activation in warm milk before mixing.
- Instant yeast – Works faster than active dry yeast and can be added directly to the flour without proofing.
Each type of yeast affects fermentation speed and dough handling, but all function by consuming sugars and releasing carbon dioxide and ethanol, which cause the dough to rise.
How Yeast Creates Dough Structure
When yeast ferments, it produces carbon dioxide gas that becomes trapped in the dough’s gluten network. This gas expansion results in:
- A light, airy texture in the final baked product.
- Proper volume and rise, preventing the pastry from becoming too dense.
- Improved flavor complexity, as fermentation develops subtle nutty and slightly tangy notes.
Without proper yeast activation and proofing, Gipfeli would turn out flat, dense, and flavorless.
The Two Stages of Dough Proofing in Gipfeli
1. Bulk Fermentation (First Proofing Stage)
The first proofing stage, known as bulk fermentation, occurs after mixing the ingredients but before shaping the dough. This step allows yeast activity to:
- Expand the dough, creating internal air pockets.
- Hydrate the gluten network, improving elasticity and structure.
- Develop flavor, as longer fermentation enhances depth and complexity.
How to Achieve Optimal Bulk Fermentation
- Place the dough in a warm, draft-free environment (ideally 24–27°C or 75–80°F).
- Allow the dough to rise for 1.5 to 2 hours, or until it doubles in size.
- If the room temperature is cool, increase proofing time to ensure full fermentation.
- Avoid over-proofing, which can weaken the structure and cause the dough to collapse.
2. Shaped Proofing (Second Proofing Stage)
After rolling and shaping Gipfeli, the dough requires a second proofing period to:
- Relax the gluten, preventing shrinkage during baking.
- Allow yeast to create additional gas expansion for final volume.
- Ensure the Gipfeli holds its crescent shape while maintaining an airy crumb.
Best Practices for Shaped Proofing
- Arrange shaped Gipfeli on a baking sheet, ensuring enough space between each piece for expansion.
- Cover lightly with a clean cloth to prevent drying.
- Allow the dough to proof for 30-45 minutes, depending on room temperature.
- Perform the poke test—gently press the dough with a fingertip. If it slowly springs back, it’s ready to bake.
If over-proofed, the dough may deflate during baking, resulting in a dense, tough pastry. Under-proofed dough will lack volume and softness.
The Science Behind Yeast Fermentation
How Temperature Affects Yeast Activity
Temperature directly influences yeast activity and proofing speed.
| Temperature | Effect on Dough Proofing |
|---|---|
| Below 10°C (50°F) | Yeast activity slows significantly; dough takes too long to rise. |
| 20–24°C (68–75°F) | Ideal proofing temperature for a controlled rise and strong gluten development. |
| 27–32°C (80–90°F) | Accelerated proofing but with potential risk of over-fermentation. |
| Above 35°C (95°F) | Yeast overreacts, leading to excessive gas production and a weakened structure. |
To maintain consistent proofing, many bakers use a proofing box or a warm oven with the light on to control the environment.
Why Cold Fermentation Improves Flavor
Some bakers choose cold fermentation (retarding the dough in the refrigerator overnight) to enhance flavor. This slow rise allows:
- More complex flavor development, as fermentation slows and extends.
- Better dough strength, preventing over-proofing.
- A firmer dough texture, making shaping easier.
Cold-fermented Gipfeli often have a richer, more developed taste, though they require extra time before baking.
Common Mistakes in Dough Proofing and How to Avoid Them
1. Over-Proofing the Dough
Over-proofing causes yeast to produce too much gas, weakening the gluten structure. As a result:
- The dough may collapse or deflate in the oven.
- The texture can become too airy, losing its chewiness.
- The final product may have a sour or over-fermented taste.
How to Fix It:
- If over-proofed, gently re-knead the dough and let it rise again for a shorter time.
- Watch for signs of over-expansion, such as dough that looks too puffy or starts deflating.
2. Under-Proofing the Dough
When the dough doesn’t proof long enough:
- The pastry turns out dense and lacks rise.
- The interior becomes tight and lacks air pockets.
- The yeast doesn’t develop enough flavor, resulting in a flat taste.
How to Fix It:
- Extend proofing time if the dough hasn’t doubled in size during the first rise.
- Use the finger dent test—if the dough springs back too quickly, it needs more time.
3. Using Water Instead of Milk in the Dough
Milk contributes to a tender crumb and rich flavor in Gipfeli. Replacing it with water:
- Reduces moisture retention, making the dough drier.
- Weakens browning potential, as milk sugars aid caramelization.
- Creates a tougher texture rather than a soft, slightly chewy bite.
For the most authentic texture, always use whole milk or a mix of milk and cream.
Final Thoughts on Proofing Gipfeli Dough
Mastering the science of dough proofing ensures that Gipfeli turns out light, airy, and flavorful. By following proper fermentation techniques, managing yeast activity, and avoiding common mistakes, bakers can achieve a perfect balance of structure, softness, and flakiness.
For the best results:
- Use fresh or active dry yeast, ensuring proper activation.
- Maintain consistent proofing temperatures to control rise.
- Test the dough at each stage to prevent over-proofing or under-proofing.
With the right proofing techniques, homemade Gipfeli will rival those found in the best Swiss bakeries.
Gipfeli Recipe Variations: Creative Fillings and Flavors
Why Fillings Enhance Gipfeli
While traditional Swiss Gipfeli is delicious on its own, adding a filling can elevate its flavor and create a more indulgent experience. Swiss bakeries often offer filled Gipfeli, making them perfect for both sweet and savory variations. The buttery, slightly chewy dough serves as a versatile base, allowing for a variety of creative fillings.
Each filling affects the texture, moisture level, and overall richness of the pastry, so choosing the right ingredients and incorporating them properly ensures a well-balanced and flavorful Gipfeli.
Sweet Fillings: Indulgent and Classic Options
1. Chocolate-Filled Gipfeli (Schokoladen-Gipfeli)
Chocolate-filled Gipfeli is one of the most popular sweet variations, offering a rich, melt-in-your-mouth experience. Swiss chocolate pairs exceptionally well with buttery pastry, creating a treat reminiscent of pain au chocolat but with a slightly denser texture.
Best Chocolate Options for Gipfeli:
- Dark chocolate (70% cocoa or higher) – Adds a rich, slightly bitter contrast to the sweet dough.
- Milk chocolate – Creates a creamier, sweeter filling, perfect for those who prefer a milder taste.
- Chocolate chips or chocolate bars – These hold their shape better during baking.
- Chocolate-hazelnut spread (Nutella) – A smoother, sweeter alternative that spreads easily.
How to Fill Gipfeli with Chocolate:
- Cut the dough into triangular pieces before shaping.
- Place a small chocolate bar or a spoonful of chocolate spread near the base of the triangle.
- Roll the dough tightly to ensure the chocolate stays inside.
- Seal the edges gently to prevent leakage during baking.
Chocolate-filled Gipfeli pairs beautifully with a cappuccino or espresso, making it a perfect breakfast or dessert option.
2. Almond Paste-Filled Gipfeli (Mandel-Gipfeli)
Almond paste (also known as marzipan or frangipane) is another classic sweet filling, offering a nutty, rich flavor with a slightly chewy texture. This variation is inspired by French almond croissants but retains the unique characteristics of Swiss Gipfeli.
How to Make Almond Filling:
- Traditional almond paste: Ground almonds, powdered sugar, egg white, and a touch of almond extract.
- Frangipane: A richer filling made by blending almond paste with butter, sugar, and eggs.
How to Fill Gipfeli with Almond Paste:
- Roll out the dough into triangles.
- Place a thin strip of almond paste near the base.
- Roll the Gipfeli into a crescent shape, sealing the edges lightly.
- Sprinkle sliced almonds on top before baking for added crunch.
Almond-filled Gipfeli pairs well with a dusting of powdered sugar or a drizzle of honey after baking.
Savory Fillings: A Hearty Twist on Classic Gipfeli
3. Cheese-Filled Gipfeli (Käse-Gipfeli)
For a savory option, cheese-filled Gipfeli is a popular choice in Swiss bakeries. The cheese melts into the soft dough, creating a rich, gooey center with a crispy golden exterior.
Best Cheeses for Gipfeli:
- Gruyère – A traditional Swiss cheese with a nutty, slightly salty taste.
- Emmental – Offers a mild, buttery flavor that melts well.
- Cheddar – A sharper option that adds a stronger bite.
- Goat cheese or cream cheese – Provides a soft, tangy contrast to the flaky dough.
How to Fill Gipfeli with Cheese:
- Cut the dough into triangles and place a small cube or thin slice of cheese at the base.
- Roll the dough tightly, ensuring the cheese stays inside.
- Brush the top with egg wash and sprinkle grated cheese for extra crispiness.
- Bake until the cheese is melted and the crust is golden brown.
Cheese-filled Gipfeli makes a perfect breakfast, snack, or appetizer, best served warm for optimal texture.
4. Ham-Filled Gipfeli (Schinken-Gipfeli)
Ham and cheese Gipfeli is a savory classic, offering a flavorful and satisfying alternative to sweet-filled pastries. The combination of salty ham and melted cheese creates a rich, indulgent bite, ideal for breakfast or brunch.
Best Ham Options for Gipfeli:
- Thinly sliced Black Forest ham – Smoky and slightly sweet.
- Prosciutto – Adds a salty, delicate texture.
- Cooked ham or turkey slices – A milder option for a softer bite.
How to Fill Gipfeli with Ham:
- Place a thin slice of ham on the dough before rolling.
- Add a small amount of cheese (optional) for extra richness.
- Roll tightly and seal the edges to prevent filling from leaking.
- Brush with egg wash and sprinkle sesame or poppy seeds on top.
Savory ham and cheese Gipfeli pairs perfectly with a warm bowl of soup or a side salad for a balanced meal.
Creative Variations for Gipfeli Fillings
Beyond the classic fillings, Gipfeli can be customized with endless flavor combinations. Some modern variations include:
- Spinach and feta Gipfeli – A Mediterranean-inspired savory option.
- Pesto and mozzarella Gipfeli – An Italian twist with rich basil flavor.
- Apricot jam and cream cheese – A tangy-sweet balance perfect for breakfast.
- Caramel and sea salt – A decadent, rich filling for dessert lovers.
Each variation offers a unique take on the traditional Swiss Gipfeli, allowing bakers to experiment with different textures and tastes.
Tips for Filling Gipfeli Successfully
- Use minimal filling to prevent overflow during baking.
- Keep fillings slightly firm (not too liquid) for better structure.
- Chill the filled Gipfeli briefly before baking to help them hold their shape.
- Seal the edges properly to avoid leaking.
Final Thoughts on Filled Gipfeli
Filled Gipfeli adds a delicious twist to this classic Swiss pastry. Whether you prefer chocolate, almond paste, cheese, or ham, the versatility of Gipfeli dough makes it easy to create both sweet and savory delights.
With the right filling and proper technique, homemade Gipfeli can rival the best Swiss bakeries, offering a flaky, rich, and indulgent experience in every bite.

Step-by-Step Guide to Making Flaky Gipfeli at Home
For a comprehensive, step-by-step guide to crafting authentic Swiss Gipfeli at home, you can refer to this detailed recipe on Erin Recipes. This resource provides clear instructions on preparing the dough, laminating it to achieve the characteristic flakiness, shaping the pastries, and baking them to golden perfection. Additionally, it offers insights into the unique aspects of Gipfeli, distinguishing them from traditional croissants, and provides troubleshooting tips to ensure your homemade pastries turn out just right. Whether you’re a seasoned baker or a beginner, this guide serves as a valuable resource for mastering this Swiss delicacy.
Step 1: Preparing the Dough (Mixing, Kneading, and First Proofing)
Understanding the Importance of Proper Dough Preparation
A well-prepared Gipfeli dough lays the foundation for a perfectly baked, flaky, and airy pastry. Unlike croissants, which rely heavily on butter layering, Gipfeli depends on a well-kneaded, yeast-based dough to achieve its characteristic texture.
To achieve the best results, it is essential to follow three critical steps:
- Mixing the ingredients to form a smooth, hydrated dough.
- Kneading to build gluten strength for elasticity and structure.
- First proofing (bulk fermentation) to develop flavor, texture, and rise.
Each step plays a key role in ensuring that the final product achieves the ideal softness, structure, and flakiness, making Gipfeli a true Swiss classic.
Mixing the Dough: Achieving the Right Balance
Essential Ingredients for a Traditional Gipfeli Dough
To create an authentic Gipfeli, using high-quality ingredients is crucial. Each component contributes to the texture and flavor in a unique way:
- 500g (4 cups) bread flour – Provides structure and strength for better gluten formation.
- 7g (2 ¼ tsp) instant yeast or 15g fresh yeast – Ensures proper fermentation and rise.
- 250ml (1 cup) warm milk (35°C/95°F) – Enhances softness and activates yeast.
- 50g (¼ cup) granulated sugar – Feeds the yeast and contributes to a mild sweetness.
- 10g (2 tsp) salt – Strengthens gluten and balances flavors.
- 60g (4 tbsp) unsalted Alpenbutter (softened) – Adds richness to the dough.
- 1 egg (room temperature) – Provides elasticity and improves dough consistency.
Step-by-Step Dough Mixing Process
- Activate the Yeast (For Active Dry Yeast Users Only)
- First, combine warm milk, yeast, and 1 teaspoon of sugar in a small bowl.
- Then, let it sit for 5–10 minutes until foamy, ensuring yeast activation.
- Combine Dry Ingredients
- Meanwhile, in a large mixing bowl, whisk together flour, salt, and the remaining sugar.
- Add Wet Ingredients
- Next, pour in the yeast mixture (or add instant yeast directly).
- Then, crack the egg into the mixture and begin combining.
- Incorporate the Butter
- After that, gradually add the softened butter, mixing continuously for even distribution.
- At first, the dough may feel sticky, but kneading will improve its texture.
- Form the Dough Ball
- Finally, mix until the dough pulls away from the sides of the bowl, forming a cohesive mass.
Kneading the Dough: Strengthening Gluten for Perfect Texture
Why Kneading Is Essential for Gipfeli Dough
Kneading plays a crucial role in the baking process. It develops the gluten network, ensuring the dough has:
- Elasticity, allowing it to stretch without breaking.
- Strength, giving Gipfeli its light yet structured crumb.
- Even air distribution, resulting in a flaky yet soft bite.
How to Knead Gipfeli Dough Correctly
By Hand (10–12 minutes):
- First, lightly flour a clean surface and place the dough on top.
- Then, use the heel of your hand to push the dough forward before folding it back.
- After that, rotate slightly and continue kneading in a rhythmic motion.
- Keep repeating the process until the dough becomes smooth, elastic, and slightly tacky but not sticky.
With a Stand Mixer (6–8 minutes):
- Start by attaching a dough hook and mix on low speed for 2 minutes.
- Next, increase to medium speed and knead until the dough pulls away from the sides of the bowl.
How to Check if the Dough Is Ready
- Windowpane Test: Stretch a small piece of dough between your fingers. If it forms a thin, translucent sheet without tearing, the gluten is well-developed.
- Spring Back Test: Press the dough lightly—if it bounces back slowly, it’s kneaded enough.
First Proofing: Allowing Yeast to Develop Flavor and Structure
Why First Proofing (Bulk Fermentation) Matters
The first proofing stage is just as important as kneading. During this phase, the yeast:
- Ferments sugars, producing carbon dioxide, which causes the dough to rise.
- Strengthens gluten, ensuring a well-structured dough.
- Develops flavor, as longer fermentation enhances depth and complexity.
Proper Proofing Conditions for Gipfeli Dough
- Shape the Dough for Proofing
- First, lightly grease a large mixing bowl to prevent sticking.
- Then, form the dough into a smooth ball and place it inside.
- After that, cover it with a damp kitchen towel or plastic wrap to retain moisture.
- Create the Ideal Proofing Environment
- Place the bowl in a warm, draft-free area (24–27°C / 75–80°F).
- Allow the dough to rise for 1.5 to 2 hours, or until doubled in size.
How to Tell If the Dough Has Proofed Properly
- Volume Increase: Dough should expand at least twice its original size.
- Soft, Domed Surface: The dough should feel light but not deflate when touched.
- Poke Test: Gently press the dough with a fingertip:
- If it slowly springs back, it’s ready for shaping.
- If it collapses, it has over-proofed.
Common Dough Proofing Problems and How to Fix Them
Dough Isn’t Rising
- Possible Causes: Yeast is expired, milk was too hot/cold, or room temperature is too low.
- Solution: Use fresh yeast, check that milk is around 35°C (95°F), and move the dough to a warmer spot.
Dough Is Too Sticky
- Possible Causes: Not enough flour or under-kneading.
- Solution: Dust lightly with flour and knead for a few extra minutes.
Dough Is Too Dry
- Possible Causes: Too much flour or not enough butter.
- Solution: Add 1–2 teaspoons of warm milk and knead until smooth.
Over-Proofed Dough (Collapses When Poked)
- Possible Causes: Left too long in warm conditions.
- Solution: Gently punch down, reshape, and proof for a shorter time.
Next Step: Rolling and Shaping the Gipfeli
After first proofing, the dough is ready to be rolled out and shaped into the signature crescent form. The next stage focuses on:
- Rolling the dough to the correct thickness.
- Cutting it into perfectly sized triangles for uniform baking.
- Ensuring proper shaping to retain structure and rise during baking.
By following each step carefully, the final Gipfeli will turn out light, airy, and full of rich flavor, just like those found in authentic Swiss bakeries.
Step 2: Laminating the Dough (Layering Butter for Maximum Flakiness)
Why Laminating the Dough Matters for Gipfeli
A properly laminated Gipfeli dough ensures flaky, delicate layers while maintaining the signature light and airy texture. Unlike croissants, which rely on extensive lamination, Gipfeli requires a moderate layering technique that balances buttery richness with a structured crumb.
Lamination involves rolling, folding, and chilling the dough while incorporating layers of high-quality butter. When baked, these layers expand as the butter creates steam, resulting in a crisp golden exterior with a tender interior.
Mastering this process requires precision in rolling, temperature control, and careful handling of the butter layers. Without proper technique, the butter can melt into the dough, preventing the formation of distinct layers.
Chilling the Dough Before Lamination
Why Resting the Dough is Essential
After the first proof, the dough needs a short resting period to:
- Relax the gluten, making it easier to roll without resistance.
- Cool down, preventing the butter from melting too quickly.
- Firm up the structure, ensuring even lamination.
How to Properly Chill the Dough
- Lightly flour a clean work surface to prevent sticking.
- Gently deflate the proofed dough and shape it into a rough rectangle.
- Wrap it tightly in plastic wrap and refrigerate for 30 minutes before rolling.
This step ensures that the dough remains firm yet pliable, making the next stage of rolling and folding more manageable.
Selecting and Preparing the Butter for Lamination
Choosing the Right Butter for the Best Layers
To create defined and evenly spaced layers, using high-quality butter is essential. Alpenbutter (Swiss Alpine Butter) is the best option because of its:
- Higher fat content (82–85%), which prevents excess moisture in the dough.
- Smooth, pliable texture, making it easy to roll without cracking.
- Slightly nutty and creamy flavor, enhancing the richness of the Gipfeli.
Creating the Butter Block for Even Distribution
- Take 150g (10 tbsp) of cold unsalted butter.
- Place the butter between two sheets of parchment paper.
- Use a rolling pin to flatten the butter into a 15×15 cm (6×6-inch) square.
- Refrigerate the butter for 15 minutes to maintain a firm but workable texture.
The butter should be pliable but not brittle. If too cold, it will break when rolled; if too soft, it will blend into the dough instead of forming layers.
Encasing the Butter in the Dough
Rolling the Dough to the Correct Size
- Remove the chilled dough from the refrigerator and place it on a lightly floured surface.
- Roll it into a 30×30 cm (12×12-inch) square, ensuring even thickness.
- Place the prepared butter block diagonally in the center of the dough, resembling a diamond inside the square.
Folding the Dough Over the Butter
- Fold each corner of the dough over the butter, enclosing it completely.
- Press the seams together gently to seal the butter inside.
- Lightly dust with flour and roll the dough into a smooth rectangle.
Chilling Before the First Fold
Once the butter is enclosed, refrigerate the dough for 15 minutes before the first fold. This prevents the butter from softening and leaking into the dough.
Rolling and Folding the Dough for Proper Lamination
First Roll and Fold: Creating Initial Layers
- Place the chilled dough on a floured surface and roll it into a 45×20 cm (18×8-inch) rectangle.
- Use gentle, even pressure to avoid breaking the butter layers.
- Perform a letter fold:
- Fold the top third of the dough down toward the center.
- Fold the bottom third up, covering the first fold.
Chilling Between Folds to Maintain Layers
- Wrap the folded dough in plastic wrap.
- Refrigerate for 20 minutes to prevent the butter from melting.
Second and Third Roll-Folds: Building More Layers
- Rotate the dough 90 degrees to ensure even butter distribution.
- Roll it out into a 45×20 cm (18×8-inch) rectangle again.
- Repeat the letter fold process.
- Chill for another 20 minutes before the final roll and fold.
Final Lamination Step: Creating Distinct Layers
- Perform one more rolling and folding cycle, ensuring the dough remains smooth.
- Wrap the laminated dough and refrigerate for at least 30 minutes before shaping.
At this stage, the dough has created 27 thin layers of butter and dough, which will expand in the oven to produce the signature flaky Gipfeli texture.
Avoiding Common Lamination Mistakes
Preventing the Butter from Melting
- Always chill the dough between folds to keep the butter cold.
- Work in a cool kitchen environment to avoid overheating the dough.
Ensuring Even Butter Distribution
- Roll the dough with light, even pressure to prevent butter from clumping.
- If the butter starts breaking through, refrigerate the dough immediately.
Fixing Dough Shrinkage Issues
- Let the dough rest after each fold to relax the gluten.
- If the dough resists rolling, chill it for 10 minutes before continuing.
Optimizing the Lamination Process
Understanding the Role of Temperature
| Condition | Effect on Dough |
|---|---|
| Too Warm (Above 27°C / 80°F) | Butter melts into the dough, preventing layers. |
| Too Cold (Below 10°C / 50°F) | Butter becomes brittle and cracks, leading to uneven layers. |
| Ideal (18-22°C / 65-72°F) | Butter remains pliable, ensuring smooth, defined layers. |
Using a Marble Surface for Rolling
A marble or chilled metal surface helps keep the dough cool, preventing butter from melting during lamination.
Using Light Flour Dusting for Better Control
Excess flour can dry out the dough, but a light dusting prevents sticking while allowing smooth folding.
What’s Next: Shaping the Gipfeli
Once the dough has been laminated and properly rested, it is ready for rolling, cutting, and shaping into the signature crescent form. The next stage will focus on:
- Rolling the laminated dough to the correct thickness.
- Cutting uniform triangles for symmetrical baking.
- Shaping the dough into Gipfeli while maintaining distinct layers.
By following these lamination techniques precisely, the final Gipfeli will bake into delicate, airy pastries with golden, crisp layers, ensuring a truly authentic Swiss experience.
Step 3: Shaping and Proofing Again (Rolling, Folding, and Letting It Rise)
Why Proper Shaping and Second Proofing Matter
At this stage, the laminated Gipfeli dough is ready to be shaped into its signature crescent form. However, shaping is not just about aesthetics—it directly impacts the texture, structure, and final rise of the pastry. If done incorrectly, the layers can collapse, and the dough may not rise evenly.
Additionally, the second proofing plays a crucial role in allowing the yeast to create light, airy pockets inside the dough. Without this step, the Gipfeli may turn out too dense and underdeveloped instead of achieving their signature flaky and airy texture.
By carefully following each step, you will ensure that your homemade Gipfeli rise evenly, bake beautifully, and taste just like those from a Swiss bakery.
Rolling Out the Dough for Perfect Layers
Preparing the Dough for Shaping
Before shaping the Gipfeli, it is important to prepare the dough correctly. Proper rolling ensures even layers, preventing excess thickness in some areas and thin spots in others.
- First, remove the chilled laminated dough from the refrigerator and place it on a lightly floured surface.
- Then, let it rest for 5 minutes at room temperature to slightly relax the gluten, making rolling easier.
- Next, roll the dough into a long rectangle (50×25 cm or 20×10 inches), ensuring an even thickness of approximately 5 mm (¼ inch).
- While rolling, always apply gentle and even pressure to avoid tearing the delicate layers.
Checking for Proper Thickness
To achieve the best results, the dough should be:
- Not too thick – If the dough is rolled too thick, the Gipfeli will not bake evenly, and the inside may remain undercooked.
- Not too thin – If the dough is too thin, it may lose structure, causing the layers to blend rather than separate during baking.
Once you have reached the correct thickness, the dough is ready to be cut and shaped into triangles.
Cutting the Dough into Even Triangles
Ensuring Symmetry for a Uniform Bake
Cutting the dough into even triangles is key to making uniform Gipfeli that bake consistently. If the triangles are uneven, some may rise more than others, leading to an inconsistent final product.
- First, use a sharp knife or a pizza cutter to mark the dough at regular intervals along the bottom edge, about 8 cm (3 inches) apart.
- Then, move to the top edge and make offset marks at the same distance.
- Next, use a ruler to connect the marks and cut the dough into long isosceles triangles.
- Each triangle should have a base of 8 cm (3 inches) and a height of 15 cm (6 inches).
By ensuring precise cutting, the Gipfeli will have a consistent size, shape, and bake.
Shaping the Gipfeli: The Signature Crescent Form
Rolling Each Triangle for the Perfect Spiral
Now that the dough is cut into even triangles, it’s time to shape them into their classic crescent form. Proper rolling technique ensures tight, defined layers, which contribute to the final texture.
- First, stretch the base of each triangle slightly to make it a little wider.
- Then, gently pull the tip of the triangle to slightly lengthen it, ensuring a tight, even roll.
- Next, start rolling the dough from the base toward the tip, keeping it firm but not overly tight.
- As you roll, maintain even tension, so the layers remain distinct while allowing space for expansion.
- Once rolled, slightly curve the edges inward to create the signature crescent shape.
Placing the Gipfeli on the Baking Sheet
- Arrange the shaped Gipfeli on a parchment-lined baking sheet, ensuring at least 5 cm (2 inches) of space between each one.
- The tip of each Gipfeli should be tucked underneath to prevent unraveling during baking.
- Finally, lightly cover them with a clean kitchen towel to prevent drying out during proofing.
Once shaped correctly, the Gipfeli are ready for their final rise.
Second Proofing: The Final Rise Before Baking
Why the Second Proofing Is Essential
During the second proofing, the yeast in the dough reactivates, allowing it to:
- Expand and create air pockets, resulting in a light and airy texture.
- Relax the gluten further, ensuring a softer bite.
- Develop deeper flavors, enhancing the overall richness of the pastry.
Best Conditions for Second Proofing
To achieve the perfect rise, the Gipfeli must be proofed in the right environment:
- Temperature: 24–27°C (75–80°F)
- Humidity: Slightly humid to prevent drying
If your kitchen is too cold, place the baking tray in a slightly warm oven with the light on or near a warm but not hot area.
How Long to Proof the Shaped Gipfeli
- Let the shaped dough rest and rise for 45 to 60 minutes, depending on room temperature.
- Check for readiness by performing the poke test:
- Lightly press the dough with your fingertip.
- If it slowly springs back but leaves a slight indentation, it’s ready to bake.
- If it bounces back too quickly, proof for 10 more minutes.
Avoid over-proofing, as this can cause the Gipfeli to lose structure and collapse during baking.
Troubleshooting Common Proofing Mistakes
Dough Isn’t Rising Enough
- Possible Causes: Yeast is old, room temperature is too low, or dough was not proofed long enough.
- Solution: Move the tray to a warmer spot, ensure yeast is fresh, and extend proofing time slightly.
Dough Over-Proofs and Collapses
- Possible Causes: Proofing too long or in a space that’s too warm.
- Solution: Reduce proofing time and move the tray to a cooler environment.
Surface Is Drying Out
- Possible Causes: Dough is exposed to dry air.
- Solution: Cover loosely with a damp towel or lightly brush with milk to keep it moist.
Final Steps Before Baking
Applying the Egg Wash for a Golden Finish
- In a small bowl, whisk together 1 egg yolk and 1 tbsp milk.
- Using a pastry brush, lightly coat each Gipfeli with the egg wash.
- Ensure the entire surface is covered to achieve a beautiful golden-brown shine.
Preheating the Oven
Before baking, preheat the oven to 190°C (375°F). A properly heated oven ensures:
- Even baking with consistent expansion.
- Crispy, golden layers without burning.
- Proper caramelization for enhanced flavor.
What’s Next: Baking and Final Touches
Once proofed and ready, the Gipfeli are placed in the preheated oven for the final step—baking. The next stage will cover:
- Baking at the ideal temperature and time.
- How to achieve a perfectly golden crust.
- Cooling and serving for the best texture.
By following this detailed process, your Gipfeli will turn out flaky, golden, and bakery-perfect, making them an irresistible treat for any occasion.
Step 4: Baking and Final Touches (Egg Wash, Oven Temperature, Baking to Golden Brown)
The Science Behind the Perfect Bake
Achieving a golden-brown, crisp, and flaky Gipfeli requires precise baking techniques. The final step in the process determines the texture, structure, and flavor of the pastry. If baked incorrectly, the layers may collapse, the crust could become too dry, or the interior might not bake fully. To avoid these issues, it is essential to focus on temperature control, proper egg washing, and precise baking times.
A perfectly baked Gipfeli should feature a delicate crispiness, a beautifully caramelized surface, and a light, airy interior. By following these final steps carefully, you can achieve bakery-quality results at home.
Applying the Egg Wash for a Golden, Glossy Finish
Why Egg Wash is Essential
The egg wash enhances color, shine, and texture, making the Gipfeli visually appealing while adding a subtle crispness to the crust. This simple yet crucial step ensures:
- A golden-brown hue, thanks to the proteins and sugars in the egg.
- A glossy, professional bakery-style finish.
- A slightly firmer exterior, which contrasts beautifully with the soft interior.
Preparing the Egg Wash Mixture
A well-balanced egg wash requires:
- 1 egg yolk for a rich color.
- 1 tablespoon of milk or cream for a smooth consistency.
- A pinch of salt or sugar to enhance browning.
- Start by whisking all ingredients together until fully combined.
- Next, strain the mixture through a fine sieve to eliminate lumps.
- Finally, set aside for brushing once the Gipfeli are ready.
How to Apply the Egg Wash Evenly
- Dip a soft pastry brush into the egg wash, ensuring it is not overly soaked.
- Gently brush a thin, even layer over each Gipfeli, covering the surface but avoiding excess dripping.
- Be careful not to apply too much wash near the seams, as this can seal the layers and prevent proper expansion.
- If a deeper golden hue is desired, apply a second light coat after five minutes of drying time.
Once all Gipfeli are coated, they are ready to go into the oven.
Preheating the Oven for Consistent Results
Why Proper Oven Temperature Matters
Oven temperature has a direct impact on how well Gipfeli rise and brown. If the oven is too hot, the butter will melt too quickly, resulting in greasy layers and uneven expansion. Conversely, if the temperature is too low, the dough may not puff up properly, leading to dense and undercooked interiors.
Ideal Baking Temperatures
- For standard ovens: 190°C (375°F)
- For convection ovens: 180°C (350°F)
How to Ensure Even Heat Distribution
- Preheat the oven for at least 15 minutes before placing the Gipfeli inside.
- Position the baking sheet on the middle rack to ensure uniform baking.
- If baking multiple trays, rotate them halfway through the baking time to prevent uneven browning.
Now that the oven is fully preheated, it’s time to bake.
Baking the Gipfeli to Perfection
How Long Should Gipfeli Bake?
- Carefully place the prepared baking sheet into the oven.
- Bake for 18–22 minutes, depending on the size of the Gipfeli and the efficiency of the oven.
- Around the 15-minute mark, begin checking for even browning. If some are darkening faster than others, rotate the tray.
How to Identify Perfectly Baked Gipfeli
- Even golden-brown color: The surface should be beautifully caramelized without burnt spots.
- Crisp but delicate crust: The exterior should feel lightly crisp, not hard or dry.
- Hollow sound test: Lightly tap the bottom of a Gipfeli—it should sound hollow, indicating a properly baked interior.
If more color is needed, allow the pastries to bake for an additional 2–3 minutes while monitoring closely.
Cooling the Gipfeli for the Best Texture
Why Cooling is Just as Important as Baking
Although freshly baked Gipfeli may be tempting to eat immediately, proper cooling enhances texture, flavor, and structure. Allowing the pastries to cool ensures:
- A fully set interior, preventing any gumminess.
- A crispier outer layer, as the steam escapes gradually.
- More intense butter flavor, which develops as the pastry cools.
Best Cooling Practices
- Immediately transfer the Gipfeli to a wire rack after removing them from the oven.
- Let them rest for at least 10–15 minutes before serving.
- If serving later, avoid covering them while still warm, as trapped moisture can soften the crisp crust.
Enhancing the Flavor with Final Touches
Sweet Finishing Options
For those who enjoy a slightly sweeter touch, consider these additional finishes:
- Light syrup glaze:
- Mix 2 tablespoons of honey with 1 tablespoon of warm water.
- Brush lightly over warm Gipfeli for an extra glossy sheen.
- Powdered sugar dusting:
- Once fully cooled, sift a fine layer of powdered sugar over the tops for a delicate, elegant finish.
Savory Enhancements
For cheese or ham-filled Gipfeli, an extra topping before baking can elevate the flavor:
- Sprinkle sesame or poppy seeds onto the egg wash for additional texture.
- Grate a small amount of Gruyère or Emmental cheese over the top for a crispier, more flavorful crust.
Troubleshooting Common Baking Mistakes
Gipfeli Appear Pale and Underbaked
- Possible Causes: Oven temperature too low, insufficient egg wash application.
- Solution: Increase oven heat slightly and apply a full, even coat of egg wash before baking.
Gipfeli Are Too Dark or Burnt on Top
- Possible Causes: Oven temperature too high, baking too close to the upper rack.
- Solution: Reduce the temperature by 5–10°C (10–15°F) and bake on the middle rack.
Gipfeli Have a Dense, Doughy Interior
- Possible Causes: Underproofed dough, oven temperature too low.
- Solution: Ensure full proofing before baking and maintain a consistent oven heat.
Storing and Reheating for Maximum Freshness
Proper Storage Methods
To maintain freshness and flakiness, store Gipfeli correctly:
- At room temperature: Keep in an airtight container for up to 2 days.
- In the freezer: Wrap individually and freeze for up to 1 month.
How to Reheat for the Best Texture
For a crisp, freshly baked effect:
- Preheat oven to 175°C (350°F).
- Place the Gipfeli on a baking sheet and warm for 5–7 minutes.
Avoid microwaving, as it softens the crust and compromises texture.
What’s Next: Serving and Enjoying Freshly Baked Gipfeli
Now that the Gipfeli are baked and perfectly golden, they are ready to be served! The next step will focus on:
- Pairing Gipfeli with coffee, butter, or jam for an authentic Swiss experience.
- Serving suggestions for breakfast, brunch, or an afternoon snack.
- How to make every bite a delightful moment.
By following these detailed instructions, your homemade Gipfeli will have flaky layers, a rich buttery aroma, and an irresistible taste, making them truly bakery-quality pastries that can be enjoyed anytime.
Expert Tips for the Best Homemade Gipfeli
How to Achieve Perfect Flaky Layers: Dough Laminating and Butter Temperature
The Key to Flaky Layers in Gipfeli
A well-made Gipfeli should have delicate, crisp layers that pull apart beautifully, revealing a soft and airy interior. This effect is achieved through proper lamination and precise butter temperature control. Without these two elements, the pastry may turn out dense, greasy, or lacking in structure.
Laminating the dough correctly creates thin, well-defined layers, while using butter at the right consistency ensures even distribution and proper steam expansion during baking. Mastering these techniques will result in golden, bakery-quality Gipfeli with the perfect balance of flakiness and richness.
Dough Laminating: The Foundation of Flaky Layers
What is Laminating and Why Does It Matter?
Laminating refers to the rolling and folding process that creates multiple layers of dough and butter. Each fold builds thin, alternating layers, which expand and separate during baking. This technique is critical because it:
- Traps air pockets, leading to a light, airy structure.
- Prevents butter from seeping out, keeping the pastry moist but not greasy.
- Ensures even baking, so the Gipfeli are crisp on the outside yet tender inside.
Step-by-Step Laminating Process
Preparing the Dough for Lamination
- After the first proof, lightly flour a clean surface.
- Roll out the chilled dough into a 30×30 cm (12×12-inch) square.
- Ensure even thickness to avoid thin spots where butter may break through.
Encasing the Butter Block
- Place a 15×15 cm (6×6-inch) butter square in the center of the dough.
- Fold each corner of the dough inward, fully covering the butter.
- Seal the edges gently, making sure no butter is exposed.
Rolling and Folding (First Turn)
- Roll the dough into a 45×20 cm (18×8-inch) rectangle using even pressure.
- Perform a letter fold:
- Fold the top third of the dough down.
- Fold the bottom third up, overlapping the first fold.
- Wrap the dough in plastic and chill for 20 minutes before the next turn.
Repeating the Process (Second and Third Turns)
- Rotate the dough 90 degrees before rolling again.
- Repeat the letter fold process two more times.
- Refrigerate between each fold to maintain distinct layers.
After three folds, the dough will contain 27 thin butter layers, ensuring a light, flaky final product.
The Role of Butter in Laminated Dough
Why Butter is Essential for Flaky Layers
Butter is the key ingredient that creates steam pockets, causing the dough to rise and separate into layers. Using the right butter, at the right temperature, directly affects:
- The integrity of the layers—preventing them from melting together.
- The richness of flavor, adding a distinct buttery taste.
- The overall texture, ensuring crispiness without excessive greasiness.
Choosing the Right Butter for Gipfeli
To achieve the best results, use high-fat European-style butter (82–85% fat content). This type of butter:
- Has less water, making it more stable during lamination.
- Melts at a higher temperature, preventing excessive softening.
- Provides a richer, deeper flavor compared to standard butter.
How Butter Temperature Affects the Dough
The temperature of the butter at each stage of lamination determines the final texture. If it is too warm, it melts into the dough, eliminating the layers. If it is too cold, it may crack and create uneven pockets.
Ideal Butter Temperature for Laminating
| Butter State | Temperature | Effect on Dough |
|---|---|---|
| Too Cold | Below 10°C (50°F) | Breaks into chunks, causing uneven layers |
| Ideal | 14-16°C (57-61°F) | Pliable but firm, ensuring smooth lamination |
| Too Warm | Above 20°C (68°F) | Melts into dough, preventing layer separation |
To maintain the correct butter temperature, refrigerate the dough between each fold and work in a cool kitchen environment.
Techniques for Maintaining Flaky Layers
Keeping the Dough at the Right Temperature
- If the butter feels too firm, let it sit for a few minutes before rolling.
- If the dough feels too soft, refrigerate it for 10–15 minutes before continuing.
- Work quickly to prevent the butter from softening excessively.
Using Proper Rolling Techniques
- Apply gentle, even pressure to prevent butter from breaking through.
- Roll away from the center to keep an even thickness.
- Avoid using excessive flour, as it can dry out the dough.
Checking for Proper Lamination Before Baking
- The dough should have visible, evenly spaced layers when cut.
- If butter leaks during baking, the dough was overworked or too warm.
- If the layers look blended together, the butter was likely too soft during rolling.
By monitoring these factors, you can achieve a pastry that is crisp, buttery, and perfectly layered.
Troubleshooting Common Laminating Mistakes
Butter Melts into Dough Before Baking
- Possible Cause: Dough was handled too much, or the kitchen was too warm.
- Solution: Chill the dough more frequently and work in short intervals.
Dough Feels Tough or Shrinks When Rolled
- Possible Cause: Overworked gluten or insufficient resting time.
- Solution: Let the dough rest for 10 minutes between rolls to relax the gluten.
Butter Breaks Instead of Rolling Smoothly
- Possible Cause: Butter was too cold and brittle.
- Solution: Allow the butter block to soften slightly before rolling.
Pastry is Dense Instead of Flaky
- Possible Cause: Layers were pressed too hard, or proofing time was too short.
- Solution: Use light pressure and proof the dough properly before baking.
Final Tips for Achieving Bakery-Quality Flakiness
Work in a Cool Environment
- If the kitchen is warm, refrigerate the dough more frequently.
- Use a cold rolling pin to prevent heat transfer.
Use High-Quality Ingredients
- Always select high-protein flour to maintain dough strength.
- Choose unsalted, high-fat butter to ensure proper lamination.
Allow Proper Proofing Time Before Baking
- Proof the shaped Gipfeli at 24–27°C (75–80°F) for at least 45 minutes.
- This step allows the layers to fully expand, leading to an airy, delicate texture.
The Result: Light, Crisp, and Buttery Gipfeli
By following these techniques, your Gipfeli will:
- Have beautifully distinct, golden layers.
- Offer a light, crispy bite with a rich, buttery aroma.
- Rival the finest Swiss bakeries in both taste and texture.
Mastering dough laminating and butter temperature control will elevate your homemade Gipfeli to professional levels, making them an irresistible treat for any occasion.
Common Mistakes to Avoid: Overproofing, Underbaking, Rolling Too Thin
Why Avoiding These Mistakes is Crucial
Achieving the perfect Gipfeli requires more than just following a recipe. Even small errors during proofing, baking, or rolling can lead to dense, flat, or uneven pastries. To ensure that every batch turns out flaky, golden, and airy, it is essential to understand these common mistakes and how to avoid them.
Each step in the process plays a role in determining the final texture and structure. If the dough is overproofed, the layers may collapse. If it is underbaked, the inside will remain doughy. If rolled too thin, the layers may not separate properly. Let’s explore how to fix these issues and achieve perfectly baked Gipfeli every time.
Overproofing: The Risk of Over-Fermentation
What Happens When Dough is Overproofed?
Overproofing occurs when the dough ferments for too long, causing the yeast to produce excessive gas. This leads to:
- Weak gluten structure, which prevents the dough from holding its shape.
- Excessively large air pockets, making the pastry fragile and prone to collapsing.
- A sour or overly yeasty flavor, as the dough continues breaking down sugars.
Signs of Overproofed Dough
- The dough more than doubles in size, appearing bloated.
- When gently pressed, the indentation remains deep instead of slowly bouncing back.
- A strong alcohol-like smell develops due to excess fermentation.
How to Prevent Overproofing
- Monitor the dough closely and check its progress every 10–15 minutes.
- Use the poke test: If the dough springs back slowly after pressing, it is ready.
- Control proofing temperature: Ideal proofing conditions are between 24–27°C (75–80°F).
- Slow-proof in the refrigerator overnight to reduce the risk of overproofing while enhancing flavor.
How to Fix Overproofed Dough
- If overproofed before shaping, gently punch down the dough, reshape, and let it proof again for a shorter time.
- If overproofed after shaping, place the Gipfeli in the fridge for 10 minutes to slightly firm them before baking.
- Reduce the oven temperature by 5–10°C (10–15°F) and bake slightly longer to help retain structure.
Underbaking: The Problem of a Doughy Interior
Why Underbaking is a Common Issue
If Gipfeli are removed from the oven too soon, the layers will not have enough time to fully develop. This results in:
- A soft, pale crust instead of a crisp, golden exterior.
- A gummy, raw center, making the texture unpleasant.
- Reduced flakiness, as the butter has not fully evaporated to create air pockets.
How to Recognize Underbaked Gipfeli
- The surface appears light and pale, rather than golden-brown.
- When tapped on the bottom, they sound dense and muffled instead of hollow.
- The inside feels sticky and doughy, indicating incomplete baking.
How to Ensure Proper Baking
- Use the correct oven temperature: Always preheat to 190°C (375°F) for conventional ovens or 180°C (350°F) for convection ovens.
- Bake for the full recommended time: Gipfeli typically need 18–22 minutes, depending on size.
- Check for color development: A properly baked pastry should be evenly golden-brown with no raw spots.
- Use the tap test: Lightly tap the bottom of a Gipfeli—if it sounds hollow, it is done.
How to Fix Underbaked Gipfeli
- If underbaked but still warm, return them to the oven for 3–5 more minutes at a slightly lower temperature.
- If already cooled, reheat in a preheated oven at 175°C (350°F) for 5 minutes to restore crispness.
- For future batches, use an oven thermometer to verify that the temperature is accurate.
Rolling Too Thin: The Effect on Layers
Why Dough Thickness is Important
The thickness of the dough directly impacts how the layers expand and separate during baking. If the dough is rolled too thin, the butter may:
- Leak out, making the pastry greasy instead of flaky.
- Prevent the layers from properly rising, resulting in a flat or dense texture.
- Bake too quickly, causing overly crispy or dry Gipfeli.
How to Tell If Dough is Too Thin
- The layers disappear instead of visibly separating.
- Butter begins seeping out before or during baking.
- The pastry turns hard and brittle instead of light and airy.
Ideal Dough Thickness for Rolling and Shaping
| Stage | Recommended Thickness |
|---|---|
| Before folding and laminating | 5 mm (¼ inch) |
| Before cutting into triangles | 3–4 mm (⅛ inch) |
How to Prevent Rolling Too Thin
- Use light, even pressure when rolling to avoid compressing layers.
- Chill the dough if it resists rolling to prevent excessive stretching.
- Measure thickness frequently using a ruler to ensure uniformity.
- Avoid over-handling the dough, as excessive rolling weakens the gluten.
How to Fix Dough That Has Been Rolled Too Thin
- Gently fold the dough over itself and roll again to the correct thickness.
- Chill for 10–15 minutes before proceeding to help retain structure.
- Use a sharp knife or pizza cutter to cut shapes cleanly, preventing the dough from stretching further.
Additional Tips to Avoid Common Mistakes
Maintaining Butter Layers
- Keep butter at 14–16°C (57–61°F) to ensure it remains pliable but firm.
- Chill the dough between each fold to prevent butter from melting.
- Roll gently to avoid breaking the butter pockets.
Ensuring Even Shaping for Consistent Baking
- Cut even-sized triangles to ensure all pastries bake at the same rate.
- Roll each Gipfeli evenly, leaving space for the layers to expand.
- Space them apart on the baking tray to allow air circulation and prevent sticking.
Adapting to Different Baking Conditions
- In humid environments, increase proofing time slightly to compensate for slower yeast activity.
- In dry conditions, cover the dough with a damp towel to prevent surface drying.
- Use the poke test before baking to confirm the dough is properly proofed.
Perfecting Your Technique for Bakery-Quality Gipfeli
By avoiding these mistakes, you can ensure that your Gipfeli:
- Have flaky, well-defined layers that separate beautifully.
- Develop a rich, golden-brown crust that is crisp yet delicate.
- Maintain a light, buttery texture inside, without being dense or greasy.
Following these tips will help you consistently bake authentic, Swiss-quality Gipfeli that rival the best bakeries.
How to Store and Reheat Gipfeli Recipe: Keeping Them Fresh and Crispy
Why Proper Storage and Reheating Matter for a Gipfeli Recipe
A well-made Gipfeli Recipe produces pastries that are flaky, golden, and buttery, but improper storage can quickly ruin their texture. Whether you’ve just baked a fresh batch or want to enjoy leftovers, understanding how to store and reheat your Gipfeli Recipe correctly will ensure that your pastries remain crispy and delicious.
Many people struggle with keeping a Gipfeli Recipe fresh because of its delicate layers. If stored incorrectly, the Gipfeli Recipe may become soggy, dry, or stale. However, with the right methods, your Gipfeli Recipe will taste just as good the next day—or even a month later if frozen properly!
How to Store Your Gipfeli Recipe for Maximum Freshness
Short-Term Storage: Keeping Your Gipfeli Recipe Fresh for 1–2 Days
If you plan to eat your Gipfeli Recipe within a day or two, storing them at room temperature is the best option. Proper storage helps maintain the crispy, airy layers of your Gipfeli Recipe.
- Allow the Gipfeli Recipe to cool completely before storing.
- Use a paper bag or a breathable container—this prevents moisture buildup that can soften the Gipfeli Recipe.
- Store the Gipfeli Recipe in a cool, dry place, away from direct sunlight or humidity.
- Reheat your Gipfeli Recipe before serving to restore crispiness.
Refrigerating Your Gipfeli Recipe: Is It a Good Idea?
While refrigeration extends the shelf life of a Gipfeli Recipe, it also dries out the pastry. Cold air absorbs moisture, making your Gipfeli Recipe lose its flakiness and softness.
If you must refrigerate your Gipfeli Recipe:
- Wrap each Gipfeli Recipe individually in parchment paper.
- Place the Gipfeli Recipe in an airtight container to prevent absorption of fridge odors.
- Reheat the Gipfeli Recipe properly before eating to restore its original texture.
Freezing Your Gipfeli Recipe for Long-Term Storage
If you want to store your Gipfeli Recipe for an extended period, freezing is the best solution. Frozen Gipfeli Recipe can taste almost as fresh as the day they were baked when reheated correctly.
- Allow the Gipfeli Recipe to cool completely before freezing.
- Wrap each Gipfeli Recipe in plastic wrap to prevent freezer burn.
- Store the Gipfeli Recipe in a freezer-safe bag or container.
- Label with the date to keep track of freshness.
Freezing Unbaked Gipfeli Recipe for Fresh Baking Anytime
To enjoy fresh-baked Gipfeli Recipe without starting from scratch:
- Shape the Gipfeli Recipe dough into crescents.
- Place the Gipfeli Recipe on a baking sheet and freeze for 1-2 hours.
- Transfer the Gipfeli Recipe to a freezer-safe bag and store for up to 2 months.
- Thaw the Gipfeli Recipe overnight, proof for 1–2 hours, then bake as usual.
How to Reheat Your Gipfeli Recipe Without Losing Crispiness
Why Proper Reheating Matters for Your Gipfeli Recipe
Reheating the Gipfeli Recipe correctly ensures that it regains its flaky layers and crisp exterior. Using the wrong method—such as microwaving—can make your Gipfeli Recipe chewy or soggy.
Best Methods for Reheating a Gipfeli Recipe
| Reheating Method | Pros | Cons | Best For |
|---|---|---|---|
| Oven | Restores crispiness, even heating | Takes longer | Large batches, best texture |
| Air Fryer | Quick, crispy exterior | Can dry out pastry | Fast reheating with good texture |
| Toaster Oven | Good balance of crispness and speed | Works best for one or two pieces | Small portions, quick fix |
| Microwave | Fast | Makes pastry soft and chewy | Not recommended unless necessary |
Reheating a Gipfeli Recipe in the Oven
The oven is the best way to restore crispiness and flakiness in a Gipfeli Recipe.
- Preheat the oven to 175°C (350°F).
- Place the Gipfeli Recipe on a baking tray.
- Heat for 5–7 minutes if at room temperature or 10–12 minutes if frozen.
- Let the Gipfeli Recipe cool slightly before serving.
Reheating a Gipfeli Recipe in an Air Fryer
For a faster option, an air fryer can quickly crisp up your Gipfeli Recipe.
- Set the air fryer to 160°C (320°F).
- Place the Gipfeli Recipe in the basket with space for airflow.
- Heat for 3–5 minutes, checking halfway through.
Reheating a Gipfeli Recipe in a Toaster Oven
A toaster oven works well for small batches of Gipfeli Recipe.
- Preheat to 175°C (350°F).
- Place the Gipfeli Recipe on a rack or tray.
- Heat for 5–7 minutes, ensuring even crisping.
Reheating a Gipfeli Recipe in the Microwave
A microwave should only be used as a last resort. It softens the Gipfeli Recipe instead of restoring crispiness.
- Wrap the Gipfeli Recipe in a damp paper towel.
- Heat for 15–20 seconds on medium power.
- Place in a toaster oven for 2 minutes to bring back some crispness.
Keeping Your Gipfeli Recipe Fresh for Special Occasions
Storing Your Gipfeli Recipe for Breakfast or Brunch
- Keep the Gipfeli Recipe in a paper bag overnight.
- Reheat the Gipfeli Recipe in the oven for 5 minutes at 175°C (350°F) before serving.
- Serve the Gipfeli Recipe with butter, jam, or coffee for a true Swiss experience.
Preventing Your Gipfeli Recipe from Becoming Stale
- Store the Gipfeli Recipe in a dry, cool space.
- Use paper bags instead of plastic to prevent moisture buildup.
- Lightly mist the Gipfeli Recipe with water before reheating in the oven if it feels dry.
Enjoying the Best Gipfeli Recipe Anytime
By following the best storage and reheating methods, your Gipfeli Recipe will stay flaky, fresh, and delicious. Whether you’re keeping them for a day, freezing them for later, or reheating leftovers, these techniques will help preserve the delicate layers and buttery flavor of your Gipfeli Recipe.
Now that you know how to store and reheat a Gipfeli Recipe, try it out for yourself! Have you used these methods before? Share your experience in the comments!
Conclusion: Why This Gipfeli Recipe is Perfect for Every Baker
If you’re looking for a foolproof, delicious, and flaky pastry, this Gipfeli recipe is the perfect choice. Not only does it guide beginners through each step with clear and detailed instructions, but it also provides advanced bakers with expert tips to refine their technique. Unlike store-bought pastries, homemade Gipfeli allows you to control the quality of ingredients while achieving that buttery, crisp perfection every time.
Moreover, this recipe is versatile and adaptable. Whether you prefer the classic Swiss version, a rich chocolate-filled twist, or a savory ham and cheese variation, this guide ensures you can customize it to your taste. Plus, with the included storage and reheating methods, you can enjoy fresh, bakery-style Gipfeli whenever you like.
If you’ve never tried making Swiss pastries at home, now is the time! The process is rewarding and fun, and the result is absolutely worth it. So, why not give it a try?
Have you made Gipfeli before? Share your experience in the comments! Let us know how it turned out and if you added your own creative twist. We’d love to hear from you!