
A graduation cake recipe is the perfect way to celebrate this momentous milestone. Whether you’re honoring a high school graduate, a college achiever, or someone completing an advanced degree, a beautifully decorated cake can make the occasion even more special.
In this guide, we’ll walk you through how to make a graduation cake from scratch, including easy DIY recipes, decorating tips, and creative design ideas. Whether you prefer buttercream frosting, fondant toppers, or elegant piping techniques, you’ll find everything you need to craft a cake that not only looks stunning but also tastes incredible.
Get ready to impress your guests and create a show-stopping graduation cake that will be remembered long after the last slice is gone!
Step 1 – Choosing the Right Graduation Cake Recipe
Choosing the perfect graduation cake recipe sets the stage for a memorable celebration. Whether you prefer a classic vanilla cake or a rich chocolate delight, starting with a reliable recipe ensures success. For a moist and flavorful vanilla option, consider this Perfect White Cake Recipe by Sally’s Baking Addiction. If chocolate is more your style, try the Ultimate Chocolate Cake Recipe from Preppy Kitchen. Once you’ve selected your recipe, you’re ready to bake and create a cake that will impress all your guests.
Best Cake Flavors for Graduation Cakes
Choosing the right cake flavor for a graduation cake is just as important as its design and decoration. While the visual appeal of the cake creates excitement, the flavor leaves a lasting impression on your guests. Whether you’re baking for a high school, college, or even kindergarten graduate, selecting a flavor that suits the occasion and pleases a crowd ensures your cake is a true celebration centerpiece.
Below, we’ll explore the best cake flavors for graduation cakes, including classic choices, fun and festive flavors, and elegant options for a more refined touch.
1. Classic Graduation Cake Flavors
If you want a crowd-pleasing cake flavor, you can’t go wrong with these timeless favorites. They are loved by all ages, pair well with various frostings, and are easy to customize with fillings or toppings.
Vanilla Cake
- A light and fluffy cake that acts as a versatile base for different fillings and frostings.
- Can be paired with buttercream, whipped cream, or fruit fillings for added flavor.
- Works well for sheet cakes, tiered cakes, and cupcakes.
Chocolate Cake
- A rich and indulgent flavor that is perfect for chocolate lovers.
- Can be paired with chocolate ganache, peanut butter frosting, or caramel filling.
- Works well with buttercream, fondant, or a simple dusting of powdered sugar for a modern look.
Red Velvet Cake
- A stunning deep-red cake with a mild cocoa and buttermilk flavor.
- Traditionally paired with cream cheese frosting, but also works with vanilla buttercream.
- Adds a bold and celebratory feel to a graduation cake.
2. Fun & Festive Cake Flavors
If you’re looking for something more playful and celebratory, consider fun and colorful cake flavors that reflect the excitement of a graduation party. These options are perfect for younger graduates, vibrant party themes, or unique cake designs.
Funfetti Cake
- A classic party favorite with colorful sprinkles baked inside the batter.
- Brings a festive and cheerful feel to the celebration.
- Best paired with vanilla buttercream or whipped frosting to keep it light and fun.
Cookies and Cream Cake
- A delicious combination of vanilla cake with crushed chocolate sandwich cookies.
- Perfect for those who love the flavor of classic Oreo cookies.
- Can be filled with cookies & cream buttercream or a white chocolate ganache.
Lemon Cake
- A bright and refreshing choice, ideal for summer graduations.
- Works well with lemon curd, raspberry filling, or vanilla buttercream.
- Adds a sophisticated yet zesty flavor to your celebration.
3. Elegant Cake Flavors for a Sophisticated Graduation Party
If you’re hosting a formal graduation dinner or a stylish celebration, consider these elevated cake flavors that offer a luxurious taste experience.
Almond Cake
- A delicate and nutty cake that pairs beautifully with vanilla or almond buttercream.
- Can be enhanced with a hint of amaretto or almond extract for extra richness.
- A great choice for elegant, minimalist cakes with metallic accents or fresh florals.
Champagne Cake
- A light and airy cake infused with champagne or sparkling wine.
- Adds a sophisticated and celebratory touch to the event.
- Pairs well with strawberry, raspberry, or vanilla mousse filling.
Mocha or Espresso Cake
- A rich, coffee-infused cake that’s perfect for coffee lovers.
- Works beautifully with chocolate ganache, caramel buttercream, or espresso frosting.
- Adds a bold and mature flavor to the graduation party.
4. How to Choose the Best Graduation Cake Flavor
When selecting the perfect cake flavor, consider the following factors:
- Guest Preferences – Opt for classic flavors like vanilla, chocolate, or red velvet if you’re serving a large crowd.
- Graduation Theme – Fun flavors like funfetti or lemon work well for lively celebrations, while almond or champagne cake fit elegant events.
- Pairing with Frosting & Fillings – Choose complementary flavors; for example, chocolate cake with peanut butter frosting or vanilla cake with fruit filling.
- Seasonal Considerations – Light flavors like lemon or coconut are perfect for spring and summer, while mocha or spice cake work well for winter graduations.
Final Thoughts
The best graduation cake flavor is one that matches your celebration style, guest preferences, and personal taste. Whether you go for a classic vanilla or chocolate, a fun and colorful funfetti, or a sophisticated almond or champagne cake, the right flavor will make your cake a delicious highlight of the event.
Buttercream vs. Fondant – Which is Better?
When it comes to decorating a graduation cake, one of the most common decisions is choosing between buttercream and fondant. Both options offer unique benefits, and the right choice depends on factors like design preference, texture, ease of use, and flavor. Below, we’ll explore the pros and cons of buttercream and fondant to help you decide which one is the best fit for your DIY graduation cake.
Buttercream: Smooth, Creamy, and Easy to Work With
What is Buttercream?
Buttercream is a soft, creamy, and spreadable frosting made from butter, powdered sugar, and flavoring. It is widely used for layer cakes, cupcakes, and piping decorations.
Pros of Using Buttercream for Graduation Cakes
- Delicious Flavor – Buttercream is rich, creamy, and has a natural sweetness that complements most cake flavors.
- Easy to Spread & Pipe – Ideal for smooth finishes or intricate piping designs such as rosettes, borders, and lettering.
- Soft Texture – Gives the cake a light, melt-in-the-mouth consistency.
- Works Well with Fillings – Can be easily combined with fruit purees, chocolate, or flavored extracts for extra depth.
- Easy to Color – Can be tinted with food coloring to match school colors or graduation themes.
Cons of Using Buttercream for Graduation Cakes
- Less Structure & Stability – Soft and sensitive to heat, which makes it harder to create sharp edges and precise designs.
- Can Melt in Warm Temperatures – Buttercream can become runny and lose shape if exposed to heat for too long.
- Requires Refrigeration – Needs to be stored in a cool place to maintain its consistency, especially in warm weather.
Best Uses for Buttercream
- Simple and rustic graduation cakes with soft, textured finishes.
- Drip cakes, floral piping, and textured buttercream effects.
- Sheet cakes or cupcakes that don’t require intricate fondant decorations.
Fondant: Sleek, Professional, and Perfect for Detailed Designs
What is Fondant?
Fondant is a sugar-based dough with a smooth, pliable texture that can be rolled out and draped over cakes for a flawless, polished appearance. It’s often used for wedding cakes, sculpted cakes, and high-detail decorations.
Pros of Using Fondant for Graduation Cakes
- Smooth & Polished Look – Creates a clean, professional finish with sharp edges.
- Great for Custom Decorations – Can be molded into graduation caps, diploma scrolls, numbers, or school logos.
- Long-Lasting – Holds its shape well and doesn’t require refrigeration.
- Less Affected by Heat & Humidity – Unlike buttercream, fondant stays firm and stable even in warm environments.
Cons of Using Fondant for Graduation Cakes
- Less Flavorful – Some people find fondant too sweet or chewy, and it lacks the richness of buttercream.
- Harder to Work With – Requires rolling, smoothing, and precise handling to avoid air bubbles or cracks.
- More Expensive – Costs more than buttercream due to its specialized ingredients and preparation process.
Best Uses for Fondant
- Elegant, sleek cakes with smooth finishes.
- Intricate designs like sculpted decorations, school logos, or diploma toppers.
- Taller cakes that require structural support.
Which One Should You Choose for Your Graduation Cake?
Choose Buttercream If:
- You want a rich, creamy flavor that everyone loves.
- You’re making a simple, homemade cake with easy decorating techniques.
- You prefer a soft texture that melts in your mouth.
Choose Fondant If:
- You want a smooth, flawless finish for a professional look.
- You need to create detailed decorations like graduation caps or school mascots.
- Your cake will be displayed for several hours and needs to hold its shape.
Ultimately, the choice between buttercream and fondant depends on your cake design, experience level, and personal preference. If you love the taste of buttercream but want the structured look of fondant, you can combine both by covering your cake in a thin layer of buttercream before adding fondant on top!
Would you like a step-by-step guide on how to apply buttercream or fondant for a graduation cake? Let me know how I can help!
Sheet Cake vs. Tiered Cake – Which One to Bake?
When planning a graduation cake, one of the first decisions is choosing between a sheet cake or a tiered cake. Both styles have their advantages, and the right choice depends on factors like the number of guests, complexity of decoration, and the type of celebration. Below, we’ll break down the differences to help you decide which cake is best for your graduation party.
Sheet Cake: Simple, Practical, and Easy to Serve
What is a Sheet Cake?
A sheet cake is a single-layer cake baked in a rectangular pan, often decorated with buttercream, piping, or edible images. It’s a great choice for casual celebrations and larger gatherings where convenience and easy slicing are priorities.
Pros of a Sheet Cake for Graduation
- Easier to Bake and Decorate – Requires less time and effort compared to a tiered cake.
- Simple to Serve – No complex slicing; guests can easily grab a piece.
- Great for Large Gatherings – A full sheet cake serves 50+ guests, making it ideal for big graduation parties.
- Budget-Friendly – Requires fewer ingredients and less structural support.
Cons of a Sheet Cake
- Less Dramatic Presentation – Flat, rectangular cakes may not have the same visual impact as tiered cakes.
- Limited Design Options – Less space for height-based decorations like graduation cap toppers or fondant figurines.
- Not Ideal for Small Celebrations – A full sheet cake may be too large for intimate gatherings.
Best Uses for a Sheet Cake
- Large graduation parties where serving a big crowd is the priority.
- Simple designs like buttercream rosettes, piped messages, or edible prints.
- Events where the cake needs to be transported easily without worrying about tier stability.
Tiered Cake: Elegant, Impressive, and Customizable
What is a Tiered Cake?
A tiered cake consists of multiple stacked layers, each supported by cake boards and dowels. This style is often used for formal occasions and offers more room for elaborate decorations.
Pros of a Tiered Cake for Graduation
- Visually Stunning – Creates a show-stopping centerpiece for the graduation party.
- More Design Flexibility – Allows for fondant decorations, cascading designs, and intricate details.
- Great for Themed Cakes – You can match the tiers to school colors, university logos, or graduation motifs.
- Can Serve Different Flavors – Each tier can be a different cake flavor, offering variety to guests.
Cons of a Tiered Cake
- More Time-Consuming to Make – Requires extra time for baking, assembling, and decorating.
- Challenging to Transport – Needs a stable cake stand and careful handling.
- More Expensive – Uses more ingredients, tools, and structural supports.
Best Uses for a Tiered Cake
- Smaller, formal graduation parties where presentation is key.
- Celebrations where custom decorations like graduation caps, fondant diplomas, and gold accents are used.
- Events where the graduate wants a personalized and elegant cake design.
Which Cake Should You Choose?
Choose a Sheet Cake If:
- You need an easy-to-serve, cost-effective cake for a large party.
- You prefer simple buttercream decorations or an edible printed design.
- The focus is on convenience and feeding a big crowd.
Choose a Tiered Cake If:
- You want a dramatic, visually stunning cake as the centerpiece of your party.
- You’re comfortable with extra baking and decorating time.
- You want a customized cake with different flavors and intricate details.
For a perfect compromise, you can combine both options by serving a small tiered cake for display and a sheet cake for easy slicing and serving!
Would you like a step-by-step guide on how to assemble a tiered graduation cake? Let me know how I can help!
Step 2 – Baking and Prepping Your Graduation Cake
Essential Baking Tools and Ingredients
Creating a graduation cake that looks professional and tastes delicious starts with having the right baking tools and high-quality ingredients. Whether you’re making a simple sheet cake or an elegant tiered cake, using the proper equipment ensures a smooth baking process and a perfect result. Below, we’ll break down the essential tools and ingredients needed to bake a stunning DIY graduation cake.
Baking Tools: Must-Have Equipment for the Perfect Graduation Cake
1. Cake Pans – Choosing the Right Shape and Size
- Round Cake Pans – Best for tiered cakes and classic graduation cake designs.
- Sheet Cake Pans – Ideal for large graduation parties where easy slicing is needed.
- Square or Rectangular Pans – Great for book-shaped cakes or diploma-style cakes.
- Cupcake Pans – Useful for mini graduation cupcakes as an alternative to a large cake.
2. Measuring Tools – Ensuring Accuracy in Baking
- Measuring Cups and Spoons – For precise measurement of dry and liquid ingredients.
- Digital Kitchen Scale – Helps ensure consistent ingredient ratios for even baking.
3. Mixing and Prep Tools
- Electric Mixer or Stand Mixer – Essential for whipping butter, sugar, and eggs to create a light and fluffy batter.
- Mixing Bowls – At least three different sizes for mixing wet and dry ingredients separately.
- Spatulas and Whisks – For folding ingredients and ensuring smooth, lump-free batter.
4. Baking Essentials for Perfect Texture
- Parchment Paper – Prevents cakes from sticking to pans.
- Cooling Racks – Allows cakes to cool evenly without trapping moisture.
- Cake Leveler or Serrated Knife – For trimming cake layers to achieve a professional, even height.
5. Decorating Tools for a Flawless Finish
- Offset Spatula – Helps spread frosting smoothly and evenly.
- Bench Scraper – Ideal for smoothing buttercream on the sides of cakes.
- Piping Bags and Tips – For adding decorative swirls, lettering, and accents.
- Fondant Smoother – A must-have if decorating with fondant.
Key Ingredients for a Graduation Cake
1. Flour – The Foundation of Every Cake
- All-Purpose Flour – Suitable for most basic cake recipes.
- Cake Flour – Creates a lighter, softer texture for delicate sponges.
- Gluten-Free Flour – A great alternative for gluten-free graduation cakes.
2. Sugar – Sweetness and Structure
- Granulated Sugar – The most common sugar used in cake batters.
- Powdered Sugar (Confectioners’ Sugar) – Used in buttercream frosting for a smooth, creamy texture.
- Brown Sugar – Adds moisture and a subtle caramel flavor, great for chocolate or spice cakes.
3. Fats and Dairy – Enhancing Flavor and Texture
- Unsalted Butter – Preferred for baking because it allows control over the salt content.
- Vegetable Oil – Keeps cakes moist and soft.
- Whole Milk or Buttermilk – Adds richness and helps activate baking powder for a better rise.
- Heavy Cream – Used for ganache, whipped toppings, and buttercream.
4. Leavening Agents – Helping the Cake Rise
- Baking Powder – Gives cakes a light and fluffy texture.
- Baking Soda – Works with acidic ingredients like buttermilk for extra lift.
- Eggs – Provide structure and stability to the cake batter.
5. Flavor Enhancers – Adding Depth and Uniqueness
- Vanilla Extract – A staple in most cake recipes for a warm, sweet aroma.
- Almond Extract – Adds a nutty depth, great for elegant cakes.
- Cocoa Powder – Essential for making chocolate graduation cakes.
- Zest or Fruit Purees – Lemon zest, orange zest, or berry purees add fresh, fruity notes.
Bonus: Optional Ingredients for a Personalized Graduation Cake
For Extra Moisture:
- Sour Cream or Greek Yogurt – Makes the cake ultra-moist and rich.
- Applesauce – A great alternative for a lighter, healthier cake.
For Special Dietary Needs:
- Vegan Butter and Milk Alternatives – Almond, oat, or coconut milk for dairy-free cakes.
- Egg Replacements – Applesauce, flaxseed meal, or commercial egg substitutes for vegan cakes.
Final Thoughts
Having the right baking tools and ingredients ensures that your graduation cake turns out perfect—from a light, fluffy sponge to a smooth, professional finish. Whether you’re making a simple buttercream cake or a fondant-covered masterpiece, using high-quality ingredients and the right equipment will set you up for success.
Would you like a step-by-step checklist of tools and ingredients to make your baking process even easier? Let me know how I can help!
How to Bake the Perfect Graduation Cake
Baking the perfect graduation cake requires more than just mixing ingredients and putting the batter in the oven. The process involves precise measurements, proper mixing techniques, and careful baking to achieve a moist, flavorful, and well-structured cake. Whether you’re making a classic vanilla sheet cake, a rich chocolate tiered cake, or a fun and colorful funfetti cake, following the right steps ensures your cake turns out light, fluffy, and picture-perfect.
Below, we’ll walk through the step-by-step process of baking a graduation cake, covering preparation, mixing, baking, and troubleshooting common mistakes.
Step 1: Preparing Your Baking Equipment and Ingredients
Before starting, it’s essential to have everything measured, prepared, and organized.
A. Gather Your Baking Tools
- Cake pans (round for tiered cakes, rectangular for sheet cakes)
- Mixing bowls (at least two—one for dry and one for wet ingredients)
- Electric mixer or stand mixer (for smooth, even batter mixing)
- Spatula and whisk (for folding and scraping down the sides of the bowl)
- Cake leveler or serrated knife (for trimming cake layers if making a tiered cake)
- Parchment paper (to prevent sticking and ensure easy removal)
B. Preheat the Oven & Prepare Cake Pans
- Set your oven to the correct temperature (typically 325°F to 350°F, depending on the recipe).
- Grease and flour your cake pans or use parchment paper to prevent sticking.
- If baking a tiered cake, use evenly sized cake pans for a balanced structure.
Step 2: Mixing the Cake Batter
A. Combine Dry Ingredients
- In a separate mixing bowl, whisk together:
- Flour (cake flour for a lighter texture, all-purpose for a denser cake)
- Baking powder or baking soda (helps the cake rise evenly)
- Salt (enhances flavor and balances sweetness)
- Cocoa powder (if making a chocolate cake)
B. Mix Wet Ingredients Separately
- In another large bowl, beat together:
- Butter and sugar (cream until light and fluffy, about 3–5 minutes)
- Eggs (add one at a time for proper emulsification)
- Vanilla extract or other flavorings
- Milk or buttermilk (adds moisture and enhances texture)
C. Combine Wet and Dry Ingredients
- Gradually add dry ingredients into the wet mixture, alternating with milk.
- Mix on low speed or gently fold in with a spatula to avoid overmixing.
- Overmixing can lead to a dense, chewy cake instead of a soft and fluffy texture.
D. Adjust for Different Cake Flavors
- For a chocolate cake: Use cocoa powder and hot water or coffee to enhance richness.
- For a funfetti cake: Fold in rainbow sprinkles just before pouring the batter into pans.
- For a lemon cake: Add lemon zest and fresh lemon juice for a bright, citrusy flavor.
Step 3: Baking the Cake to Perfection
A. Proper Baking Time and Temperature
- Check your recipe’s temperature setting (typically between 325°F and 350°F).
- Place cake pans on the center rack to ensure even heat distribution.
- Bake for 25–35 minutes, depending on the cake size and type.
B. How to Know When the Cake is Done
- Toothpick Test: Insert a toothpick into the center—if it comes out clean, the cake is done.
- Spring Test: Gently press the top of the cake—it should bounce back slightly without leaving an indentation.
- Pulling Away from Edges: The cake should pull away slightly from the sides of the pan.
C. Cooling the Cake Properly
- Allow the cake to cool in the pan for 10–15 minutes before removing.
- Transfer to a cooling rack and let it cool completely before frosting.
- If decorating later, wrap the cake in plastic wrap and refrigerate to prevent drying out.
Step 4: Troubleshooting Common Baking Mistakes
Even experienced bakers run into issues. Here are common baking problems and how to fix them:
A. Cake is Too Dense or Dry
✔ Possible Cause: Overmixing the batter or using too much flour.
✔ Fix: Fold ingredients gently and measure flour using the spoon-and-level method.
B. Cake Didn’t Rise Properly
✔ Possible Cause: Expired baking powder/soda or oven temperature too low.
✔ Fix: Always use fresh leavening agents and preheat your oven correctly.
C. Cake is Sinking in the Middle
✔ Possible Cause: Opening the oven door too early or underbaking.
✔ Fix: Bake for the full time and avoid disturbing the cake until fully set.
D. Cake Sticks to the Pan
✔ Possible Cause: Not greasing/flouring the pan properly.
✔ Fix: Use parchment paper for easy removal.
Final Thoughts
Baking the perfect graduation cake requires patience, precision, and the right techniques. By following these steps—proper preparation, correct mixing, controlled baking, and troubleshooting mistakes—you can achieve a fluffy, moist, and well-structured cake that will be the highlight of the celebration.
Now that your cake is baked to perfection, it’s time for the fun part—decorating! Would you like a guide on buttercream piping techniques, fondant decorations, or personalized cake toppers for your graduation cake? Let me know how I can help!
Cooling and Leveling Your Cake for Decorating
Properly cooling and leveling your cake is a crucial step before decorating. A warm cake can cause buttercream to melt, fondant to slide, and decorations to become uneven. Similarly, an uneven cake surface can lead to instability, making tiered or structured cakes more difficult to assemble. Taking the time to cool and level your cake correctly ensures a professional, smooth, and well-balanced finish.
Below, we’ll walk through the best techniques for cooling and leveling your cake before decorating to help you achieve a flawless and polished graduation cake.
Step 1: Properly Cooling Your Cake After Baking
A. Why Cooling Matters
- A cake that is too warm will cause buttercream to melt and make decorating difficult.
- Cakes continue to set and develop their structure as they cool.
- Cooling prevents crumbling when slicing and layering.
B. How to Cool a Cake Correctly
- Cool in the Pan First
- Once removed from the oven, let the cake sit in the pan for 10–15 minutes.
- This helps it firm up slightly, making it easier to handle.
- Transfer to a Cooling Rack
- Carefully turn the cake out of the pan onto a wire cooling rack.
- The cooling rack allows air circulation around the cake, preventing condensation and sogginess.
- Avoid Placing the Cake in the Fridge While Warm
- Placing a hot cake in the refrigerator can create excess condensation, making the cake sticky and harder to frost.
- Let the cake cool to room temperature first before refrigerating.
C. How Long Should a Cake Cool?
- Single-layer cakes: Cool for 1–2 hours before decorating.
- Layered cakes: Cool for at least 2 hours, or refrigerate for 30–45 minutes to firm up.
- Sheet cakes: Cool for about 1 hour before frosting.
D. How to Speed Up the Cooling Process
- Place the cake on a wire rack in a cool room to promote airflow.
- For faster cooling, place the cake (after it has reached room temperature) in the refrigerator for 30 minutes before decorating.
- Avoid using a freezer for rapid cooling, as this can lead to uneven textures.
Step 2: Leveling Your Cake for an Even Surface
A. Why Leveling is Important
- Ensures even frosting application without lumps or gaps.
- Prevents a lopsided cake, especially for tiered designs.
- Helps the cake stack properly if making a multi-layered cake.
B. Tools Needed for Leveling
- Serrated Bread Knife – A sharp knife allows for precise trimming.
- Cake Leveler – A professional tool for ensuring a uniform cake surface.
- Turntable – Helps rotate the cake smoothly while cutting.
- Offset Spatula – Used to check for high and low points on the cake’s surface.
C. How to Level a Cake Properly
- Chill the Cake for Easier Cutting
- A slightly chilled cake is firmer and less prone to crumbling when slicing.
- Refrigerate the cake for 30 minutes before leveling.
- Find the Highest Point of the Cake
- Place the cake on a flat surface and check for uneven spots.
- Use an offset spatula or ruler to identify the highest point.
- Use a Serrated Knife or Cake Leveler
- Hold the knife parallel to the table and gently saw through the dome.
- If using a cake leveler, adjust the height and carefully slide it across.
- Rotate the Cake While Cutting
- If using a knife, turn the cake slowly while making shallow cuts.
- Avoid pressing too hard, as this can squish the cake.
- Check for Evenness
- Once leveled, place a ruler or flat spatula across the top of the cake.
- If it wobbles, trim any remaining high points.
D. Leveling Multi-Layer Cakes
- If baking a tiered or multi-layered cake, ensure that each layer is the same height.
- Stack the layers and check for even alignment before adding frosting.
- If necessary, trim each layer individually for precision.
Step 3: Storing Your Cake Before Decorating
A. When to Store Before Decorating
- If you’re not decorating the cake immediately, proper storage keeps it moist and fresh.
- A cooled and leveled cake can be stored for up to 2 days before decorating.
B. How to Wrap and Store the Cake
- Wrap the cake tightly in plastic wrap to prevent it from drying out.
- If storing overnight, place it in an airtight container.
- Keep it in the refrigerator if the room is warm or humid.
C. Should You Freeze the Cake?
- Cakes can be frozen for up to 3 months before decorating.
- Wrap in plastic wrap and aluminum foil, then store in an airtight container.
- Thaw at room temperature for 1–2 hours before frosting.
Final Thoughts
Cooling and leveling your cake properly is essential for a smooth decorating process. A well-cooled cake prevents melting frosting, while a level cake ensures professional-looking results. Taking the time to follow these steps will make it easier to apply buttercream, stack layers, and create a visually stunning graduation cake.
Now that your cake is cooled and leveled, are you ready to move on to decorating? Let me know if you’d like tips on buttercream piping, fondant work, or creative cake toppers!
Step 3 – Easy Graduation Cake Decorating Tips
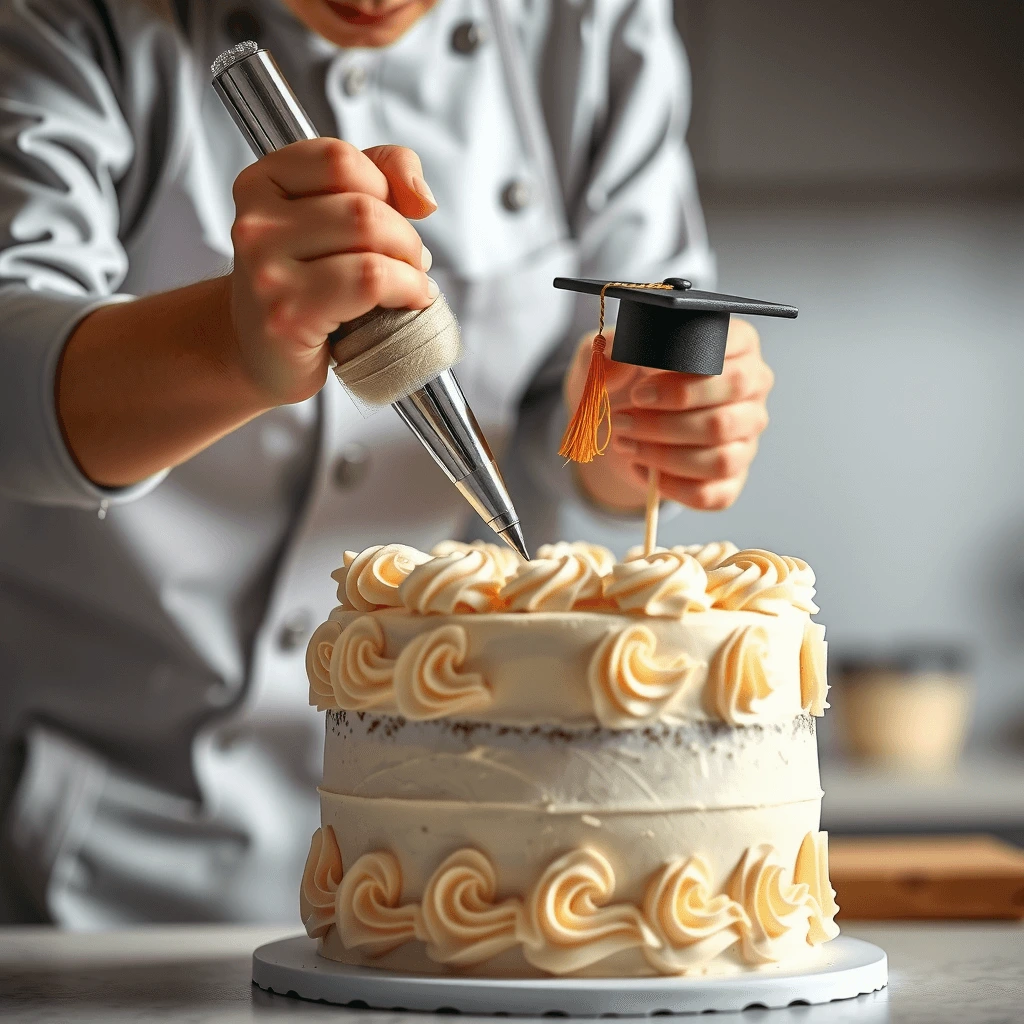
How to Make a Graduation Cap Cake Topper
A graduation cap cake topper is the perfect finishing touch for a DIY graduation cake. Whether made from fondant, chocolate, or modeling paste, this topper adds a symbolic and celebratory element to your cake. By following these step-by-step instructions, you can create a realistic, edible graduation cap that complements any graduation cake design.
Step 1: Choosing the Right Materials for Your Graduation Cap Topper
A. Best Edible Materials to Use
- Fondant – Easy to shape, firm once set, and works well for detailed decorations.
- Modeling Chocolate – Offers a smoother texture and tastes better than fondant.
- Gum Paste – Dries harder and faster, ideal for structured cake toppers.
- Rice Krispies Base (for larger toppers) – Helps add height and stability.
B. Alternative Non-Edible Materials
If you prefer a non-edible cake topper, consider:
- Cardstock or thick paper (cut into a square and attached to a toothpick).
- Plastic graduation cap toppers (available at party stores).
- Miniature fabric tassels for a realistic touch.
Step 2: Creating the Graduation Cap Base
A. Shaping the Base (Hat Portion)
- Roll out black fondant or modeling chocolate to about ¼ inch thick.
- Cut a 2.5 to 3-inch circle using a round cookie cutter.
- Mold the fondant over a small, rounded object (such as an upside-down bowl or cupcake liner) to form a slightly curved dome shape.
- Let the piece dry for at least 12–24 hours to harden.
B. Making the Flat Square Top
- Roll out another piece of black fondant to about ¼ inch thick.
- Cut a square measuring about 3.5 to 4 inches on each side.
- Let it air-dry on a flat surface for 12–24 hours until it is firm enough to hold its shape.
C. Attaching the Cap Pieces Together
- Apply a small amount of edible glue, royal icing, or melted chocolate to the center of the dried dome.
- Carefully place the square top onto the dome, pressing gently.
- Allow the cap to set and dry for another 1–2 hours before moving on to the tassel.
Step 3: Making the Graduation Cap Tassel
A. Rolling the Fondant Tassel Strands
- Roll thin strips of yellow or gold fondant about 2–3 inches long.
- Gather them together at one end and press slightly to form a small bundle.
- Roll a small ball of fondant (about the size of a pea) and attach it to the top of the tassel bundle.
B. Attaching the Tassel to the Cap
- Use a small amount of edible glue or water to stick the fondant ball to the center of the square cap.
- Arrange the tassel strands so they naturally drape over the side of the cap.
- Let dry for at least 2 hours before placing on the cake.
C. Alternative Tassel Decoration Ideas
- Use gold luster dust or edible gold paint to give the tassel a metallic shine.
- For a textured effect, gently press a small piping tip onto the fondant strands to create indentations.
- If using a non-edible tassel, attach it with a thin, food-safe wire or toothpick.
Step 4: Placing the Graduation Cap Topper on the Cake
A. Choosing the Right Placement
- Center the cap topper on top of the cake for a classic look.
- Position it slightly tilted for a more dynamic, fun design.
- Use extra decorations like diplomas, stars, or gold accents to enhance the theme.
B. Securing the Topper to the Cake
- If the topper is lightweight, place it directly on top of the cake.
- If the topper is heavier, use a cake dowel or toothpicks to hold it in place.
- For multi-tier cakes, place the cap topper on the top tier for maximum visibility.
Final Thoughts
Making a graduation cap cake topper is a simple yet impactful way to elevate your DIY graduation cake. Whether using fondant, modeling chocolate, or non-edible materials, this topper adds a personal and celebratory touch to your cake design.
Now that your graduation cap topper is complete, are you looking for matching cake decoration ideas like fondant diplomas or edible gold accents? Let me know how I can help!
Adding Edible Gold and Silver Accents
Edible gold and silver accents are a sophisticated way to elevate your graduation cake, making it look elegant, luxurious, and celebration-worthy. Whether you’re adding a metallic finish to fondant decorations, brushing gold onto buttercream, or using shimmering sprinkles, gold and silver accents bring a touch of glamour to any cake design.
In this section, we’ll explore the different types of edible gold and silver, how to apply them, and creative ways to use metallic details on your graduation cake.
Step 1: Choosing the Right Edible Gold and Silver for Cake Decorating
Before you start decorating, it’s essential to choose the right type of edible gold or silver for your cake.
A. Types of Edible Gold and Silver
- Edible Gold and Silver Leaf – Thin, delicate sheets used for a dramatic metallic effect.
- Edible Gold and Silver Luster Dust – A fine powder that creates a soft shimmer when brushed onto fondant or buttercream.
- Edible Gold and Silver Paint – Liquid gold or silver that can be painted onto cakes for precise detailing.
- Gold and Silver Sprinkles/Pearls – Adds texture and shine to the cake’s surface.
- Gold and Silver Dragees (Sugar Beads) – Tiny decorative beads that create a sophisticated look on borders and accents.
B. Choosing the Best Option for Your Cake
- For an all-over metallic finish: Use gold or silver leaf for a luxurious look.
- For subtle elegance: Dust the cake with luster dust or apply a light coat of metallic paint.
- For fun, modern designs: Decorate with gold or silver sprinkles around the edges.
- For structured decorations: Use gold or silver dragees to create geometric patterns.
Step 2: Applying Edible Gold and Silver to Your Graduation Cake
Once you’ve chosen the right type of edible metallic accents, it’s time to apply them properly to achieve a flawless, professional look.
A. How to Apply Edible Gold and Silver Leaf
- Prepare the cake by ensuring the buttercream or fondant surface is slightly sticky.
- Carefully lift the gold/silver leaf using a dry brush or tweezers (as it can be very delicate).
- Gently press it onto the cake, smoothing it down with a soft brush or parchment paper.
- Use a clean, dry brush to remove any excess gold or silver.
B. How to Use Edible Gold and Silver Luster Dust
- Mix luster dust with a few drops of lemon extract or clear alcohol (vodka works best) to create a metallic paint.
- Use a food-safe brush to lightly dust or paint the surface of fondant, buttercream, or decorations.
- Let it dry for 10–15 minutes before handling.
C. How to Decorate with Gold and Silver Sprinkles or Dragees
- Apply a thin layer of buttercream or edible glue where you want the sprinkles to stick.
- Lightly press the gold or silver beads/sprinkles into the frosting.
- Use a toothpick or tweezers for precise placement in patterns or lettering.
Step 3: Creative Ways to Use Edible Gold and Silver Accents on Graduation Cakes
Now that you know how to apply edible metallic decorations, let’s explore some creative ways to incorporate them into your graduation cake design.
A. Gold and Silver Graduation Cap Toppers
- Paint a fondant graduation cap topper with gold or silver luster dust for a sleek look.
- Use gold beads or dragees for the tassel details.
B. Elegant Gold or Silver Cake Borders
- Apply gold or silver sprinkles around the base of the cake for a clean, polished look.
- Use gold-painted fondant ribbons to create an elegant border effect.
C. Metallic Edible Lettering and Numbers
- Write “Class of [Year]” using gold-painted piped buttercream.
- Use metallic fondant cutouts to create school initials, names, or special messages.
D. Gold or Silver Brushstroke Cakes
- Use a dry brush dipped in luster dust to create a brushed metallic texture.
- Works best on dark-colored cakes like black, navy blue, or burgundy for a bold contrast.
E. Dripping Gold or Silver Ganache
- Create a dramatic effect by drizzling gold or silver ganache down the sides of the cake.
- This pairs well with naked cakes, dark buttercream, or ombré designs.
Final Thoughts
Adding edible gold and silver accents transforms a simple graduation cake into a stunning, elegant masterpiece. Whether you use gold leaf for a luxurious effect, luster dust for subtle shimmer, or metallic sprinkles for a fun touch, these techniques will make your cake stand out at the celebration.
Would you like suggestions on how to combine gold and silver accents with buttercream piping or fondant details? Let me know how I can help!
Piping Techniques for Buttercream Designs
Mastering buttercream piping techniques can take a graduation cake from simple to stunning. Whether you’re adding elegant swirls, delicate floral patterns, or intricate lettering, the right piping techniques can make your cake look professional and polished.
This guide will break down the essential buttercream piping techniques, covering the best tools, how to achieve different textures, and tips for clean, precise designs.
Step 1: Choosing the Right Piping Tools
Before you start piping, it’s important to select the right tools for the job.
A. Essential Piping Tools
- Piping Bags – Available in disposable and reusable options.
- Piping Tips (Nozzles) – Different tips create various designs and textures.
- Couplers – Allow you to switch piping tips without changing the bag.
- Turntable – Helps rotate the cake smoothly while piping.
- Bench Scraper & Offset Spatula – For smoothing the base buttercream layer before piping.
B. Types of Piping Tips and Their Uses
- Round Tip (#1–#12) – Best for lettering, dots, and simple outlines.
- Star Tip (#16–#32) – Creates rosettes, shells, and textured designs.
- Petal Tip (#104, #127) – Ideal for buttercream flowers and ruffles.
- Leaf Tip (#352) – Perfect for fondant or piped leaves to accompany flowers.
Step 2: Basic Piping Techniques for Graduation Cakes
A. Rosette Piping for a Classic Look
- Use a large star tip (#1M or #2D).
- Hold the piping bag at a 90-degree angle.
- Start in the center and pipe in a circular motion outward.
- Works well for floral-themed cakes or cupcake decorations.
B. Shell Border for Elegant Edges
- Use a medium star tip (#21 or #32).
- Apply steady pressure while dragging the bag slightly to create shell-like ridges.
- Best for borders along the bottom and top edges of the cake.
C. Buttercream Ruffles for a Textured Effect
- Use a petal tip (#104 or #127) with the thin edge facing outward.
- Pipe in a side-to-side motion to create a ruffled texture.
- Works beautifully on layered or ombré cakes.
D. Dot & Bead Borders for a Simple Finish
- Use a round tip (#5–#12) for uniform buttercream dots.
- Pipe small dots close together to create a string of pearls effect.
- Ideal for elegant or minimalist cake designs.
Step 3: Advanced Piping Techniques for Custom Cake Designs
A. Graduation-Themed Lettering & Messages
- Use a round piping tip (#3 or #5) for precise writing.
- Hold the piping bag at a 45-degree angle for better control.
- Write phrases like “Class of [Year]” or “Congrats [Name]” in a steady, flowing motion.
B. Scrollwork and Swirls for Decorative Accents
- Use a small round tip (#2 or #3) for delicate scroll designs.
- Pipe curved, looping patterns along the cake’s surface.
- Perfect for elegant or vintage-style graduation cakes.
C. Ombre Piping for a Gradient Effect
- Divide buttercream into three or more shades of the same color.
- Load the piping bag with multiple colors for a blended ombré look.
- Works well for textured buttercream finishes.
Step 4: Tips for Perfect Piping Results
A. Preparing the Buttercream for Piping
- Ensure the buttercream is smooth and at the right consistency—not too stiff or runny.
- If too thick, add a teaspoon of milk at a time to soften it.
- If too soft, chill it for 10–15 minutes before piping.
B. Proper Grip and Pressure Control
- Hold the piping bag at the right angle (45° or 90°) depending on the technique.
- Apply consistent pressure to avoid uneven designs.
- For detailed work, stabilize your hand with a turntable or countertop edge.
C. Fixing Mistakes Easily
- If a piped design goes wrong, use a spatula to smooth it out and try again.
- Refrigerate the cake briefly if the buttercream becomes too soft while piping.
- Use a toothpick to outline text before piping words for precision.
Final Thoughts
Mastering buttercream piping techniques allows you to create a stunning and professional-looking graduation cake. Whether you choose simple swirls, elegant borders, or intricate lettering, the right technique adds personality and beauty to your cake.
Would you like a step-by-step visual guide on how to pipe buttercream designs? Let me know how I can help!
Step 4 – Graduation Cake Ideas for Different Themes
High School Graduation Cake Designs
A high school graduation cake is a special way to celebrate a major milestone in a student’s life. Whether it’s a simple sheet cake with school colors or an elaborate tiered cake with fondant decorations, the right design can make the celebration even more memorable.
Below, we’ll explore various cake design ideas, decorating techniques, and personalized touches that will help you create a stunning high school graduation cake.
Step 1: Choosing the Right Cake Shape and Size
A. Sheet Cake for Large Celebrations
- Best for big graduation parties with a large guest list.
- Can be decorated with piped buttercream designs, edible images, or a printed school logo.
- Easy to serve and customize with a “Class of [Year]” inscription.
B. Tiered Cake for a Dramatic Effect
- A two- or three-tiered cake adds a touch of elegance to the celebration.
- Each tier can feature different flavors or unique designs.
- Great for formal graduation parties where the cake serves as a centerpiece.
C. Custom-Shaped Cakes for a Unique Look
- Consider a diploma-shaped cake rolled up with fondant details.
- A graduation cap cake with a fondant tassel and metallic details.
- A number cake (representing the graduation year) decorated with sprinkles or edible gold.
Step 2: Decorating the Cake with High School Themes
A. School Colors and Logos
- Use fondant, edible prints, or buttercream piping to create the school logo.
- Decorate with two-tone buttercream in the graduate’s school colors.
- Add sprinkles, ribbons, or edible glitter that match the school’s theme.
B. Personalized Graduation Messages
- Pipe a celebratory message like “Congrats [Graduate’s Name]” or “Class of 2024”.
- Use fondant cutouts or edible gold leaf for a luxurious look.
- Write a fun message like “The Future is Bright” or “Off to College!”.
C. Edible Photo Prints for a Personal Touch
- Print an edible image of the graduate to place on the cake.
- Use an edible diploma or cap topper with the student’s name.
- Create a collage of past school moments in edible print form.
Step 3: Adding Graduation-Themed Cake Toppers
A. Fondant Graduation Cap and Diploma
- Roll out black fondant to create a miniature graduation cap.
- Use white fondant to form a diploma scroll with gold ribbon detailing.
- Attach a fondant tassel in the graduate’s school colors.
B. Gold and Silver Accents for a Luxury Look
- Dust the cake with edible gold or silver luster dust.
- Add metallic dragees, edible pearls, or gold foil accents.
- Use gold piping for elegant borders and lettering.
C. 3D Cake Toppers for a Fun Celebration
- A fondant figurine of the graduate in a cap and gown.
- Edible books, notebooks, or a mini school mascot.
- A sparkler topper for a dramatic reveal moment.
Step 4: Custom Cake Flavor and Fillings for a Personal Touch
A. Classic Flavors for a Crowd-Pleasing Cake
- Vanilla bean cake with buttercream frosting.
- Chocolate fudge cake with rich ganache layers.
- Red velvet cake with cream cheese frosting for a festive touch.
B. Fun and Unique Flavors for a Special Twist
- Funfetti cake with colorful sprinkles inside for a surprise element.
- Cookies and cream cake for a sweet, nostalgic flavor.
- Lemon raspberry cake for a fresh and summery taste.
C. Layered Cakes with Surprise Fillings
- Chocolate cake with peanut butter mousse for a decadent bite.
- White cake with fresh fruit filling for a light and elegant touch.
- Caramel or dulce de leche filling for a rich and creamy experience.
Final Thoughts
A high school graduation cake is a symbol of achievement and celebration, and the right design can make it even more special. Whether you choose a simple sheet cake in school colors, a detailed fondant cake with a graduation cap, or a tiered masterpiece with metallic accents, adding personalized elements ensures a memorable and meaningful cake.
Would you like step-by-step guidance on fondant decorations or buttercream piping to bring your design ideas to life? Let me know how I can help!
College Graduation Cake Inspirations
A college graduation cake represents years of hard work, dedication, and achievement. Whether you’re celebrating a university graduate, a law school graduate, or even a medical school completion, the right cake design can make the occasion even more special. From minimalist elegance to school-themed designs, a college graduation cake should reflect the graduate’s journey, personality, and future aspirations.
In this section, we’ll explore creative and stylish college graduation cake ideas, including classic themes, modern designs, and elegant decorations to make your cake stand out.
Step 1: Choosing a Theme for a College Graduation Cake
A. University-Themed Cake
- Decorate the cake in the university’s official colors.
- Add an edible college logo or mascot using fondant or printed edible images.
- Create a custom cake topper with the graduate’s degree or major (e.g., “Business Graduate 2024”).
B. Degree-Specific Cake Design
- Medical school graduation: A cake shaped like a stethoscope, scrubs, or a doctor’s coat.
- Law school graduation: A scales of justice or law book cake.
- Engineering graduate: A cake with blueprints, gears, or tools made from fondant.
C. Minimalist & Modern Graduation Cakes
- A black and gold cake with metallic accents for an elegant and mature look.
- A clean white buttercream cake with a simple fondant graduation cap topper.
- A naked cake with gold leaf accents for a rustic yet sophisticated feel.
Step 2: Elegant Decoration Ideas for College Graduation Cakes
A. Gold and Silver Accents for a Luxurious Look
- Use gold or silver leaf detailing to create a sophisticated finish.
- Apply gold luster dust to fondant decorations for a metallic touch.
- Decorate with gold or silver dragees (edible pearls) for a modern look.
B. Personalized Cake Toppers
- A custom cake topper with the graduate’s name and graduation year.
- A “Class of [Year]” topper in acrylic, gold foil, or glittered fondant.
- A mini fondant diploma scroll with a ribbon as a decorative element.
C. Edible Lettering & Calligraphy
- Pipe a special message like “Congratulations [Graduate’s Name]” using buttercream or royal icing.
- Use edible gold paint or chocolate lettering to write an inspirational quote like “The Best is Yet to Come”.
- Apply stenciled text on the cake’s surface for a modern typography effect.
Step 3: Unique Cake Shapes and Structures for College Graduation Cakes
A. Two-Tier or Three-Tier Cakes
- The bottom tier can represent the past school years, while the top symbolizes future success.
- The middle tier can feature a message or degree-related theme.
- Add a structured graduation cap on the top tier for a showstopping effect.
B. Book Stack Cake for Academic Graduates
- Create a realistic-looking fondant-covered cake shaped like stacked books.
- Each “book” layer can represent different subjects or achievements.
- Use gold or silver accents on the book spines for a polished effect.
C. Diploma Scroll Cake for a Classic Graduation Design
- A rolled-up diploma cake with a fondant ribbon tied around it.
- Use an edible printed diploma to personalize the cake.
- Perfect for graduates who prefer a classic and elegant design.
Step 4: Best Cake Flavors for a College Graduation Celebration
A. Classic Flavors for a Timeless Cake
- Vanilla cake with vanilla buttercream for a simple, crowd-pleasing option.
- Chocolate cake with ganache layers for a rich, decadent treat.
- Red velvet cake with cream cheese frosting for a bold yet elegant flavor.
B. Unique Flavors for a Modern Twist
- Champagne cake with strawberry filling for a celebratory feel.
- Mocha espresso cake with chocolate ganache for coffee lovers.
- Funfetti cake with colorful sprinkles for a playful and festive touch.
C. Multi-Flavored Tiered Cakes for Variety
- Each tier can feature a different flavor to accommodate different tastes.
- Consider pairing citrusy flavors with vanilla, or chocolate with salted caramel.
- A combination of fruit-filled layers and creamy frostings for a balanced flavor profile.
Final Thoughts
A college graduation cake is more than just a dessert—it’s a symbol of accomplishment and new beginnings. Whether you opt for a university-themed cake, an elegant tiered masterpiece, or a unique book stack design, the key is to make the cake personal, meaningful, and visually stunning.
Would you like step-by-step guidance on fondant work, edible gold accents, or cake flavor pairings? Let me know how I can help bring your vision to life!
Fun Graduation Cakes for a Party
A graduation party cake should be just as exciting as the celebration itself! Whether you’re looking for a playful, colorful, or unique design, a fun graduation cake adds personality and joy to the occasion. From humorous cake messages to interactive designs, there are endless ways to make the dessert the highlight of the party.
Below, we’ll explore creative and entertaining graduation cake ideas, including whimsical themes, interactive elements, and trendy designs that will bring laughter and excitement to any graduation celebration.
Step 1: Creative and Playful Graduation Cake Themes
A. Graduation Emoji Cake for a Lighthearted Look
- A fun emoji-themed cake featuring 🎓😊🎉 symbols.
- Can include laughing, winking, or crying emojis to represent different emotions about graduation.
- Works well as a single-tier or cupcake tower design.
B. “The Struggle Was Real” Meme Cake
- A humorous cake featuring the phrase “The Struggle Was Real” in bold lettering.
- Can include edible decorations like alarm clocks, textbooks, and coffee cups to symbolize all-nighters.
- Perfect for graduates who appreciate humor and fun memories.
C. “Next Stop: Adulting” Cake
- A lighthearted design symbolizing the transition from school to real life.
- Decorations can include mini fondant credit cards, bills, coffee cups, or a tiny office desk.
- A great choice for college graduates entering the workforce.
Step 2: Fun & Interactive Graduation Cake Ideas
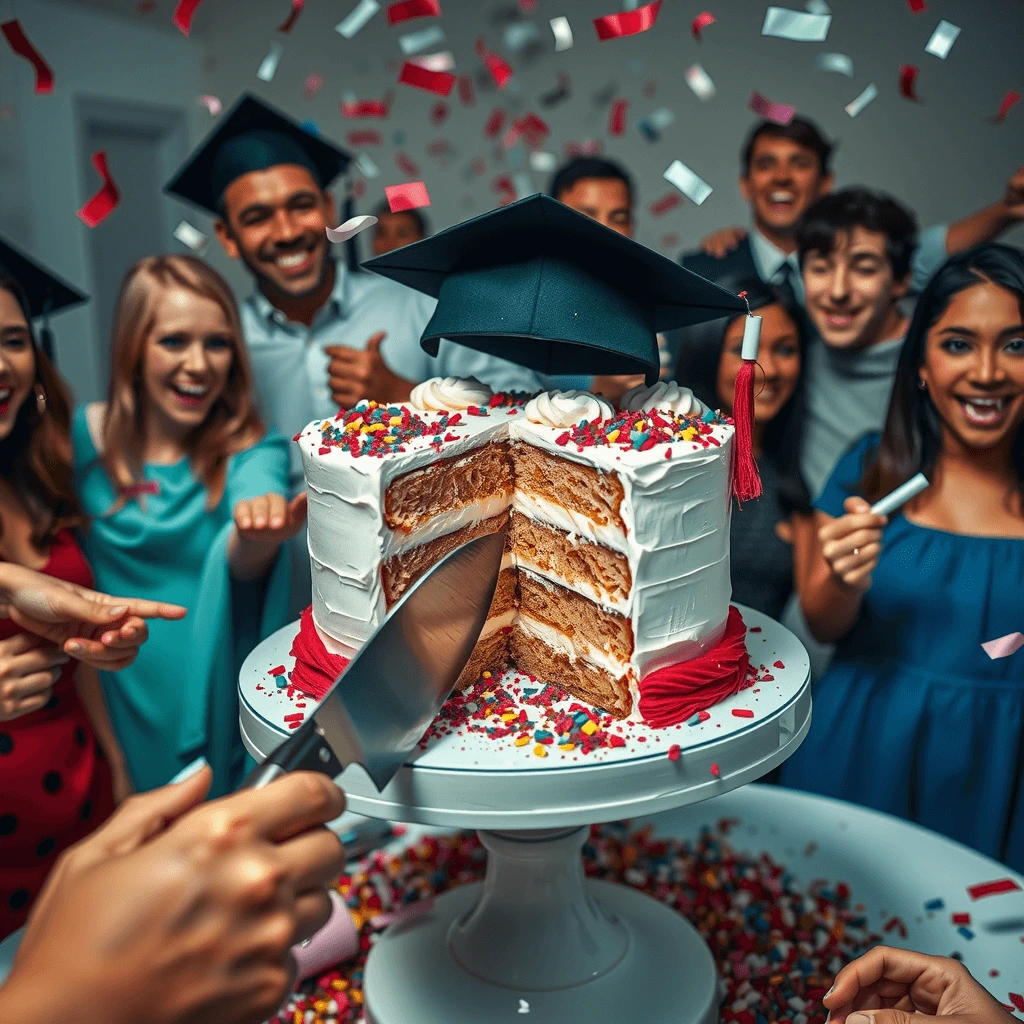
A. Piñata-Style Cake with Candy Surprise
- A cake with a hidden compartment filled with candy, sprinkles, or money.
- When cut, the contents spill out for a dramatic surprise.
- Can be customized with school colors, graduation caps, or themed decorations.
B. Fortune Cookie Cake with Graduation Advice
- A cake topped with edible fortune cookies containing inspirational graduation messages.
- Messages can include funny or motivational quotes like “Welcome to the real world!”.
- Ideal for group celebrations where guests can pick a fortune cookie.
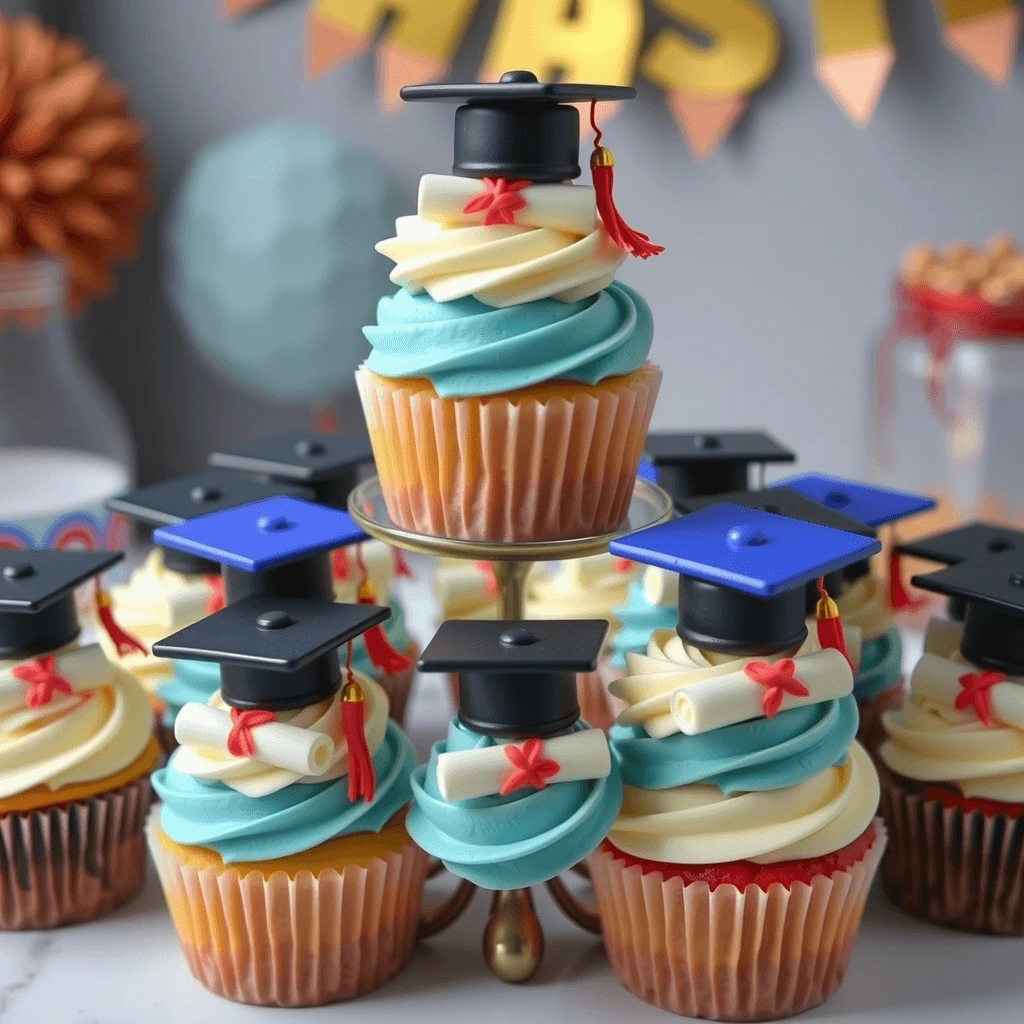
C. Cupcake Pull-Apart Cake in the Shape of a Graduation Cap
- Instead of a traditional cake, arrange cupcakes into the shape of a graduation cap.
- Guests can pull apart the cupcakes without needing to cut the cake.
- Can be decorated with fondant tassels and edible gold accents.
Step 3: Eye-Catching & Trendy Graduation Cake Designs
A. Drip Cake with Metallic or Glitter Accents
- A trendy cake design featuring a dripping ganache effect in gold, silver, or school colors.
- Can be paired with fresh berries, edible glitter, or a mini diploma topper.
- Works well for both high school and college graduation parties.
B. Chalkboard-Style Graduation Cake
- A black fondant cake decorated with white chalk-like lettering.
- Messages can include math equations, school subjects, or a personalized note.
- Creates a vintage classroom effect and pairs well with fondant books or pencils.
C. “Glow-in-the-Dark” Neon Cake for a Party Atmosphere
- A cake decorated with neon-colored icing that glows under blacklight.
- Perfect for nighttime graduation parties or club-style celebrations.
- Can include neon graduation caps, stars, or personalized messages.
Step 4: Best Cake Flavors for a Fun Graduation Party
A. Colorful and Playful Cake Flavors
- Rainbow cake with vibrant, colorful layers.
- Confetti funfetti cake for a classic party vibe.
- Cotton candy-flavored cake for a sweet and nostalgic taste.
B. Crowd-Pleasing Cake Flavors for All Guests
- Chocolate chip cookie dough cake for cookie lovers.
- Peanut butter and jelly cake for a nostalgic childhood twist.
- Marble swirl cake for a mix of vanilla and chocolate flavors.
C. Cakes with a Surprise Inside
- Oreo-stuffed cake with hidden cookies in each layer.
- Sprinkle explosion cake with a burst of confetti sprinkles inside.
- Layered cheesecake and sponge cake for a decadent, creamy texture.
Final Thoughts
A fun graduation cake should reflect the graduate’s personality, humor, and excitement for the future. Whether you choose a meme-inspired cake, a piñata surprise cake, or a glow-in-the-dark neon cake, the goal is to create something memorable, interactive, and full of celebration energy.
Would you like help designing a personalized fun graduation cake with custom decorations and unique flavor pairings? Let me know how I can help!
Step 5 – Tips for Storing, Transporting, and Serving Your Cake
Best Ways to Store Your Graduation Cake
Properly storing your graduation cake ensures that it stays fresh, flavorful, and visually stunning until it’s time to serve. Whether you’re making the cake a few days in advance, need to store leftovers, or want to transport the cake safely, following the correct storage methods is essential.
Below, we’ll cover the best practices for storing buttercream, fondant, and tiered cakes, along with tips for refrigeration, freezing, and transportation.
Step 1: Short-Term Storage for Cakes Before Serving
A. How Long Can a Cake Sit at Room Temperature?
- A buttercream-covered cake can sit out for 1–2 days at room temperature in a cool, dry place.
- A fondant-covered cake lasts longer at room temperature because fondant seals in moisture.
- If your cake contains perishable fillings (cream, custard, fresh fruit, or whipped cream), it must be refrigerated.
B. Covering the Cake to Maintain Freshness
- Place the cake in a cake box or under a cake dome to prevent dust or dryness.
- Avoid plastic wrap directly on decorated cakes, as it can damage frosting and fondant.
- If the cake is fully assembled but not yet served, store it in a cool, shaded area away from direct sunlight and heat.
Step 2: Refrigerating a Graduation Cake
A. When to Refrigerate a Cake
- If the cake is made more than 24 hours in advance, it should be refrigerated to maintain freshness.
- Cakes with cream cheese frosting, fresh fruit fillings, or dairy-based toppings must be kept in the fridge.
B. How to Store a Cake in the Refrigerator Without Drying It Out
- Cover the cake loosely with plastic wrap or place it in an airtight cake container.
- If refrigeration makes the buttercream too firm, let the cake sit at room temperature for 30–60 minutes before serving.
- Avoid placing the cake near strong-smelling foods like onions, as cakes can absorb odors.
C. Storing a Tiered Cake in the Fridge
- If storing a multi-tiered cake, place it on a sturdy cake board and store it in the fridge with ample space around it.
- You can also refrigerate each tier separately and assemble closer to serving time.
- Use cake dowels or supports to prevent tier shifting.
Step 3: Freezing a Graduation Cake for Long-Term Storage
A. How to Freeze an Unfrosted Cake
- Let cake layers cool completely before freezing to prevent condensation.
- Wrap each layer tightly in plastic wrap and then a layer of aluminum foil to prevent freezer burn.
- Store in a freezer-safe container or zip-top bag for up to 3 months.
B. How to Freeze a Fully Decorated Cake
- Place the decorated cake in the freezer uncovered for 1 hour to firm up the frosting.
- Once slightly hardened, wrap the cake gently in plastic wrap and store it in a cake box or airtight container.
- When ready to serve, thaw the cake in the fridge overnight, then let it sit at room temperature for 30–60 minutes before serving.
C. Freezing Leftover Cake Slices
- Wrap individual cake slices in plastic wrap and aluminum foil.
- Store in an airtight container and label with the freezing date.
- To enjoy later, thaw a slice in the fridge for a few hours or at room temperature for 30 minutes.
Step 4: Transporting a Graduation Cake Safely
A. Choosing the Right Cake Box for Transportation
- Use a sturdy cake box that fits snugly around the cake to prevent movement.
- If transporting a tiered cake, use a cake carrier or a reinforced box with dowel supports.
- Keep the cake on a flat surface (never on a car seat).
B. Keeping the Cake Cool During Travel
- If traveling in warm weather, place the cake in an air-conditioned vehicle.
- Use gel ice packs or a cooling bag to prevent buttercream from melting.
- Avoid direct sunlight on the cake box.
C. Driving Carefully with a Cake
- Place the cake on a flat surface, such as the car floor, rather than a seat.
- Avoid sudden stops or sharp turns to prevent shifting.
- Drive slowly and cautiously if transporting a tall cake.
Final Thoughts
Storing and transporting a graduation cake properly ensures that it remains fresh, intact, and picture-perfect for the big celebration. Whether you’re making the cake in advance, storing leftovers, or transporting a multi-tiered cake, following these steps will preserve the flavor and structure of your cake.
Would you like a checklist for cake storage and transportation to keep things organized? Let me know how I can help!
How to Safely Transport a Graduation Cake
Transporting a graduation cake requires careful planning to ensure it arrives intact, fresh, and beautifully decorated. Whether you’re delivering a single-tier, multi-tiered, or shaped cake, following proper transportation techniques prevents sliding, melting, or damage during the journey.
In this section, we’ll cover the best methods for packaging, securing, and driving with a graduation cake, so you can confidently transport your masterpiece without worry.
Step 1: Choosing the Right Cake Box and Packaging
A. Selecting the Proper Cake Box Size
- Choose a box that is slightly larger than the cake but snug enough to prevent movement.
- For single-tier cakes: Use a sturdy cardboard cake box with a height at least 2 inches taller than the cake.
- For tiered cakes: Use a reinforced box with enough height to protect decorations.
- If transporting cupcakes or small cakes, use individual cupcake carriers to prevent tipping.
B. Using Cake Boards for Extra Stability
- Place the cake on a thick cake board (at least ½ inch thick) to provide a stable base.
- Ensure the cake board is at least 2 inches larger than the cake to allow for handling.
- If necessary, double the cake board for added strength.
C. Securing the Cake Inside the Box
- Add non-slip matting (like shelf liners or rubber grip mats) under the cake board to prevent shifting.
- Use tape or a small amount of frosting to attach the cake board to the bottom of the box for extra security.
- If the box is too large, fill empty spaces with bubble wrap or crumpled parchment paper to prevent movement.
Step 2: Preparing the Cake for Transport
A. Chilling the Cake Before Transporting
- Refrigerate the cake for at least 30–60 minutes before transport to firm up the buttercream or fondant.
- If the cake has perishable fillings (cream, fruit, custard, or whipped frosting), it must be transported in a cool environment.
- Avoid freezing unless necessary, as it may cause condensation when thawing.
B. Protecting Delicate Decorations
- If the cake has fragile decorations (sugar flowers, edible toppers, or figurines), transport them separately and attach them on-site.
- Use small boxes with tissue paper padding for fragile elements.
- Avoid placing plastic wrap directly on buttercream or fondant, as it can ruin the texture.
C. Preventing Buttercream and Fondant Melting
- If transporting in warm weather, avoid direct sunlight on the cake box.
- Keep the car’s air conditioning on full blast before placing the cake inside.
- For long distances, use gel ice packs wrapped in towels to keep the cake cool.
Step 3: Proper Placement in the Vehicle
A. Best Spot to Place the Cake for Stability
- Always place the cake on a flat surface inside the vehicle.
- DO NOT place the cake on a car seat, as the slight tilt can cause shifting.
- The best location is the flat floor of the car’s trunk or back seat.
B. Using Non-Slip Mats for Extra Grip
- Place a non-slip mat (such as rubber drawer liners or yoga mats) under the cake box to prevent sliding.
- If using a large cake board, secure it to the car’s surface with non-slip material.
C. Securing the Cake During Travel
- If transporting multiple cakes, ensure they are spaced apart and secured in their own boxes.
- Use seat belts or soft padding (like towels or pillows) to keep the cake from shifting.
- Drive cautiously, avoiding sudden stops, sharp turns, or bumpy roads.
Step 4: Driving Safely with a Cake
A. Controlling the Temperature Inside the Car
- Pre-cool the car before placing the cake inside.
- Keep the air conditioning on to prevent the frosting from melting.
- If traveling a long distance, bring a cooler bag with ice packs for extra cooling.
B. Driving Techniques to Prevent Cake Damage
- Accelerate and brake gradually to avoid sudden shifts.
- Take wider turns and drive slowly over speed bumps.
- Avoid potholes, uneven roads, and high-speed highways if possible.
- If driving for more than one hour, make periodic stops to check the cake’s stability.
C. Handling a Multi-Tiered Cake During Travel
- If transporting a fully assembled tiered cake, ensure internal supports (dowels and cake boards) are properly placed.
- If the cake is extremely tall or delicate, consider transporting tiers separately and assembling them at the venue.
- Carry extra buttercream or royal icing for quick touch-ups if needed.
Step 5: Unpacking and Setting Up the Cake at the Venue
A. Carefully Lifting the Cake Out of the Car
- Gently slide the cake box out of the vehicle, avoiding any sudden tilts.
- If carrying a large cake, ask for assistance to prevent dropping.
- Hold the cake board, not the cake itself, to maintain structural integrity.
B. Positioning the Cake at the Party Venue
- Place the cake on a sturdy table away from direct sunlight and heat sources.
- If possible, store it in a cool room until serving time.
- Avoid placing the cake near vents, candles, or other heat-emitting objects.
C. Final Touch-Ups Before Serving
- If necessary, reassemble any decorations that were transported separately.
- Use a small offset spatula to smooth any buttercream imperfections.
- Lightly dust fondant or metallic decorations with edible luster dust for extra shine.
Final Thoughts
Transporting a graduation cake safely requires careful preparation, temperature control, and secure placement to prevent damage. Whether delivering a single-tier, multi-tier, or custom-shaped cake, following these steps ensures your cake arrives fresh, intact, and ready to impress.
Would you like a checklist for cake transportation or tips on assembling a cake on-site? Let me know how I can help!
Slicing and Serving Your Cake at the Party
A beautifully decorated graduation cake deserves to be served perfectly, ensuring that every slice is neatly cut, evenly portioned, and presented elegantly. Proper slicing techniques help maintain the cake’s structure, prevent frosting smudging, and ensure that each guest receives a well-proportioned slice.
In this section, we’ll walk through the best methods for slicing and serving a graduation cake, including portion sizes, cutting techniques, and presentation tips to make serving the cake effortless and mess-free.
Step 1: Preparing to Slice the Graduation Cake
A. Gathering the Right Tools for Cake Cutting
To achieve clean and even slices, make sure you have the following:
- A long, sharp serrated knife (for soft cakes) or a chef’s knife (for dense cakes).
- A cake server or offset spatula to transfer slices neatly.
- A damp cloth or warm water for wiping the knife between cuts.
- A cake cutting guide or ruler for precision cutting, especially for tiered cakes.
B. When to Cut the Cake for Best Results
- For buttercream cakes: Let the cake sit at room temperature for 15–30 minutes to soften before slicing.
- For fondant-covered cakes: Slice immediately to avoid hardening.
- For frozen or refrigerated cakes: Allow 45–60 minutes of defrosting before cutting to prevent cracking.
C. Choosing the Right Cake Cutting Location
- Place the cake on a stable, flat surface before cutting.
- Use a cake stand or cutting board for easier maneuvering.
- Ensure there is ample space around the cake for comfortable slicing.
Step 2: How to Slice a Graduation Cake Properly
A. Cutting a Round Graduation Cake
- Start by cutting a small circle in the center (about 2 inches from the edge).
- Slice the outer ring into even portions using a grid or fan pattern.
- Continue slicing inward, working towards the center for equal-sized slices.
- This method is ideal for larger gatherings, as it maximizes servings.
B. Cutting a Square or Sheet Cake
- Use a grid-cutting technique by making horizontal and vertical cuts for even rectangular slices.
- For party servings, cut slices about 2 inches wide.
- For smaller bite-sized portions, cut slices 1 inch wide.
- Use a clean spatula to lift each slice without disrupting the cake’s structure.
C. Slicing a Tiered Cake
- Remove the top tier first by gently lifting it with a cake spatula or cake knife.
- Cut the bottom tier using the round or square-cutting method.
- If the cake has internal dowels for support, remove them carefully before slicing.
D. Serving Cupcake Cakes or Pull-Apart Cakes
- Simply allow guests to grab a cupcake rather than cutting slices.
- If cupcakes have filling or decorations, use a cake knife to cut them neatly in half for smaller servings.
Step 3: Portion Sizes for Different Guest Counts
A. Cake Serving Size Guide
The number of servings depends on cake size and thickness. Use the following guide for reference:
- 6-inch round cake → 10–12 servings
- 8-inch round cake → 20–24 servings
- 9×13-inch sheet cake → 30–40 servings
- Two-tier cake (6″ & 8″) → 30–35 servings
- Three-tier cake (6″, 8″, & 10″) → 50–60 servings
B. Adjusting Portion Sizes Based on Event Type
- For formal events: Serve smaller, evenly cut portions (1.5 x 2 inches).
- For casual parties: Serve larger slices for generous servings (2 x 3 inches).
- If serving multiple desserts, smaller cake slices work best so guests can enjoy a variety.
Step 4: Serving and Presenting the Cake
A. Choosing the Right Serving Plates & Utensils
- Use dessert plates (6-8 inches) for easy handling.
- Provide guests with forks or dessert spoons for clean eating.
- If serving cupcakes alongside the main cake, arrange them neatly around the cake stand.
B. Garnishing and Adding Final Touches
- Place fresh berries, mint leaves, or edible gold flakes on individual slices for an elegant presentation.
- Drizzle chocolate sauce or caramel on each plate for extra flair.
- Dust slices with powdered sugar or cocoa powder for a polished finish.
C. Offering Alternative Serving Options
- If serving outdoors, consider pre-sliced cake trays for easy grab-and-go servings.
- Provide napkins or cupcake liners for guests who prefer to eat without utensils.
- Offer whipped cream or ice cream scoops as side toppings.
Final Thoughts
Slicing and serving a graduation cake should be effortless and enjoyable, ensuring that every guest gets a beautifully presented slice. By following the right cutting techniques, portion sizes, and serving strategies, you can make the cake-cutting moment smooth, elegant, and mess-free.
Would you like a visual guide or printable cake cutting chart to make slicing even easier? Let me know how I can help!
Conclusion
A graduation cake is more than just a dessert—it’s a symbol of achievement, celebration, and new beginnings. Whether you choose a simple buttercream sheet cake, an elegant tiered design, or a fun and creative theme, the right cake will make the occasion even more memorable.
From selecting the perfect cake flavor and decoration style to mastering piping techniques, fondant toppers, and storage tips, this guide has provided you with everything you need to create a stunning graduation cake. By following these expert baking and decorating tips, you can confidently make a cake that will impress both the graduate and the guests.
As you prepare to celebrate this special milestone, remember that the most important ingredient in any cake is love and joy. So, whether you’re baking from scratch or ordering from a bakery, make sure your graduation cake reflects the hard work, dedication, and bright future of the graduate.
Now it’s your turn! Are you planning a graduation cake for a loved one? Share your favorite cake ideas, designs, or baking tips in the comments below. Let’s celebrate success together!
1 thought on “Graduation Cake Recipe: How to Make a Stunning Celebration Cake”