
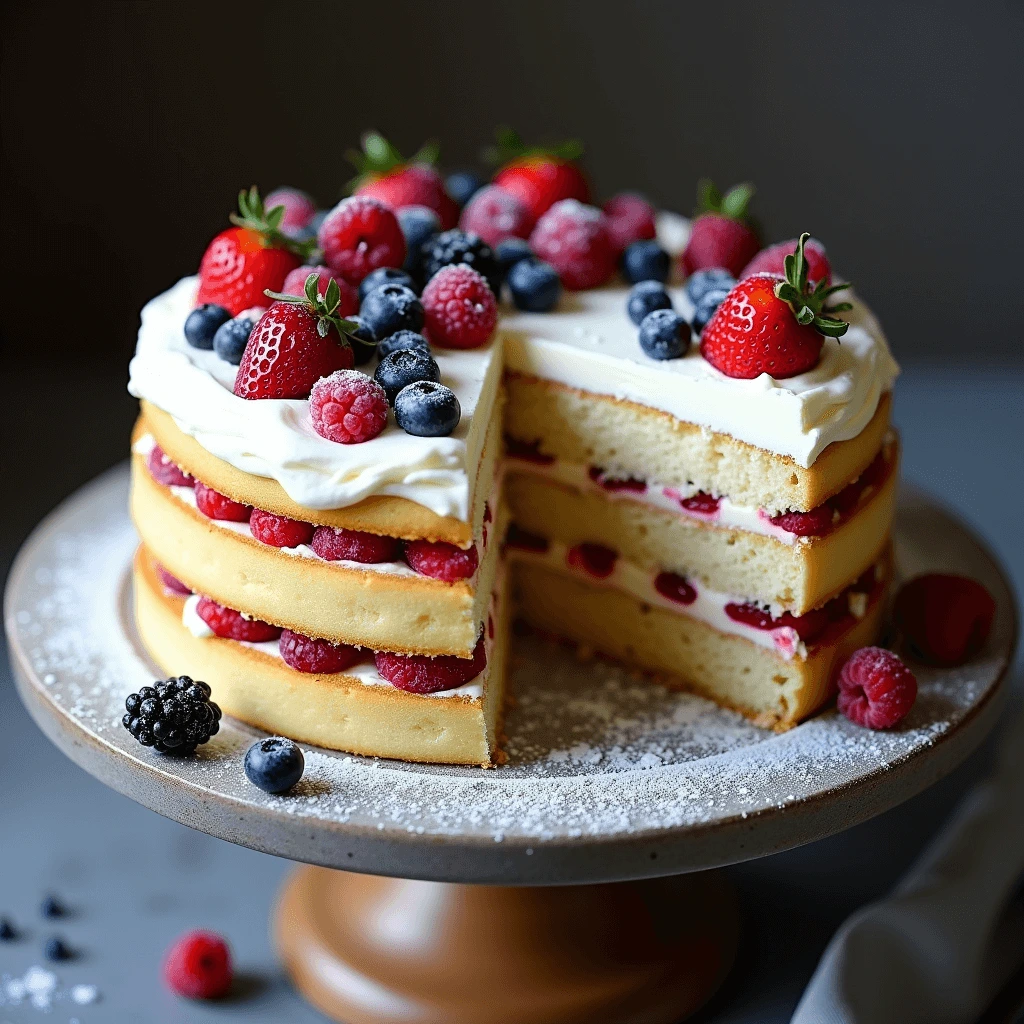
If you’ve ever strolled through a New Orleans bakery, chances are you’ve come across the Gentilly Cake—a light, fluffy dessert that’s as rich in flavor as it is in history. This elegant cake is known for its moist vanilla layers, luscious mascarpone or cream cheese frosting, and a crown of fresh berries, making it a true Southern favorite.
Unlike traditional buttercream cakes, Gentilly Cake stands out with its airy texture and fresh, natural sweetness. The combination of whipped cream frosting, delicate sponge, and vibrant fruit makes every bite melt in your mouth. Whether you’re celebrating a special occasion or simply craving a bakery-quality dessert at home, this cake is sure to impress.
In this guide, I’ll walk you through a simple, step-by-step recipe to create the perfect homemade Gentilly Cake. From choosing the right ingredients to expert decorating tips, you’ll learn everything you need to bake this New Orleans classic like a pro. Let’s get started!
What Is Gentilly Cake? A Taste of New Orleans
The History Behind Gentilly Cake – How It Became a New Orleans Favorite
Gentilly Cake is more than just a dessert—it’s a reflection of New Orleans’ rich culinary history, blending European influences with Southern baking traditions. This cake has evolved over time, gaining recognition as a staple in Louisiana bakeries and homes. But what makes it unique, and how did it earn its place as one of the most beloved cakes in the region?
The Origins: A Fusion of French and Italian Pastries
New Orleans is a city built on the flavors and traditions of French, Spanish, Italian, and Creole influences, and Gentilly Cake is a perfect example of this cultural fusion. The cake itself is often compared to classic European sponge cakes, which rely on a light, airy texture rather than the denser butter-based cakes found in traditional American baking.
French Pastry Techniques and Their Influence
The inspiration behind Gentilly Cake can be traced to French pâtisserie techniques, which emphasize delicate cake structures, whipped creams, and fruit pairings. French desserts like génoise sponge cake and fraisier cake share similarities with Gentilly Cake, especially in their use of whipped cream-based frostings and fresh berries as a natural sweetener.
One of the defining features of Gentilly Cake—the mascarpone or cream cheese frosting—is likely an adaptation of the French crème diplomat, a mixture of pastry cream and whipped cream that creates a smooth yet stable texture. Unlike traditional American buttercream, this type of frosting is lighter, less sugary, and enhances the cake’s moisture without overpowering the flavor.
Italian Influence: The Role of Mascarpone Cheese
The incorporation of mascarpone cheese into Gentilly Cake’s frosting is a distinct nod to Italian baking traditions, particularly those seen in Tiramisu. Mascarpone, a creamy and slightly tangy Italian cheese, gives the frosting a luxurious mouthfeel that contrasts beautifully with the soft vanilla cake base. This Italian touch adds depth to the cake’s overall profile, making it stand out from standard whipped cream cakes.
Why the Name “Gentilly”?
Gentilly Cake is named after Gentilly, a historic neighborhood in New Orleans, which was originally a French Creole settlement. The area became known for its bakeries, local markets, and a rich food culture that blended influences from Europe, the Caribbean, and the American South.
Gentilly Neighborhood: A Culinary Hotspot
The Gentilly area has long been a place where small, family-owned bakeries thrived, offering a mix of classic French pastries and Southern confections. It is believed that local bakers developed this cake as a response to the city’s love for light, refreshing desserts, especially during the hot Louisiana summers.
Unlike heavier cakes with thick buttercream, Gentilly Cake provided a lighter alternative, making it perfect for celebrations and gatherings. Over time, it became a favorite at weddings, birthdays, and family events, eventually making its way into mainstream bakeries across Louisiana.
Rouses Market and the Rise of Gentilly Cake
While small bakeries had been making Gentilly Cake for years, its popularity skyrocketed when Rouses Market, a well-known Louisiana-based grocery chain, started selling its signature Gentilly Cake.
The cake quickly gained a reputation for its delicate layers, rich mascarpone frosting, and vibrant berry toppings, leading to a surge in demand. Today, Rouses remains one of the top places to purchase an authentic Gentilly Cake, though many home bakers now attempt to recreate the recipe in their own kitchens.
The Evolution of Gentilly Cake Over Time
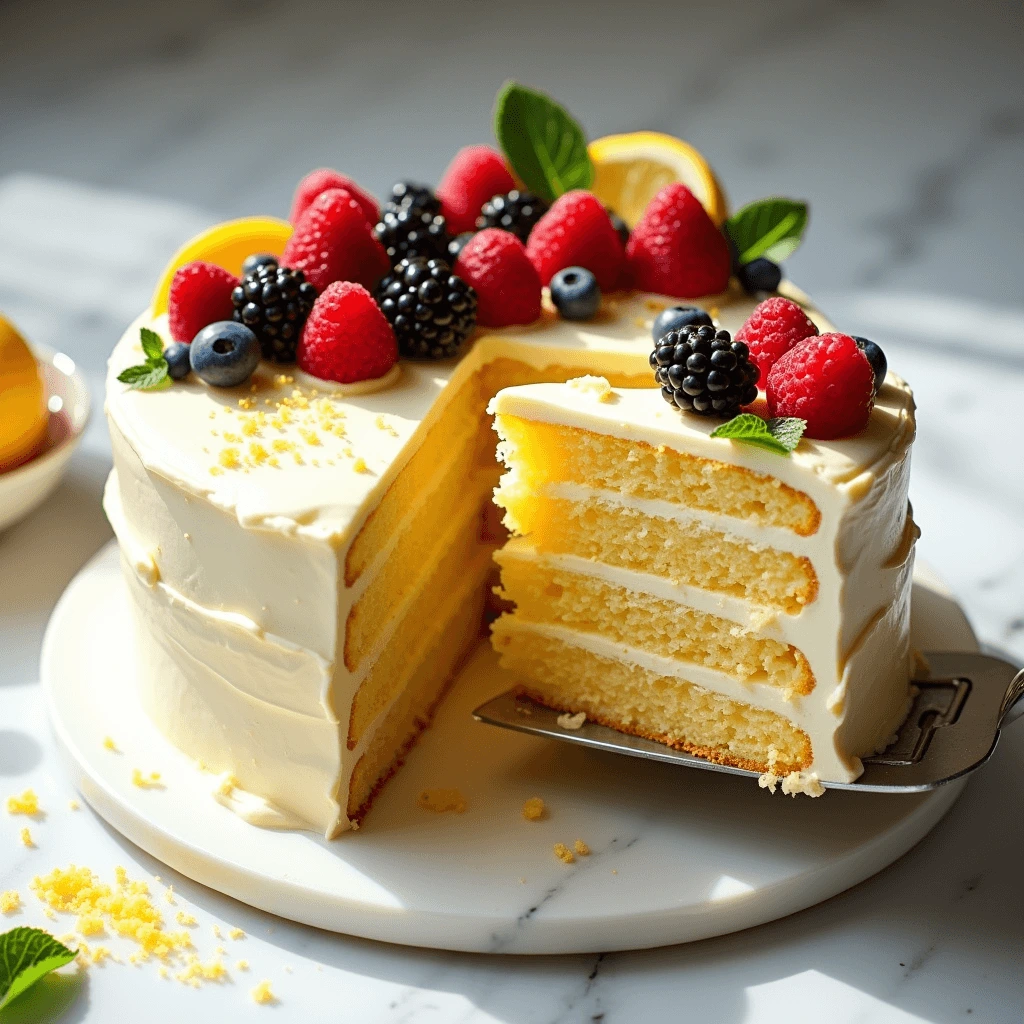
Gentilly Cake has gone through various adaptations, with bakers adding their own twists to the traditional recipe. Some variations use almond flour for added texture, while others introduce lemon zest to brighten the flavors.
Traditional vs. Modern Interpretations
- Traditional Version: Features a soft vanilla sponge, mascarpone or cream cheese frosting, and fresh berries. The cake is often soaked in a light syrup to enhance its moisture.
- Modern Variations: Some recipes incorporate almond flour, which adds a nutty depth, or a hint of lemon zest, which complements the tanginess of the frosting. Others experiment with different berry combinations, such as blackberries, pomegranate seeds, or even passion fruit.
Why Gentilly Cake Is Still a New Orleans Favorite
Despite new variations, the essence of Gentilly Cake remains the same:
- A celebration cake that is light yet indulgent
- A perfect balance of sweetness, acidity, and creaminess
- A visually stunning dessert that looks as good as it tastes
A Cake That Stands the Test of Time
From its European-inspired roots to its modern-day popularity in New Orleans bakeries, Gentilly Cake has firmly established itself as a must-try dessert for anyone who loves light, fresh, and flavorful cakes.
As this cake continues to gain recognition beyond Louisiana, more people are discovering what makes it so special. Whether you buy it from a local bakery or make it at home, one thing is certain: Gentilly Cake is here to stay.
Would you like to experience this iconic cake in your own kitchen? Keep reading for a step-by-step guide to baking the perfect homemade Gentilly Cake.
Gentilly Cake vs. Chantilly Cake – Key Differences in Ingredients and Texture
Gentilly Cake and Chantilly Cake are often confused due to their similar appearance and shared use of fresh berries and light frosting. However, these cakes have distinct differences in ingredients, flavor, and texture that set them apart. Understanding these key differences will help you choose (or bake!) the perfect cake for any occasion.
Origins and Background
Chantilly Cake: A French-Inspired Classic
Chantilly Cake traces its roots back to French pastry traditions. The term “Chantilly” is derived from Chantilly cream (crème Chantilly), a sweetened whipped cream originating from France. In classic French cuisine, Chantilly cream is used to complement delicate sponge cakes and fresh fruit desserts.
Gentilly Cake: A New Orleans Favorite
Gentilly Cake, on the other hand, is a Southern adaptation with a New Orleans twist. It was made popular by local bakeries, particularly Rouses Market, and has become a beloved Louisiana dessert. The main difference lies in the use of cream cheese or mascarpone in the frosting, which gives Gentilly Cake a richer, more tangy profile compared to the sweeter, more delicate Chantilly Cake.
Key Differences in Ingredients
Cake Base: Moisture and Structure
- Chantilly Cake is typically made with a classic butter cake or white cake, which is light and fluffy but slightly denser due to the butter content. Some variations use a génoise sponge cake, which is even airier.
- Gentilly Cake often features a moist vanilla cake base made with buttermilk, giving it a softer, more tender crumb. Some recipes incorporate almond flour, adding a subtle nuttiness and enhancing the cake’s delicate texture.
Frosting: Buttercream vs. Whipped Cream Blend
- Chantilly Cake frosting is typically a sweetened whipped cream or Chantilly cream, which is made with heavy cream, sugar, and vanilla extract. Some versions include a stabilizing agent like cornstarch or gelatin to help the cream hold its shape.
- Gentilly Cake frosting is richer, made with cream cheese or mascarpone blended with heavy cream and powdered sugar. This gives it a tangy, velvety smooth texture, making it thicker and more stable than classic Chantilly frosting.
Sweetness Level: Light vs. Decadent
- Chantilly Cake leans toward a light, subtly sweet flavor, relying on the natural sweetness of the whipped cream and berries.
- Gentilly Cake has a slightly richer taste, thanks to the mascarpone or cream cheese frosting, which adds a layer of depth and mild tanginess.
Texture and Mouthfeel
Chantilly Cake: Light and Airy
- Because Chantilly Cake uses either génoise or butter cake, its texture is soft but structured, giving each bite a delicate, melt-in-your-mouth feel.
- The whipped cream frosting is light and fluffy, complementing the cake’s airy texture.
Gentilly Cake: Creamy and Moist
- Gentilly Cake tends to be moister and slightly denser, especially when made with buttermilk or almond flour.
- The mascarpone frosting is creamier and more luxurious, creating a rich, well-balanced contrast to the fresh berries.
Fresh Berry Toppings and Flavor Profile
Both cakes are typically topped with a generous layer of fresh berries, including:
- Strawberries (adds natural sweetness)
- Blueberries (for a subtle tartness)
- Raspberries (provides a tangy, bright flavor)
However, the way the berries interact with the cake differs:
- In Chantilly Cake, the berries enhance the delicate, sweet flavor without overpowering the whipped cream.
- In Gentilly Cake, the tangy mascarpone or cream cheese frosting complements the natural acidity of the berries, creating a more balanced flavor profile.
Which Cake Should You Choose?
| Feature | Chantilly Cake | Gentilly Cake |
|---|---|---|
| Origin | French-inspired | New Orleans-style |
| Cake Base | Butter cake or génoise | Moist vanilla cake (sometimes with buttermilk) |
| Frosting | Whipped cream (Chantilly cream) | Mascarpone or cream cheese with whipped cream |
| Sweetness Level | Light and airy | Rich and slightly tangy |
| Texture | Soft and delicate | Moist, creamy, and slightly denser |
| Berry Toppings | Fresh strawberries, blueberries, raspberries | Fresh strawberries, blueberries, raspberries |
| Best For | Those who love lighter cakes with subtle sweetness | Those who enjoy richer, creamier cakes with balanced flavors |
If you’re looking for a light, fresh, and airy cake, Chantilly Cake is the perfect choice. But if you prefer a slightly richer, creamier cake with a velvety texture, then Gentilly Cake is the ultimate indulgence.
Both cakes are crowd-pleasers and perfect for special occasions. However, if you’re a fan of New Orleans flavors, making a homemade Gentilly Cake is an experience you don’t want to miss!
Next, let’s dive into the essential ingredients and step-by-step guide to making your own Gentilly Cake like a pro!
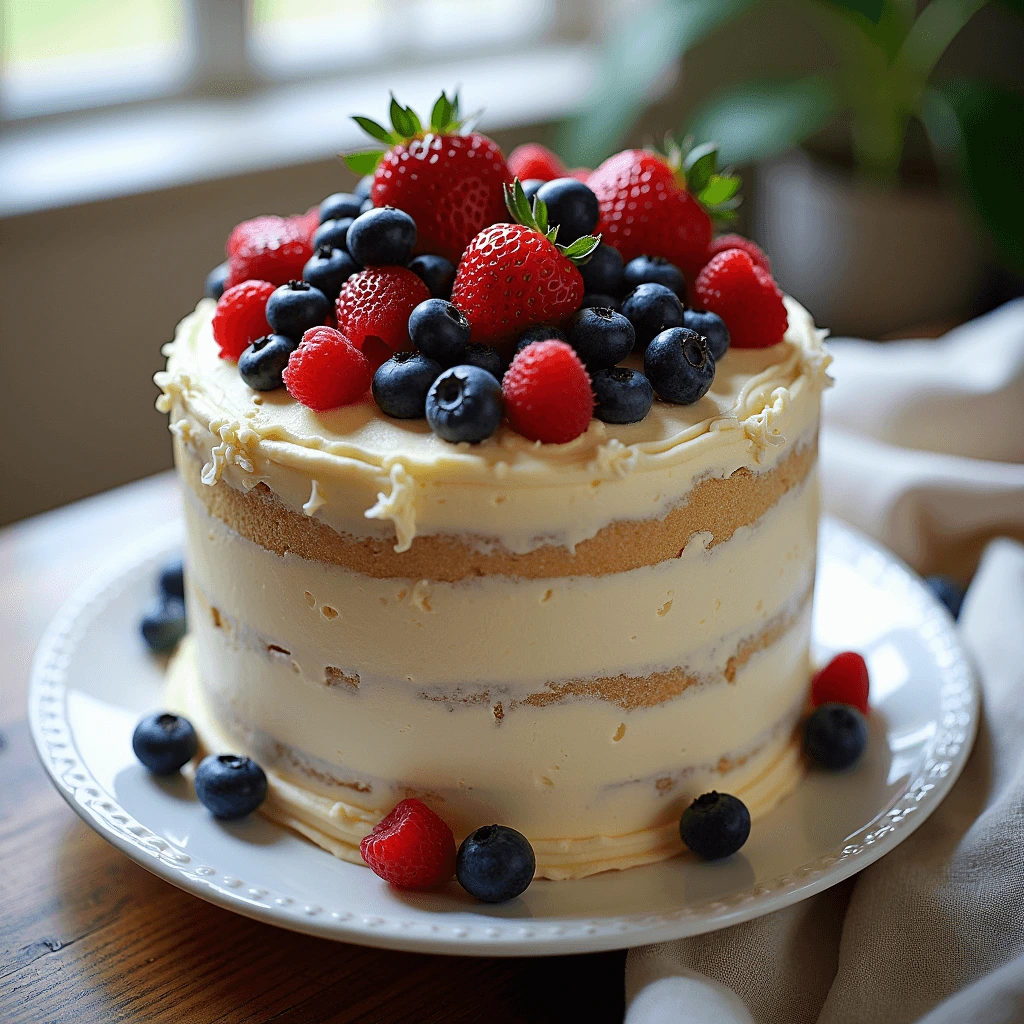
Why This Cake Is Special – Light Vanilla Cake Base, Mascarpone or Cream Cheese Frosting, and Fresh Berries
Gentilly Cake is a true standout in the world of desserts, offering a luxurious yet refreshing experience in every bite. Its delicate vanilla cake base, smooth and creamy mascarpone or cream cheese frosting, and the burst of freshness from ripe berries make it a cake like no other. Let’s break down what makes Gentilly Cake so irresistible.
The Cake Base: Light, Moist, and Buttery
Unlike denser cakes like traditional butter cakes, Gentilly Cake features a soft, airy vanilla cake base that is known for its moist and delicate crumb.
Key Ingredients That Make the Cake Base Unique
- Buttermilk – Adds a subtle tang and enhances moisture, keeping the cake soft for days.
- Almond Flour (Optional) – Some recipes include almond flour, which gives a slight nutty depth and enhances the cake’s texture.
- Egg Whites or Whole Eggs – Some versions use beaten egg whites to create a lighter, fluffier structure.
- Vanilla Extract – The rich aroma and warmth of vanilla create a classic, comforting flavor.
Texture and Flavor Profile
The base of a Gentilly Cake is not overly sweet, allowing the frosting and berries to shine. The light yet moist consistency makes it easy to eat while still feeling indulgent.
The Frosting: A Creamy Mascarpone or Cream Cheese Delight
One of the biggest factors that set Gentilly Cake apart is its signature frosting—a blend of mascarpone or cream cheese whipped with heavy cream and powdered sugar. This creates a smooth, rich, yet not overly sweet topping that perfectly complements the soft cake layers.
Mascarpone vs. Cream Cheese: What’s the Difference?
- Mascarpone Frosting – More buttery, silky, and mildly sweet, giving a velvety texture that melts in your mouth.
- Cream Cheese Frosting – Slightly more tangy and structured, providing a contrast to the sweetness of the cake and berries.
Why This Frosting Is Better Than Traditional Buttercream
- Lighter and Airier – Unlike traditional buttercream, which can feel heavy, this frosting has a whipped, mousse-like texture.
- Balanced Sweetness – The subtle tang from mascarpone or cream cheese prevents the cake from being overpoweringly sweet.
- Natural Flavor Enhancer – It pairs beautifully with fresh berries, amplifying their natural tartness and sweetness.
The Fresh Berry Topping: A Perfect Balance of Sweet and Tart
The finishing touch on a Gentilly Cake is a generous layer of fresh, juicy berries, which add vibrancy, texture, and natural sweetness.
Best Berries to Use for Gentilly Cake
- Strawberries – Provide sweetness and a bright, juicy texture.
- Blueberries – Add a mild tartness and deep flavor.
- Raspberries – Bring a sharp, tangy contrast to the creamy frosting.
- Blackberries (Optional) – Introduce a deeper, more complex berry flavor.
Why Fresh Berries Make a Difference
- Enhance Natural Sweetness – The cake itself isn’t overly sweet, so the fruity burst makes it feel naturally balanced.
- Add a Refreshing Element – Unlike heavy cakes with thick frostings, the berries make Gentilly Cake feel light and fresh.
- Provide a Stunning Visual Appeal – The contrast of red, blue, and purple berries against the creamy white frosting makes this cake as beautiful as it is delicious.
A Cake That Feels Indulgent Yet Refreshing
Gentilly Cake is decadent without being overwhelming, making it perfect for:
- Spring and summer celebrations – Its light, fresh quality makes it a great alternative to richer cakes.
- Birthdays, weddings, and special occasions – It’s elegant enough for formal events yet simple enough to enjoy any day.
- Those who love fruit-forward desserts – If you prefer fruit-based cakes over heavy chocolate or caramel ones, this is the ultimate treat.
The magic of Gentilly Cake lies in its perfect harmony of flavors and textures. The soft, vanilla-scented cake, creamy and airy frosting, and the natural sweetness of berries create a dessert that’s both luxurious and light—a true Southern favorite that deserves all the hype.
Next, let’s get into the essential ingredients you need to bake this cake at home!
Essential Ingredients for the Perfect Gentilly Cake
Cake Base Ingredients – Flour, Buttermilk, Eggs, Sugar, Vanilla Extract for a Moist and Fluffy Texture
The foundation of a perfect Gentilly Cake lies in its soft, moist, and fluffy cake base. Unlike heavier butter-based cakes, this cake is known for its light crumb and delicate structure, achieved by using high-quality ingredients in just the right proportions. Let’s break down the essential components that make this cake truly special.
Flour: The Backbone of the Cake
Flour provides the structure and stability needed for the cake to rise properly. The type of flour used plays a crucial role in determining the final texture.
Best Flour Options for Gentilly Cake
- All-Purpose Flour – The most common choice, offering a balanced texture that is neither too dense nor too airy.
- Cake Flour (Recommended for a Softer Crumb) – Contains less protein than all-purpose flour, resulting in a lighter and more tender cake. If you want an ultra-soft Gentilly Cake, cake flour is the way to go.
- Almond Flour (Optional Addition for Extra Flavor and Texture) – Some bakers add a small portion of almond flour (about ¼ cup per recipe) to introduce a subtle nutty flavor and a slightly denser but velvety crumb.
Pro Tip: How to Measure Flour Correctly
- Spoon and level method – Avoid compacting the flour by scooping directly from the bag. Instead, spoon the flour into a measuring cup and level it with a knife to prevent excess density in the batter.
Buttermilk: The Secret to Moisture and Tanginess
Buttermilk is one of the key ingredients that sets Gentilly Cake apart from traditional vanilla cakes. It adds richness, tenderness, and a slight tang that enhances the overall flavor.
Why Buttermilk is Essential
- Breaks Down Gluten – Helps create a softer, more tender texture.
- Adds Moisture Without Extra Fat – Unlike whole milk or cream, buttermilk provides richness without making the cake too heavy.
- Enhances Flavor – Its slight tang balances the sweetness of the sugar and the richness of the frosting.
Substitutes for Buttermilk (If You Don’t Have It on Hand)
If you don’t have buttermilk, you can make a quick substitute:
- Milk + Vinegar or Lemon Juice – Add 1 tablespoon of white vinegar or lemon juice to 1 cup of whole milk. Let it sit for 5-10 minutes before using.
- Greek Yogurt or Sour Cream + Water – Mix ¾ cup of Greek yogurt or sour cream with ¼ cup of water to achieve a similar consistency.
Eggs: The Binding Agent for Fluffiness
Eggs play a crucial role in the cake’s structure and texture, helping to bind the ingredients, create lift, and add richness.
Why Eggs Matter in Gentilly Cake
- Act as an emulsifier – Helps combine the fat and liquid ingredients for a smooth batter.
- Provide stability – Ensures the cake holds its shape while staying soft.
- Add moisture and richness – The yolks contribute to tenderness, while the whites help with fluffiness.
Best Practices for Using Eggs in Cake Batter
- Room Temperature is Key – Cold eggs don’t mix well with butter and sugar. Let eggs sit at room temperature for 30 minutes before using.
- Beaten Egg Whites for Extra Lightness (Optional Step) – Some bakers separate the eggs and beat the whites separately before folding them into the batter for an extra airy texture.
Sugar: Sweetness and Moisture Retention
Sugar does more than just add sweetness—it plays a vital role in moisture retention, texture, and browning.
Types of Sugar for Gentilly Cake
- Granulated Sugar – The standard choice, providing clean, balanced sweetness.
- Cane Sugar (for a Slightly Richer Flavor) – Some bakers prefer organic cane sugar, which adds a more complex, caramel-like note.
- Brown Sugar (for Extra Moisture – Optional Addition) – If you want a slightly deeper flavor and increased moisture, substitute ¼ cup of brown sugar for part of the granulated sugar.
How Sugar Affects Cake Texture
- Creates Tenderness – Sugar weakens gluten, keeping the cake soft.
- Retains Moisture – Helps prevent a dry or crumbly cake.
- Aids in Caramelization – Promotes a golden brown, slightly crisp exterior while keeping the inside moist.
Vanilla Extract: The Flavor Enhancer
Vanilla extract is a non-negotiable ingredient in Gentilly Cake, as it provides depth and warmth to the flavor profile.
Best Types of Vanilla for Baking
- Pure Vanilla Extract – Offers the most authentic, rich vanilla flavor.
- Vanilla Bean Paste – More concentrated than extract, giving a stronger aroma and visible vanilla specks in the cake.
- Almond Extract (Optional Addition for a Unique Flavor Twist) – A small amount (about ½ teaspoon) can complement the nuttiness of the cake if using almond flour.
How to Maximize Vanilla Flavor
- Add it at the Right Time – Mix vanilla into the wet ingredients before adding dry ingredients to ensure even distribution.
- Double the Vanilla for an Extra Flavor Boost – If you love a stronger vanilla presence, increase the amount slightly without overpowering the balance of flavors.
Bringing It All Together: A Perfectly Balanced Cake Base
When combined in just the right way, these ingredients create a moist, fluffy, and flavorful cake that serves as the perfect base for the rich mascarpone frosting and fresh berry topping.
Key Takeaways for the Best Gentilly Cake Base
- Use cake flour for a lighter, more delicate crumb.
- Buttermilk keeps the cake ultra-moist and tender.
- Eggs provide structure and enhance fluffiness.
- Sugar not only sweetens but locks in moisture.
- Vanilla adds depth and warmth to the cake’s flavor.
A well-made cake base is the foundation of an unforgettable Gentilly Cake. Now that we’ve covered the key ingredients, let’s move on to the whipped mascarpone or cream cheese frosting—the component that takes this cake to the next level!
Whipped Cream Frosting & Filling – Mascarpone or Cream Cheese, Heavy Cream, Powdered Sugar
The frosting and filling are what set Gentilly Cake apart from other vanilla cakes. Instead of a thick buttercream, this cake is topped with a light, airy, and creamy whipped frosting that melts in your mouth while perfectly complementing the fresh berries. The secret to its silky yet stable texture lies in the use of mascarpone or cream cheese combined with heavy cream and powdered sugar.
Why This Frosting Stands Out
Unlike traditional buttercream, which can feel dense and overly sweet, this whipped cream frosting is:
- Light and airy – It creates a smooth texture that doesn’t overpower the cake.
- Slightly tangy – The addition of mascarpone or cream cheese balances the sweetness.
- Less sugary – Since it relies on powdered sugar, it has a delicate sweetness without being overwhelming.
- Pairs perfectly with fresh berries – The tanginess enhances the natural flavors of the strawberries, blueberries, and raspberries.
Key Ingredients for the Perfect Frosting
Mascarpone or Cream Cheese: The Foundation of the Frosting
The choice between mascarpone and cream cheese depends on the flavor and texture you prefer.
- Mascarpone Cheese – A rich Italian cheese with a buttery, slightly sweet taste. It gives the frosting a silky texture without overpowering the flavors.
- Cream Cheese – Slightly tangier and firmer than mascarpone, it adds more structure to the frosting and a hint of acidity, which contrasts beautifully with the sweet cake.
Heavy Cream: The Secret to Airiness
Heavy cream is what makes this frosting whipped and airy. When beaten properly, it creates soft peaks that hold their shape without becoming too stiff.
- Use heavy whipping cream with at least 36% fat content for the best results.
- Chill the cream before whipping to achieve maximum fluffiness.
- Whip just until soft peaks form—overbeating can lead to a grainy texture.
Powdered Sugar: Gentle Sweetness and Stability
Unlike granulated sugar, powdered sugar dissolves easily, making the frosting silky smooth. It also contains a small amount of cornstarch, which helps stabilize the frosting.
- Adds gentle sweetness without making the frosting too heavy.
- Helps hold the structure of the whipped cream for a longer period.
- Enhances the creamy consistency by preventing excess liquid separation.
How to Make the Perfect Whipped Cream Frosting
Step 1: Chill Your Ingredients and Tools
For the best results, make sure everything is cold before starting:
- Chill the mixing bowl and beaters in the freezer for 10–15 minutes.
- Use cold mascarpone or cream cheese (but not rock hard) to prevent the frosting from becoming too soft.
Step 2: Whip the Heavy Cream
- Pour cold heavy cream into the chilled mixing bowl.
- Using a hand mixer or stand mixer, beat the cream on medium-high speed until it starts to thicken.
- Add powdered sugar gradually and continue whipping until soft peaks form.
Step 3: Incorporate the Mascarpone or Cream Cheese
- In a separate bowl, beat the mascarpone or cream cheese until smooth.
- Slowly fold it into the whipped cream mixture, being careful not to deflate the air in the frosting.
- Continue mixing on low speed until the frosting is fully combined and holds its shape.
Step 4: Adjust the Consistency
- If the frosting is too soft, chill it in the refrigerator for 10–15 minutes before using.
- If the frosting is too thick, add a splash of heavy cream and mix gently.
Pro Tips for a Stable and Smooth Frosting
- Don’t overwhip the cream – Stop once soft peaks form to avoid a grainy texture.
- If using cream cheese, let it soften slightly before beating to prevent lumps.
- For extra flavor, add a splash of vanilla extract or almond extract to enhance the richness.
- If your frosting is too loose, refrigerate for 30 minutes before applying to the cake.
How to Use the Frosting in Gentilly Cake
This frosting is perfect for both filling and decorating the cake.
Layering the Cake
- Spread a thin, even layer of frosting between each cake layer.
- Add fresh berries between the layers for extra texture and flavor.
- Ensure the top layer is level before applying the final coat of frosting.
Decorating the Cake
- Use an offset spatula to smooth out the frosting.
- Pipe additional whipped cream around the edges for a bakery-style look.
- Garnish with fresh strawberries, blueberries, and raspberries for a beautiful finish.
A Frosting That Complements Every Bite
The combination of mascarpone or cream cheese, whipped cream, and powdered sugar creates a frosting that is light yet rich, creamy yet not overpowering. This silky-smooth topping is what makes Gentilly Cake a true indulgence, balancing sweetness, tartness, and texture in every forkful.
Now that the frosting is ready, let’s move on to the final touch—the fresh berry topping that gives this cake its signature look and flavor!
Fresh Berry Toppings – Strawberries, Blueberries, Raspberries for a Balanced Sweetness
A signature element of Gentilly Cake is its fresh berry topping, which enhances both the flavor and visual appeal of this elegant dessert. Unlike traditional cakes that rely heavily on sugar-based decorations, Gentilly Cake is adorned with ripe, juicy berries that bring a natural sweetness, a touch of tartness, and a vibrant color contrast to the creamy white frosting. The selection and arrangement of these berries are crucial to achieving a perfect balance of flavors, textures, and aesthetics.
The Role of Fresh Berries in Gentilly Cake
Berries do more than just make the cake look beautiful; they play an essential role in defining its flavor complexity and mouthfeel. Each type of berry contributes unique characteristics that, when combined, create a harmonious and refreshing experience.
Enhancing Natural Sweetness
Unlike butter-heavy cakes that rely on frosting for sweetness, Gentilly Cake benefits from the delicate, fruity notes of fresh berries. The natural sugars in strawberries, blueberries, and raspberries infuse the cake with layers of subtle sweetness, ensuring that every bite is balanced without being overly sugary.
Creating a Refreshing Contrast
The light and airy texture of the whipped mascarpone or cream cheese frosting pairs beautifully with the juicy, slightly tangy nature of the berries. This contrast between creamy and fresh elements keeps the cake from feeling too rich, making it an ideal dessert for warmer weather and festive occasions.
Adding Visual Appeal
Beyond taste, fresh berries transform the cake into an eye-catching masterpiece. Their deep reds, blues, and purples stand out against the pale white frosting, making the cake appear as luxurious as it tastes.
Selecting the Best Berries for Optimal Flavor and Texture
To achieve the ideal balance of flavors, it’s important to use high-quality, fresh berries that complement each other.
Strawberries: The Sweet Foundation
- Provide a mild, juicy sweetness with a soft texture.
- Offer a bright red color, enhancing the cake’s visual appeal.
- Work well sliced thinly for layering or halved for decorative topping.
Blueberries: The Subtle Flavor Enhancer
- Contribute a deep, mellow sweetness with a slightly floral undertone.
- Their firm, plump texture contrasts with the softness of the frosting.
- Their small size makes them perfect for scattering across the cake without overpowering other elements.
Raspberries: The Tangy Accent
- Deliver a burst of tartness, which helps balance the cake’s sweetness.
- Have a delicate structure, making them ideal for placing on top rather than inside the cake layers.
- Their deep red hue adds a bold contrast that enhances the overall presentation.
How to Properly Prepare Berries for Maximum Freshness
To ensure that the berries retain their flavor, texture, and vibrant appearance, proper preparation is essential.
Washing and Drying
- Rinse the berries under cold running water just before using them to avoid premature softening.
- Place them on a paper towel or clean cloth to absorb excess moisture.
- Gently pat dry each berry individually, especially raspberries, to prevent them from becoming soggy.
Cutting and Slicing for Even Distribution
- Strawberries should be hulled and sliced thinly if used between cake layers. For the topping, they can be halved or quartered for a more decorative appearance.
- Blueberries can be used whole, but if they are large, they can be cut in half to release more juices into the cake.
- Raspberries are best left whole, as their fragile nature can cause them to disintegrate if cut.
Preventing Berries from Bleeding into the Frosting
To keep the cake looking pristine and avoid color bleeding:
- Place a thin layer of frosting between the cake layers before adding berries to create a barrier.
- Avoid pressing the berries into the frosting too firmly, as their natural juices may seep out.
- If preparing the cake ahead of time, add the berries just before serving to maintain their vibrant color and fresh taste.
Arranging Berries for a Stunning Presentation
The placement of berries on the cake affects both its aesthetic appeal and eating experience. A well-arranged topping can elevate the overall look while ensuring that every bite contains the perfect mix of flavors.
Layering Berries Between Cake Layers
- Thinly sliced strawberries should be evenly spread across the frosting to create a stable and flavorful middle layer.
- A handful of blueberries can be scattered between the layers for added texture.
- Raspberries should be used sparingly inside the cake to prevent excess moisture from softening the layers.
Decorating the Top of the Cake
There are multiple ways to style the cake using fresh berries:
- Classic Circular Pattern: Arrange strawberry halves in a concentric circle, then fill the center with a mix of blueberries and raspberries.
- Rustic Mixed Berry Look: Scatter the berries randomly for a more natural, effortless appeal.
- Alternating Layers: Place alternating rows of strawberries and blueberries for a clean, modern finish.
- Elegant Drizzle Effect: For a bakery-style touch, lightly dust the berries with powdered sugar or drizzle with honey or a simple syrup glaze.
Garnishing the Sides of the Cake
- Whole berries can be pressed gently into the lower sides of the cake for an added decorative element.
- Sliced strawberries can be fanned out along the base of the cake, creating an elegant border.
How to Store a Berry-Topped Gentilly Cake for Maximum Freshness
Since berries are delicate and prone to softening, proper storage is key to maintaining the cake’s integrity.
Short-Term Storage (Same Day Serving)
- If serving within a few hours, store the cake uncovered in the refrigerator to keep the frosting firm.
- Remove the cake 15–20 minutes before serving to allow it to return to a slightly softer texture.
Overnight Storage
- Cover the cake loosely with plastic wrap or place it in a cake box to prevent moisture loss.
- If possible, store the berries separately and add them just before serving to maintain their firmness.
Long-Term Storage (Freezing Tips)
- If you need to store the cake for a longer period, avoid freezing it with fresh berries.
- Instead, freeze the cake and frosting separately, then add fresh berries after thawing for a just-made appearance.
Why Fresh Berries Make Gentilly Cake an Iconic Dessert
The inclusion of fresh berries in Gentilly Cake is not just about taste—it’s about creating a truly balanced and refreshing dessert. The interplay of sweet, tart, and creamy flavors ensures that this cake stands out from traditional buttercream-heavy cakes, making it a favorite for celebrations, weddings, and warm-weather gatherings.
By carefully selecting, preparing, and arranging fresh berries, you can transform a simple cake into a visually stunning and flavor-packed masterpiece that delivers an unforgettable taste experience with every slice.
Now that the berries are perfectly placed, it’s time to assemble the entire cake and enjoy the ultimate Gentilly Cake experience!
Optional Additions – Almond Flour for Texture, Lemon Zest for Freshness, or a Hint of Almond Extract
Enhancing the Gentilly Cake with subtle, well-balanced additions can elevate its flavor profile and texture to new heights. While the traditional recipe is already a delicate blend of light vanilla cake, airy whipped frosting, and fresh berries, incorporating almond flour, lemon zest, or almond extract can introduce depth, complexity, and an extra touch of sophistication. These optional ingredients work harmoniously to enhance the cake’s natural qualities without overpowering its signature lightness.
Almond Flour: Enhancing Texture and Structure
Gentilly Cake is known for its soft, tender crumb, and almond flour can be a game-changer in further refining its structure. When used correctly, it can add richness, slight density, and a nutty undertone that subtly enhances the overall flavor experience.
The Role of Almond Flour in Cake Baking
Almond flour is derived from finely ground blanched almonds, making it naturally gluten-free and higher in healthy fats than traditional wheat flour. This results in a moist, slightly dense cake with a more delicate texture than regular flour alone can provide.
How Almond Flour Improves Cake Quality
- Adds Moisture Retention – Due to its higher fat content, almond flour helps the cake stay moist for longer periods without becoming greasy.
- Provides a Soft, Buttery Texture – Unlike wheat flour, which can develop gluten and become tough, almond flour gives the cake a velvety, melt-in-your-mouth consistency.
- Enhances Nutritional Value – Almonds are rich in vitamin E, protein, and fiber, making the cake slightly more nutrient-dense without compromising taste.
- Pairs Well with Vanilla and Berries – The mild nuttiness of almond flour subtly enhances the natural sweetness of vanilla extract and fresh fruit toppings.
How to Incorporate Almond Flour Properly
To ensure the best results, almond flour should be used in proportion with all-purpose or cake flour rather than as a full substitute.
- Replace ¼ to ½ cup of all-purpose flour with almond flour to introduce a nutty depth without making the cake overly dense.
- Sift the almond flour before adding it to the batter to prevent clumping and ensure an even texture.
- Adjust the liquid content slightly if using a higher percentage of almond flour, as it absorbs moisture differently than wheat flour.
Lemon Zest: A Natural Flavor Enhancer
Lemon zest is a powerful yet delicate ingredient that can brighten the cake’s overall profile without adding liquid or affecting texture.
Why Lemon Zest Works in Gentilly Cake
- Amplifies the Freshness – The natural oils in lemon zest contain intense citrus aromas, which add a refreshing contrast to the cake’s creamy mascarpone frosting and rich vanilla base.
- Balances the Sweetness – Gentilly Cake is mildly sweet, and a small amount of lemon zest introduces a hint of tartness that keeps the flavors from becoming one-dimensional.
- Enhances the Berries – Since strawberries, blueberries, and raspberries contain natural acidity, lemon zest subtly amplifies their fruity tang while creating a more cohesive flavor experience.
Best Ways to Incorporate Lemon Zest
Lemon zest can be added in various stages of the cake-making process to achieve different effects.
- In the Cake Batter – Add 1 teaspoon of finely grated lemon zest to the wet ingredients before mixing. This allows the natural oils to infuse the batter for a light citrus undertone.
- In the Frosting – Blend ½ teaspoon of lemon zest into the mascarpone or cream cheese frosting to create a subtly tangy contrast that complements the richness.
- As a Garnish – Lightly grate lemon zest over the finished cake just before serving to add a fragrant, fresh finish.
Tips for Using Lemon Zest Correctly
- Use organic lemons when possible to avoid pesticide residue on the peel.
- Grate only the yellow part of the peel—avoid the white pith, as it is bitter.
- If using zest in the batter, rub it into the sugar first before mixing to release more essential oils.
Almond Extract: A Touch of Sophistication
Almond extract is a potent, aromatic enhancer that works exceptionally well in vanilla-based cakes, providing a unique depth of flavor without overpowering the delicate balance of ingredients.
How Almond Extract Affects the Cake’s Flavor Profile
- Enhances the Cake’s Aroma – Almond extract adds a slightly floral, nutty note that intensifies the cake’s sweet and buttery components.
- Works in Harmony with Vanilla Extract – While vanilla extract provides warmth and depth, almond extract offers a bright, slightly fruity undertone that complements it beautifully.
- Pairs Well with Mascarpone Frosting – The slight nuttiness of almond extract blends seamlessly with the creaminess of mascarpone or cream cheese, making the frosting taste more sophisticated.
How to Use Almond Extract Effectively
Since almond extract is more potent than vanilla extract, it should be used in moderation to avoid overpowering the cake.
- In the Cake Batter – Add ¼ teaspoon of almond extract along with vanilla extract to subtly enhance the overall flavor.
- In the Frosting – Use ⅛ teaspoon of almond extract if you want a delicate nutty aroma without overwhelming the mascarpone’s natural richness.
- In a Syrup Glaze – Mix a drop of almond extract with simple syrup and lightly brush over the cake layers before frosting for a hint of sweetness and extra moisture.
Combining These Ingredients for the Ultimate Gentilly Cake
The beauty of these optional additions lies in their ability to enhance, rather than overpower, the cake’s classic flavors. The right combination of almond flour, lemon zest, and almond extract can transform a traditional Gentilly Cake into a signature, bakery-quality dessert.
For a Nutty, Buttery Variation
- Replace ¼ cup of all-purpose flour with almond flour.
- Add ¼ teaspoon of almond extract to the batter.
- Decorate the top with slivered almonds for added crunch and visual appeal.
For a Light, Refreshing Citrus Twist
- Incorporate 1 teaspoon of lemon zest into the cake batter.
- Blend ½ teaspoon of lemon zest into the mascarpone frosting.
- Garnish the cake with a final dusting of zest and fresh blueberries to enhance the tartness.
For a Balanced and Complex Flavor Profile
- Use a combination of vanilla and almond extract to achieve a multi-layered taste.
- Add a small amount of almond flour to enhance texture while keeping the cake light.
- Complement the almond notes with a touch of citrus zest in the frosting.
Why These Additions Make a Difference
Each of these enhancements serves a specific purpose in creating a more refined, nuanced flavor experience. Whether you choose to highlight the nutty richness of almonds, the fresh brightness of citrus, or a delicate fusion of both, these small adjustments can make your Gentilly Cake taste truly exceptional.
With these flavor-boosting techniques, your homemade Gentilly Cake will not only be a personal favorite but also a showstopper that rivals the best bakeries. Now that the ingredients are perfected, it’s time to assemble, frost, and garnish the ultimate Gentilly Cake for an unforgettable dessert experience.
Step-by-Step Guide: How to Make Gentilly Cake at Home
Preparing the Cake Batter – Mixing Dry and Wet Ingredients for the Perfect Light and Fluffy Base
A well-prepared cake batter is the foundation of a light, airy, and moist Gentilly Cake. Achieving the perfect fluffy texture requires the right balance of ingredients, proper mixing techniques, and attention to detail. The secret lies in properly incorporating dry and wet ingredients to create a batter that bakes into a tender, soft, and flavorful cake.
The Importance of Proper Mixing Techniques
Each ingredient in the cake batter serves a crucial function, and how they are mixed determines the final texture. Overmixing can result in a dense, tough cake, while undermixing can lead to uneven textures and pockets of dry flour.
Key Goals in Mixing Cake Batter
- Achieve a homogeneous, smooth consistency with no lumps.
- Develop a light structure that bakes into a soft, tender crumb.
- Prevent overworking the gluten, which can make the cake too chewy.
- Incorporate air into the batter for a fluffy rise and delicate texture.
Step-by-Step Guide to Mixing the Batter
Step 1: Sift and Combine Dry Ingredients
Sifting the dry ingredients helps aerate the flour, ensuring a light and even texture in the final cake.
- All-Purpose or Cake Flour – Provides structure and stability.
- Almond Flour (Optional) – Enhances softness and adds a nutty depth.
- Baking Powder & Baking Soda – Essential leavening agents that help the cake rise.
- Salt – Enhances flavor and balances sweetness.
How to Properly Mix Dry Ingredients
- In a large bowl, sift the flour, baking powder, baking soda, and salt to remove any lumps.
- Use a whisk to evenly distribute the leavening agents and salt throughout the flour.
- If using almond flour, ensure it is well-blended with the dry ingredients to prevent clumping.
Step 2: Creaming Butter and Sugar for a Light Texture
The creaming process is one of the most important steps in achieving a soft, fluffy cake texture. This method helps incorporate air into the batter, resulting in a lighter and more delicate crumb.
- Use room temperature butter for the best consistency.
- Beat the butter and sugar together on medium-high speed for 2-4 minutes until the mixture is light, pale, and fluffy.
- Proper creaming creates tiny air pockets that expand during baking, leading to a moist yet airy cake.
Why Granulated Sugar is Best for Creaming
Granulated sugar is preferred because its crystalline structure helps break down the butter, allowing more air to be incorporated. This is key to achieving the signature fluffiness of Gentilly Cake.
Step 3: Incorporate Eggs One at a Time
Eggs play a critical role in binding the ingredients, adding structure, and enhancing moisture.
- Add eggs one at a time, mixing well after each addition.
- This prevents the batter from separating and ensures even distribution of the eggs’ proteins and fats.
- Use room temperature eggs to help them blend smoothly with the butter mixture.
Egg Separation Method for Extra Lightness
For an even fluffier cake, consider separating the egg whites and yolks:
- Beat the egg yolks into the butter mixture.
- Separately whip the egg whites to soft peaks, then fold them into the batter at the end for extra aeration.
Step 4: Add Vanilla Extract and Optional Almond Extract
Vanilla extract provides warmth and depth, while a touch of almond extract enhances the nutty undertones of the cake.
- Use pure vanilla extract for the best flavor.
- If using almond extract, add only ¼ teaspoon to prevent overpowering the vanilla.
Step 5: Alternate Adding Dry Ingredients and Buttermilk
To ensure a smooth, lump-free batter, the dry and wet ingredients should be incorporated gradually and in alternating additions.
- Start by adding ⅓ of the dry ingredients to the butter mixture, then mix on low speed just until combined.
- Add ½ of the buttermilk, then mix again until just incorporated.
- Repeat this process: another ⅓ of dry ingredients, the remaining buttermilk, and then the final portion of dry ingredients.
Why Alternating Wet and Dry Ingredients Matters
- Helps maintain a stable emulsion, preventing curdling.
- Ensures the flour is evenly hydrated, creating a smooth and well-balanced batter.
- Keeps the batter light and airy, avoiding overdevelopment of gluten.
Step 6: Fold in Lemon Zest (If Using)
If adding lemon zest for a fresh citrus note:
- Gently fold it into the batter using a spatula to avoid deflating the air bubbles.
- Make sure it’s evenly distributed for a consistent flavor throughout the cake.
Step 7: The Final Mix – Do Not Overbeat
Once all ingredients are incorporated, give the batter a final gentle mix by hand with a rubber spatula to ensure everything is blended.
- Avoid overmixing, as this can cause the cake to be dense and tough.
- The batter should be smooth and slightly thick, but not runny.
Testing the Batter for the Right Consistency
Before pouring the batter into cake pans, check for these signs of a well-mixed batter:
- Light and slightly airy – Should not be too dense or too liquid.
- Smooth with no visible streaks of dry flour or butter.
- Holds its shape but still flows off a spoon when lifted.
Final Step: Transferring Batter to Cake Pans
Prepping the Cake Pans
- Grease cake pans with butter or non-stick baking spray.
- Line the bottoms with parchment paper for easy release.
Dividing the Batter Evenly
- Pour the batter evenly into prepared cake pans, smoothing out the tops with a spatula.
- Tap the pans gently on the counter to release any trapped air bubbles.
Baking Temperature and Time
- Preheat the oven to 325°F (163°C) for a gentle bake that prevents over-browning.
- Bake for 30-35 minutes, or until a toothpick inserted in the center comes out clean.
Cooling the Cakes Properly
- Let the cakes cool in the pans for 10 minutes before transferring to a wire rack.
- Allow them to cool completely before frosting, as warm cakes can cause the frosting to melt.
Why Proper Mixing Creates the Best Gentilly Cake
A well-mixed batter ensures that Gentilly Cake has:
- A soft, cloud-like crumb that melts in the mouth.
- Even baking and rise, with no dense or heavy spots.
- A delicate flavor balance where vanilla, almond, and citrus complement each other seamlessly.
By mastering the art of mixing wet and dry ingredients, you’re setting the stage for a light, flavorful, and bakery-quality Gentilly Cake. Now that the batter is ready, it’s time to move on to baking and assembling the perfect cake layers for a stunning final presentation.
Baking the Cake Layers – Oven Temperature, Baking Time, and Tips to Prevent Dryness
A perfectly baked Gentilly Cake is moist, tender, and evenly risen, with a light golden color and a delicate crumb. Achieving this requires precise control over oven temperature, proper baking time, and techniques to retain moisture. Even the most well-mixed batter can be ruined if the cake is overbaked, unevenly cooked, or dried out. By following the right steps, you’ll ensure your cake layers come out fluffy, soft, and bakery-perfect every time.
Setting the Right Oven Temperature for a Perfect Bake
Temperature control is one of the most critical factors in baking a cake that is neither too dry nor undercooked.
The Ideal Baking Temperature for Gentilly Cake
- Preheat the oven to 325°F (163°C) for a gentle, even bake.
- This temperature prevents the cake from browning too quickly on the outside while allowing the inside to bake thoroughly.
- If baking at 350°F (177°C), reduce the baking time slightly to avoid drying out the layers.
Why Lower Temperatures Work Best for This Cake
- Allows even heat distribution – Baking at a moderate temperature ensures gradual rise and a uniform crumb.
- Prevents cracking – A lower temperature minimizes the risk of the cake developing deep cracks or doming in the center.
- Preserves moisture – Slower baking reduces the likelihood of excess moisture loss, keeping the cake soft and tender.
Choosing the Right Bakeware for Even Layers
Best Cake Pans for Gentilly Cake
- Use two or three 8-inch round cake pans for standard layers.
- Opt for light-colored aluminum pans – Darker pans absorb more heat, which can lead to over-browning and dryness.
- If using a glass or ceramic dish, reduce the oven temperature by 10-15°F, as these materials retain more heat.
How to Properly Prepare the Cake Pans
- Grease and Flour – Coat the pans with butter or non-stick baking spray, then dust lightly with flour to prevent sticking.
- Use Parchment Paper – Lining the bottom of each pan with parchment paper ensures an effortless release after baking.
- Tap Out Air Bubbles – Once the batter is poured, gently tap the pans on the counter to eliminate any trapped air pockets that could cause uneven baking.
Determining the Correct Baking Time
The baking time varies depending on pan size and cake thickness.
Recommended Baking Times
- Two 8-inch layers – Bake for 30-35 minutes.
- Three 8-inch layers (thinner layers) – Bake for 22-28 minutes.
- Sheet cake (9×13-inch pan) – Bake for 35-40 minutes.
How to Know When the Cake Is Done
Instead of relying solely on baking time, test the cake for doneness using the following methods:
- Toothpick Test – Insert a toothpick in the center of the cake. If it comes out clean or with a few moist crumbs, the cake is ready.
- Spring-Back Test – Gently press the center of the cake with your finger. If it springs back without leaving an indentation, it’s fully baked.
- Edge Pulling Test – The cake should slightly pull away from the sides of the pan, indicating it has finished baking.
What to Do If the Cake Is Undercooked
- If the center is still wet but the edges are done, cover the cake loosely with foil and bake for an additional 5-10 minutes at lower heat (300°F/150°C).
- Avoid opening the oven door too often, as this can cause the cake to collapse due to sudden temperature changes.
Preventing Dryness and Ensuring Moist Layers
A moist cake starts with the right ingredients and mixing technique, but baking techniques also play a key role in retaining moisture.
Tips to Prevent a Dry Cake
- Do Not Overbake – Check for doneness 5 minutes before the minimum baking time to prevent over-drying.
- Use Buttermilk in the Batter – Buttermilk naturally adds moisture and tenderness to the cake layers.
- Avoid Overmixing the Batter – Overworking the flour develops excess gluten, leading to a tough texture.
- Bake in the Center Rack – Placing the cake in the middle of the oven ensures even heat distribution.
Trapping Moisture After Baking
Once the cake is baked, cooling it properly is just as important as baking time.
- Cool in the Pan for 10 Minutes – Let the cake rest in the pan before transferring it to a wire rack. Removing it too soon may cause it to break apart.
- Wrap the Cake While Still Warm – If storing the cake layers for later use, wrap them in plastic wrap while they are slightly warm. This helps trap steam and moisture inside the cake.
- Brush with a Simple Syrup – For an extra layer of moisture, lightly brush the cake with simple syrup (equal parts sugar and water, boiled until dissolved) before frosting.
What to Do If the Cake Turns Out Too Dry
If the cake layers have lost too much moisture, there are ways to salvage them before assembling the final dessert.
Moisture-Boosting Solutions
- Apply a Syrup Soak – A simple mixture of sugar, water, and vanilla can be brushed onto the cake layers to add back some lost moisture.
- Use a Thicker Frosting Layer – A slightly more generous amount of mascarpone frosting can help counteract dryness.
- Refrigerate with Plastic Wrap Overnight – If the cake feels dry immediately after baking, wrap it in plastic wrap and refrigerate overnight. The moisture will redistribute throughout the cake.
Why Proper Baking Leads to the Best Gentilly Cake
By maintaining consistent oven temperatures, baking for the correct time, and using moisture-retaining techniques, you’ll achieve a perfectly baked, soft, and fluffy Gentilly Cake.
Once the layers are fully baked and cooled, the next step is to assemble the cake, apply the rich mascarpone frosting, and layer it with fresh berries for the ultimate bakery-quality dessert.
Making the Whipped Cream Frosting – How to Achieve a Smooth, Stable Frosting with Cream Cheese or Mascarpone
A Gentilly Cake is incomplete without its signature whipped cream frosting, a light and creamy topping that sets it apart from traditional buttercream-based cakes. Unlike heavy frostings that rely on butter, this airy, slightly tangy, and perfectly balanced frosting is made with cream cheese or mascarpone, heavy cream, and powdered sugar. Achieving the right texture, stability, and flavor requires precise techniques to ensure the frosting is smooth, velvety, and holds its shape without deflating or becoming runny.
Choosing the Right Base: Cream Cheese vs. Mascarpone
Both cream cheese and mascarpone work well for whipped cream frosting, but they offer slightly different textures and flavor profiles.
Mascarpone: The Silky Italian Classic
- Mildly sweet and buttery with a delicate richness.
- Higher fat content than cream cheese, which makes it more naturally stable.
- Results in a smoother, silkier frosting with a mild, creamy taste.
Cream Cheese: The Tangy, Structured Alternative
- Slightly firmer texture with a tangy, more pronounced flavor.
- Adds a bit more structure to the frosting, helping it hold up better over time.
- Works well for those who prefer a more balanced sweet-tart contrast in the frosting.
Which One to Choose?
- For a richer, creamier, and slightly softer frosting, use mascarpone.
- For a tangier, slightly firmer frosting that holds its shape longer, use cream cheese.
- You can also blend both together (50/50 ratio) to get the best of both worlds—creaminess from mascarpone and stability from cream cheese.
The Importance of Heavy Cream in Whipped Frosting
Heavy cream is what aerates the frosting, making it fluffy and light. However, whipping cream properly is essential to ensure it holds its structure without becoming grainy or overbeaten.
Choosing the Right Heavy Cream
- Use heavy whipping cream with at least 36% fat content to ensure it whips up properly.
- Avoid ultra-pasteurized cream, as it doesn’t whip as well as regular heavy cream.
Why Heavy Cream Must Be Cold
- Cold cream whips up faster and holds its shape longer.
- Warm cream won’t aerate properly and may turn runny instead of forming soft peaks.
- For best results, chill the bowl and beaters before whipping to maintain a cold temperature.
Step-by-Step Guide to Making the Perfect Whipped Cream Frosting
Step 1: Chill All Your Equipment
- Place the mixing bowl and beaters in the freezer for at least 15 minutes before starting.
- Keep the heavy cream and mascarpone or cream cheese refrigerated until just before using.
Step 2: Beat the Cream Cheese or Mascarpone Until Smooth
- In a large mixing bowl, beat mascarpone or cream cheese using a hand mixer or stand mixer on medium speed until smooth and creamy (about 30–45 seconds).
- Scrape down the sides of the bowl to ensure no lumps remain.
Step 3: Slowly Add Powdered Sugar and Vanilla Extract
- Gradually add powdered sugar (½ cup at a time) and mix on low speed until fully incorporated.
- Add 1 teaspoon of pure vanilla extract to enhance the flavor.
- Increase the speed slightly and beat until the mixture becomes light and fluffy.
Step 4: Incorporate Cold Heavy Cream in Stages
- Pour in ¼ cup of heavy cream at a time, beating on medium-low speed to allow it to mix smoothly.
- Once all the cream is added, increase the speed to medium-high and beat until soft peaks form.
Step 5: Whip to Stiff Peaks Without Overbeating
- Continue whipping on high speed until the frosting reaches stiff peaks—this means the frosting holds its shape when lifted with a spoon.
- Be careful not to overwhip, as the frosting can become grainy or separate into butter and liquid.
How to Fix Common Frosting Issues
Frosting is Too Runny
- Place the frosting in the refrigerator for 20–30 minutes to firm up before using.
- If still too soft, add 1–2 tablespoons of powdered sugar and whip for a few seconds.
- Ensure the heavy cream was cold before whipping—warm cream won’t hold peaks.
Frosting is Too Thick
- Add 1 tablespoon of cold heavy cream at a time while mixing on low speed to loosen the consistency.
- Avoid adding too much liquid at once, or the frosting may break down.
Frosting Became Grainy
- This happens when the heavy cream is overwhipped.
- To fix, fold in 1–2 tablespoons of fresh heavy cream and mix gently until the consistency smooths out.
How to Use the Whipped Cream Frosting for Gentilly Cake
Once the frosting is smooth and stable, it’s ready to be used in assembling the cake.
Filling Between Cake Layers
- Spread a thin, even layer of frosting over the first cake layer.
- If using berries in the filling, lightly press sliced strawberries or whole blueberries into the frosting before adding the next layer.
Frosting the Outside of the Cake
- Apply a thin crumb coat first—this is a light layer of frosting to seal in crumbs.
- Chill the cake for 15 minutes, then apply a final smooth layer of frosting.
- Use an offset spatula to create clean, even strokes for a professional finish.
Decorating the Cake
- Pipe decorative swirls or rosettes using a piping bag with a star tip for an elegant look.
- Top the cake with fresh strawberries, raspberries, and blueberries for a natural, colorful presentation.
- Lightly dust with powdered sugar or drizzle with honey for a finishing touch.
Storing Whipped Cream Frosting for Maximum Freshness
Short-Term Storage
- Keep the frosted cake refrigerated until ready to serve, as whipped cream frosting is perishable.
- If making the frosting ahead of time, store it in an airtight container in the fridge for up to 2 days.
Freezing the Frosting
- Whipped cream frosting does not freeze well, as it can separate upon thawing.
- If freezing is necessary, rewhip the frosting after thawing to restore consistency.
Why This Frosting is the Best Choice for Gentilly Cake
- Light and Airy – Keeps the cake feeling refreshing and not overly heavy.
- Balanced Sweetness – Less sugar than traditional buttercream, allowing the cake’s natural flavors to shine.
- Perfectly Stable – Holds its shape well for decorating, yet remains soft and velvety on the palate.
- Pairs Beautifully with Berries – The slight tang of the frosting enhances the natural sweetness and juiciness of fresh fruit.
Mastering this whipped cream frosting with mascarpone or cream cheese will ensure your Gentilly Cake looks and tastes like a bakery masterpiece. Now that the frosting is ready, it’s time to assemble and decorate the cake for the final stunning presentation!
Assembling & Decorating – Layering, Frosting Evenly, and Adding Fresh Berries for a Bakery-Style Finish
A flawlessly assembled Gentilly Cake is more than just a dessert—it is a work of art, combining delicate layers of cake, rich yet airy whipped cream frosting, and a vibrant topping of fresh berries. Proper assembly ensures the cake retains its structure, has balanced flavors in every bite, and presents beautifully. By following professional layering, frosting, and decorating techniques, you can achieve a cake that looks and tastes like it came straight from a high-end bakery.
Preparing the Cake Layers for a Strong and Even Structure
A well-prepared cake base is the foundation of a stable and aesthetically pleasing cake. The key to a smooth assembly process is ensuring the layers are level, chilled, and properly handled.
Leveling the Cake Layers for Even Stacking
- Once the cake layers are completely cooled, use a serrated knife or cake leveler to trim the tops.
- Trim off any domed or uneven surfaces to create a flat, stable base for stacking.
- Keep your knife parallel to the table and make slow, even cuts to avoid tearing the cake.
Chilling the Cake Layers for Better Handling
- Place the cake layers in the refrigerator for at least 30 minutes before assembling.
- Chilled cakes are firmer and easier to handle, reducing the risk of crumbling when layering.
- If making the cake ahead of time, wrap the layers tightly in plastic wrap to prevent them from drying out.
Layering the Cake for a Balanced Texture
Gentilly Cake is unique in its light yet creamy texture, which comes from proper layering of frosting and fruit. An uneven or unstable cake can lead to sliding layers, bulging frosting, or fruit leaking moisture into the cake.
Positioning the First Cake Layer on a Base
- Place the bottom cake layer on a turntable or cake stand to allow for easy frosting.
- Spread a small dollop of frosting on the stand before placing the first layer—this acts as an adhesive to keep the cake from shifting.
Spreading an Even Layer of Frosting
- Use an offset spatula to apply a generous but even layer of whipped cream frosting.
- The frosting should be about ¼ to ½ inch thick, ensuring enough coverage without overwhelming the cake.
- Spread outward from the center, keeping the layer level and smooth to prevent uneven stacking.
Adding Fresh Berries for a Natural Burst of Flavor
- Gently press a layer of sliced strawberries onto the frosting, ensuring even distribution.
- Scatter blueberries and raspberries between the strawberries, maintaining a balanced flavor profile.
- Avoid overloading the layer with fruit, as excess moisture can cause instability and make the cake soggy.
Stacking the Second Cake Layer with Precision
- Carefully place the second cake layer on top, ensuring it is aligned evenly with the bottom layer.
- Apply gentle pressure to secure the layers without compressing the frosting.
- If making a three-layer cake, repeat the process before adding the final layer.
Creating a Crumb Coat for a Professional Finish
A crumb coat is a thin layer of frosting that locks in loose crumbs and provides a smooth base for the final coat. This step is crucial for achieving a bakery-style, polished finish.
Applying the First Thin Layer of Frosting
- Use a small amount of whipped cream frosting to lightly coat the entire cake.
- Spread the frosting with an offset spatula, ensuring a thin, even layer around the sides and top.
- The goal is not to fully cover the cake, but to trap any loose crumbs so they don’t appear in the final layer.
Chilling the Cake to Set the Crumb Coat
- Place the cake in the refrigerator for at least 15–30 minutes to allow the crumb coat to set.
- Chilling helps the frosting firm up, creating a more stable base for the final layer.
- Once set, the crumb coat should feel slightly firm to the touch.
Applying the Final Layer of Frosting
A smooth, evenly spread final coat of frosting gives the cake its signature bakery-quality appearance.
Using the Right Tools for a Flawless Finish
- An offset spatula or bench scraper helps achieve a polished, professional look.
- A turntable allows for smooth, even frosting application.
- A piping bag can be used for decorative details along the edges.
Spreading the Final Coat Evenly
- Start with a thick layer of frosting on the top, spreading outward toward the edges.
- Apply additional frosting to the sides, smoothing it out while keeping the thickness consistent.
- Rotate the cake stand while using a bench scraper to create clean, even edges.
Creating Sharp Edges or a Soft, Rustic Look
- For a modern, sharp-edged cake, gently drag the offset spatula along the top edge to create a crisp, clean border.
- For a more rustic, textured look, use the spatula to create soft swirls and peaks in the frosting.
Decorating with Fresh Berries for a Stunning Presentation
Gentilly Cake’s final touch is its signature berry topping, which adds color, texture, and natural sweetness.
Arranging the Berries for Maximum Visual Impact
- Place whole or halved strawberries in the center of the cake, arranging them in a circular pattern.
- Scatter blueberries and raspberries evenly across the top, ensuring a balanced distribution.
- If desired, create a gradient effect by grouping different berries in distinct sections.
Adding a Decorative Berry Border
- Line the base of the cake with small clusters of blueberries and raspberries, creating a cohesive, elegant border.
- If preferred, add thinly sliced strawberries along the bottom edge for a classic finish.
Final Garnishes for a Bakery-Worthy Look
- Lightly dust with powdered sugar for a soft, elegant touch.
- Drizzle a small amount of honey or simple syrup over the berries to enhance their shine.
- Sprinkle toasted almond slivers around the edges for added texture and sophistication.
Serving the Cake for the Best Presentation
The final step in a well-assembled cake is serving it in a way that maintains its structural integrity and visual appeal.
Chilling Before Slicing for Clean, Defined Layers
- Refrigerate the assembled cake for 30 minutes before slicing to allow the frosting to set.
- This prevents the layers from shifting and ensures each slice remains intact.
Cutting Even, Professional Slices
- Use a sharp, serrated knife to make clean, even cuts.
- Wipe the knife with a warm, damp cloth between slices to prevent smearing.
- Serve each slice with a few extra fresh berries on the side for an elegant plating.
Why Proper Assembly and Decoration Matter
A well-assembled Gentilly Cake is not just about taste—it’s about creating an unforgettable dessert experience.
- A level, stable cake ensures even layers and a balanced bite.
- Proper frosting techniques create a flawless, bakery-quality finish.
- Thoughtful decoration enhances the cake’s visual appeal and elevates its elegance.
By following expert techniques for layering, frosting, and decorating, you can achieve a restaurant-worthy Gentilly Cake that impresses both visually and in taste. Now that the cake is complete, it’s time to slice, serve, and enjoy a true masterpiece of flavor and texture.
Expert Tips for a Bakery-Style Gentilly Cake
Baking a perfect Gentilly Cake requires the right techniques for moisture, structure, and decoration. For expert cake baking tips, check out this guide from Sally’s Baking Addiction to learn professional tricks for achieving bakery-quality results.
How to Keep the Cake Moist – Using Buttermilk, Avoiding Overbaking, and Proper Storage
A perfectly baked Gentilly Cake should be soft, fluffy, and moist, with a delicate crumb that melts in your mouth. However, achieving and maintaining this texture requires the right ingredients, precise baking techniques, and proper storage methods. Whether you’re making the cake for a special occasion or preparing it in advance, these expert tips will ensure it stays fresh and moist for days.
Using Buttermilk for Enhanced Moisture and Tenderness
Buttermilk is one of the most essential ingredients for keeping Gentilly Cake moist and flavorful. It plays a critical role in improving both the texture and longevity of the cake.
Why Buttermilk is a Key Ingredient for Moistness
- Acidic Properties Help Tenderize the Cake
Buttermilk contains lactic acid, which breaks down the gluten structure in flour. This results in a softer, more tender crumb that prevents the cake from becoming tough or dry. - Adds Richness Without Extra Fat
While butter provides moisture through fat, buttermilk enhances hydration without making the cake too greasy. This balance ensures a cake that is light yet decadently moist. - Improves the Cake’s Shelf Life
The acidity in buttermilk slows down the staling process, keeping the cake soft and fresh for longer.
How to Use Buttermilk Effectively in the Recipe
- Replace regular milk with buttermilk in the cake batter to increase moisture retention.
- Ensure buttermilk is at room temperature before mixing to help it blend smoothly with other ingredients.
- If you don’t have buttermilk, create a substitute by mixing 1 cup of whole milk with 1 tablespoon of white vinegar or lemon juice, letting it sit for 10 minutes before using.
Avoiding Overbaking to Retain Moisture
One of the most common reasons cakes turn out dry is overbaking. Even a few extra minutes in the oven can cause excessive moisture loss, resulting in a cake that feels dense and crumbly.
Optimal Baking Time and Temperature
- Bake at 325°F (163°C) for a gentle, even bake that prevents the edges from drying out before the center is fully cooked.
- If using a convection oven, lower the temperature by 25°F to avoid overbrowning.
- Check the cake 5 minutes before the recommended baking time to prevent overbaking.
How to Test for Perfect Doneness
Instead of relying on the baking time alone, use these three foolproof methods to determine when the cake is ready:
- Toothpick Test
Insert a toothpick in the center of the cake. If it comes out clean or with a few moist crumbs, the cake is done. If it has wet batter, bake for a few more minutes and check again. - Spring-Back Test
Gently press the center of the cake with your fingertip. If it springs back immediately, it’s fully baked. If it leaves an indentation, it needs more time. - Edge-Pull Test
The edges of the cake should slightly pull away from the pan when it’s done. If the cake looks stuck to the sides, it may need additional baking time.
What to Do If the Cake is Overbaked
- Brush with Simple Syrup – Lightly brush the cake layers with a mixture of equal parts sugar and water to restore lost moisture.
- Wrap While Warm – If the cake is slightly dry, wrap it in plastic wrap while still warm to help trap residual steam.
Proper Storage to Maintain Freshness and Moisture
Even a perfectly baked cake can lose moisture quickly if not stored correctly. Proper storage methods will keep the cake soft and fresh for several days.
Short-Term Storage (Same Day or Next Day)
- Keep the cake covered at room temperature for up to 24 hours to prevent it from drying out.
- Store in a cake dome or airtight container to trap moisture and protect it from air exposure.
- If the kitchen is warm, refrigerate the cake but allow it to return to room temperature before serving for the best texture.
Refrigerating the Cake for Longer Freshness
If storing for more than one day, refrigeration is the best option to preserve the frosting and prevent moisture loss.
- Wrap the cake tightly with plastic wrap before placing it in the fridge. This prevents it from absorbing any unwanted fridge odors.
- If the cake has already been sliced, place a piece of parchment paper against the exposed edges to keep them from drying out.
- When ready to serve, let the cake sit at room temperature for at least 30 minutes to soften before slicing.
Freezing the Cake for Extended Storage
For longer storage, freezing the cake layers before assembling helps maintain their freshness for weeks.
- Wrap each cake layer individually in plastic wrap, followed by a layer of aluminum foil to prevent freezer burn.
- Store the wrapped layers in a zip-top freezer bag or airtight container for up to 3 months.
- To thaw, transfer the cake to the fridge overnight, then let it sit at room temperature before frosting and serving.
How to Keep a Frosted Cake Moist in the Freezer
- If freezing a fully assembled cake, place it in the freezer uncovered for 1–2 hours to firm up the frosting.
- Once set, wrap the cake gently but securely in plastic wrap, followed by a layer of foil.
- Thaw overnight in the refrigerator and let it sit at room temperature before serving.
Preventing Dryness When Serving the Cake
Even after baking and storing properly, how you serve the cake can impact its moisture retention.
Slicing the Cake Without Drying It Out
- Use a sharp, serrated knife for clean slices that don’t tear the cake.
- Wipe the knife with a warm, damp cloth between slices to maintain smooth cuts.
- Avoid leaving the cake uncovered for long periods, as air exposure can cause the edges to dry out.
Moisture-Boosting Tips Before Serving
- Lightly brush the cake with simple syrup if it has been stored for a few days.
- Add an extra layer of fresh whipped cream frosting before serving to enhance the cake’s soft texture.
- Serve with extra fresh berries, which add natural juiciness and help balance the moisture level in each bite.
Why Proper Moisture Control Makes a Difference
Keeping a Gentilly Cake moist is essential for preserving its luxurious, bakery-style texture. By using buttermilk for tenderness, avoiding overbaking, and storing it properly, you ensure that every bite remains fluffy, soft, and full of flavor.
With these expert techniques, your Gentilly Cake will stay fresh and delicious, making it the perfect dessert for any occasion, whether served immediately or stored for later indulgence. Now that the cake is perfectly moist, it’s time to serve and enjoy every light, creamy, and berry-filled bite!
Choosing the Best Berries – Fresh vs. Frozen, Balancing Tart and Sweet Flavors
Berries play a crucial role in Gentilly Cake, adding natural sweetness, a pop of color, and a juicy contrast to the creamy mascarpone or whipped cream frosting. The right selection of berries enhances the flavor balance, texture, and presentation, making the cake look and taste like a bakery masterpiece. However, not all berries are created equal, and choosing the best type—whether fresh or frozen—can make a significant difference in the final result.
Fresh vs. Frozen Berries: Which One is Best?
Both fresh and frozen berries have unique advantages and drawbacks, but the best choice depends on how they’re used in the cake.
Fresh Berries: The Gold Standard for Gentilly Cake
- Best for decorating and layering – Fresh berries retain their firm texture and provide a juicy, refreshing bite.
- Better flavor balance – Fresh berries offer the perfect balance of tartness and sweetness, complementing the light cake and creamy frosting.
- Visually appealing – Their vibrant, natural color enhances the cake’s overall presentation.
- Less moisture release – Fresh berries don’t release excess liquid into the frosting, preventing sogginess.
Frozen Berries: When to Use Them
- Best for making compotes or sauces – If using a berry reduction or glaze as a garnish, frozen berries work well.
- Tend to be softer when thawed – They lose their firmness and may become mushy, making them unsuitable for decoration.
- More affordable and available year-round – A good alternative when fresh berries are out of season.
- Can be mixed into the batter – If incorporating berries inside the cake batter, frozen berries work well but should be used directly from frozen (not thawed) to prevent bleeding.
Final Verdict: Fresh Berries for the Best Gentilly Cake
While frozen berries can be useful for sauces or fillings, fresh berries are the superior choice for layering, topping, and decorating, ensuring the cake remains visually stunning, structurally stable, and perfectly flavored.
Selecting the Best Berries for Flavor Balance
A well-balanced Gentilly Cake features a mix of sweet and tart berries, creating a layered flavor experience that complements the rich frosting and soft cake layers.
Strawberries: The Sweet Foundation
- Mildly sweet with a juicy bite that pairs perfectly with whipped frosting.
- Provide a vibrant red color, making the cake visually appealing.
- Work best when thinly sliced for layering or halved for decoration.
Blueberries: The Balanced Middle Ground
- Offer a mild sweetness with subtle floral undertones.
- Small, round shape makes them perfect for scattering evenly across the cake.
- Retain their firm texture, providing a slight contrast to the softness of the cake and frosting.
Raspberries: The Tart Contrast
- Bring a tangy brightness that enhances the richness of the mascarpone frosting.
- Slightly softer texture, making them ideal for topping rather than layering inside the cake.
- Their deep red hue adds sophistication to the final decoration.
Optional Additions for a Unique Twist
- Blackberries – A deeper, earthier berry that pairs well with the lighter flavors of the cake.
- Pomegranate Seeds – Provide a juicy pop of flavor and crunch, adding a gourmet touch.
- Gooseberries or Currants – For those who love an extra tangy contrast to the sweet mascarpone frosting.
How to Properly Prepare Berries for the Cake
Washing and Drying the Berries Correctly
- Rinse berries under cold running water just before using.
- Place them on a paper towel or clean cloth to absorb excess moisture.
- Gently pat dry each berry to prevent excess liquid from seeping into the cake or frosting.
Slicing and Arranging for Even Flavor Distribution
- Strawberries should be hulled and sliced thinly for layering inside the cake. For decoration, cut them in halves or quarters for a natural look.
- Blueberries and raspberries can be left whole for a rustic, bakery-style effect.
- Blackberries, if used, should be halved if they’re too large for a more refined appearance.
Preventing Berries from Bleeding into the Frosting
- To keep berries from releasing excess juice, layer them on a thin base of frosting first rather than placing them directly on the cake.
- If storing the cake overnight, add the fresh berries just before serving to maintain their vibrant color and fresh texture.
Layering Berries for a Balanced Cake Structure
The way berries are distributed throughout the cake impacts not only the flavor but also the cake’s stability and moisture retention.
Inside the Cake Layers
- Place berries in an even layer between frosting layers to prevent clumping in one area.
- Avoid overloading—too many berries can cause the cake to become unstable when sliced.
On Top of the Cake for a Stunning Presentation
- Arrange berries in a circular pattern for a classic bakery look.
- Scatter them in a natural, organic way for a more relaxed, rustic feel.
- Use a combination of whole and sliced berries to create depth and contrast.
On the Sides for an Elegant Border
- Press whole blueberries and raspberries gently into the lower frosting edge for a subtle border.
- Arrange thinly sliced strawberries along the sides for a more intricate design.
Enhancing the Berries for Extra Shine and Flavor
For an elevated, bakery-style finish, consider adding a light glaze or dusting to the berries.
Glazing for a Glossy Appearance
- Honey or Simple Syrup – Lightly brush berries with a thin layer of honey or sugar syrup to enhance their shine.
- Apricot Glaze – Mix a small amount of apricot jam with warm water and lightly coat the berries for a professional finish.
Dusting for a Sophisticated Look
- A light dusting of powdered sugar creates an elegant, soft finish.
- Finely grated lemon zest adds a pop of citrus brightness that enhances the tartness of the berries.
Why the Right Berries Make a Difference
The choice and arrangement of berries can transform the flavor, texture, and overall presentation of Gentilly Cake. Using fresh, high-quality berries in the right proportions ensures the cake remains:
- Perfectly balanced in sweetness and tartness
- Visually stunning with vibrant colors
- Moist and fresh, without excess juice affecting the frosting
By following these expert tips, your Gentilly Cake will not only taste exceptional but also look like a work of art, worthy of the finest bakeries. Now, with the perfect selection and arrangement of berries, it’s time to serve and enjoy every decadent, fruit-filled bite!
Storing & Serving – Refrigeration Tips to Maintain Freshness and Best Serving Practices
A well-made Gentilly Cake deserves proper storage and serving techniques to preserve its delicate texture, rich frosting, and fresh berries. Since this cake is made with whipped cream or mascarpone frosting, it requires careful handling to maintain its moisture, structure, and visual appeal. Whether you’re storing it for a few hours, overnight, or long-term, the right methods will ensure your cake remains bakery-fresh until the last bite.
Refrigeration Tips to Maintain Freshness
Since Gentilly Cake contains perishable ingredients like fresh cream, mascarpone, and berries, proper refrigeration is key to preventing spoilage while keeping the cake soft and moist.
Short-Term Storage (Same Day or Next Day Serving)
- Keep the cake covered and refrigerated if serving within 24 hours.
- Place the cake in a cake dome or airtight container to prevent it from absorbing fridge odors.
- If no cake cover is available, wrap it loosely in plastic wrap to retain moisture while allowing some airflow to prevent condensation.
- Store the cake on a flat, stable surface in the fridge to prevent shifting or damage.
How Long Can Gentilly Cake Stay Fresh in the Refrigerator?
- Unfrosted cake layers: Store for 2–3 days if wrapped tightly in plastic wrap.
- Fully assembled cake: Best enjoyed within 48 hours for peak freshness.
- Sliced cake: Can last up to 3 days, but berries may start to soften after 1–2 days.
Preventing Dryness in the Refrigerator
- Before refrigerating, brush the cake layers with a simple syrup (equal parts sugar and water boiled together) to keep them extra moist.
- Avoid placing the cake near strong-smelling foods like onions or garlic, as it can absorb unwanted flavors.
- If possible, store the cake on a shelf instead of the fridge door—the temperature fluctuates more in the door area, which can affect the cake’s texture.
Long-Term Storage: Freezing the Cake for Future Use
If you want to store Gentilly Cake for an extended period, freezing is the best option. However, since it contains whipped cream frosting and fresh berries, proper freezing techniques are crucial to maintaining its texture and flavor.
Freezing Unfrosted Cake Layers
- Wrap each cooled cake layer tightly in plastic wrap, then add a layer of aluminum foil for extra protection.
- Place the wrapped layers in an airtight container or freezer-safe zip-top bag to prevent freezer burn.
- Store for up to 3 months and thaw overnight in the refrigerator before frosting.
Freezing a Fully Assembled Cake
- First, place the cake in the freezer uncovered for 1–2 hours until the frosting firms up.
- Once set, wrap the entire cake in plastic wrap, followed by a layer of aluminum foil.
- If possible, store in a cake box or airtight container for added protection.
- When ready to serve, thaw overnight in the fridge and let it sit at room temperature for 30 minutes before slicing.
Can You Freeze a Frosted Cake with Fresh Berries?
- Not recommended – Fresh berries contain water, which can cause them to become mushy and lose their texture when thawed.
- If planning to freeze, decorate with berries only after thawing for the best presentation.
Best Serving Practices for the Perfect Cake Experience
A properly served Gentilly Cake ensures that each slice is light, moist, and visually appealing.
Bringing the Cake to the Right Temperature
- Remove the cake from the refrigerator 30–45 minutes before serving to allow the frosting and cake layers to soften.
- Serve the cake slightly chilled or at cool room temperature for the best flavor and texture.
- If the cake has been stored in the fridge for more than a day, lightly brush the exposed cake layers with simple syrup before serving to refresh the moisture.
Cutting the Cake for Clean, Even Slices
- Use a sharp serrated knife for clean cuts without pulling on the cake.
- Wipe the knife with a warm, damp cloth between slices to prevent smearing.
- If the cake is extra soft, chill it for 10–15 minutes before slicing to make handling easier.
Serving Suggestions to Elevate the Cake Experience
- Garnish each slice with extra fresh berries and a light dusting of powdered sugar for a refined look.
- Pair with a dollop of whipped cream or a drizzle of berry compote for added indulgence.
- Serve with a cup of hot tea, coffee, or a glass of dessert wine for a complementary flavor pairing.
Keeping Leftovers Fresh for Maximum Enjoyment
How to Store Leftover Slices Without Drying Out
- Wrap each individual slice tightly in plastic wrap to lock in moisture.
- Store in an airtight container to prevent the cake from absorbing fridge odors.
- If berries on top begin to soften, remove them and add fresh berries before serving again.
How to Revive a Cake That Feels Dry
- Lightly brush the cake layers with simple syrup to restore moisture.
- Add an extra layer of whipped cream frosting before serving to freshen the texture.
- Serve with a side of vanilla ice cream or fresh fruit to balance out any dryness.
Why Proper Storage & Serving Techniques Matter
By following these expert storage and serving practices, your Gentilly Cake will remain moist, flavorful, and visually stunning. Proper refrigeration preserves the delicate frosting and fresh berries, while thoughtful serving techniques ensure each bite is as soft and delicious as the first.
Now that your Gentilly Cake is perfectly stored and ready to serve, it’s time to cut into this bakery-quality masterpiece and enjoy every creamy, berry-filled bite!
Conclusion
Baking the perfect Gentilly Cake is all about mastering simple techniques, using high-quality ingredients, and balancing fluffy cake layers, rich whipped cream frosting, and fresh berries. By following the steps outlined in this guide, you can create a bakery-worthy dessert that is as light and delicious as it is visually stunning.
From choosing the best berries to keeping the cake moist with buttermilk, and from layering and decorating to storing it for lasting freshness, every detail contributes to making this cake a true New Orleans classic.
Customize and Make It Your Own
One of the best things about Gentilly Cake is that you can personalize it to match your taste:
- Swap blueberries for blackberries or add a mix of exotic fruits for a unique twist.
- Infuse the frosting with a hint of lemon zest or almond extract for extra depth.
- Try layering the cake with a berry compote instead of fresh fruit for a richer flavor.
Share Your Creations & Keep Baking!
Now that you know how to bake, assemble, and serve the perfect Gentilly Cake, it’s time to put your skills to the test!
- Try this recipe and customize it with your favorite berries or toppings.
- Share your results—post your cake on social media and tag us so we can see your masterpiece!
- Leave a comment—ask questions, share your baking experience, or let us know how your cake turned out.
- Explore more Southern desserts—if you loved this cake, why not try baking a classic Hummingbird Cake, Beignets, or a Pecan Praline Cheesecake next?
There’s nothing more rewarding than creating a homemade cake that looks and tastes amazing. So, grab your ingredients, preheat the oven, and start baking—your perfect Gentilly Cake awaits!