
Every princess cake deserves to be as magical as her special day! Whether you’re planning a royal-themed birthday party, a fairytale baby shower, or an elegant celebration, a stunning princess cake can be the perfect showstopper. From classic pink and gold princess cake designs to Disney princess-inspired cakes, there are endless ways to bring a touch of enchantment to your dessert table.
In this guide, we’ll explore 10 breathtaking princess cake ideas that will make any celebration feel truly regal. Whether you’re looking for an elegant floral cake, a whimsical castle cake, or a sparkling tiara-topped masterpiece, we’ve got inspiration for every theme. Plus, we’ll cover the best flavors, decorating techniques, and expert tips to help you create (or order) the perfect princess cake.
Ready to find the ultimate cake fit for royalty? Let’s dive into these stunning princess cake ideas that will make your celebration unforgettable!
10 Stunning Princess Cake Ideas for a Magical Celebration
Creating a princess cake is all about elegance, creativity, and a touch of fairytale magic. Whether you’re designing a cake inspired by a Disney princess or a regal royal theme, having the right ideas can make all the difference. For more inspiration and expert decorating tips, check out these beautiful princess cake designs from Wilton and explore custom cake inspirations on Pinterest.
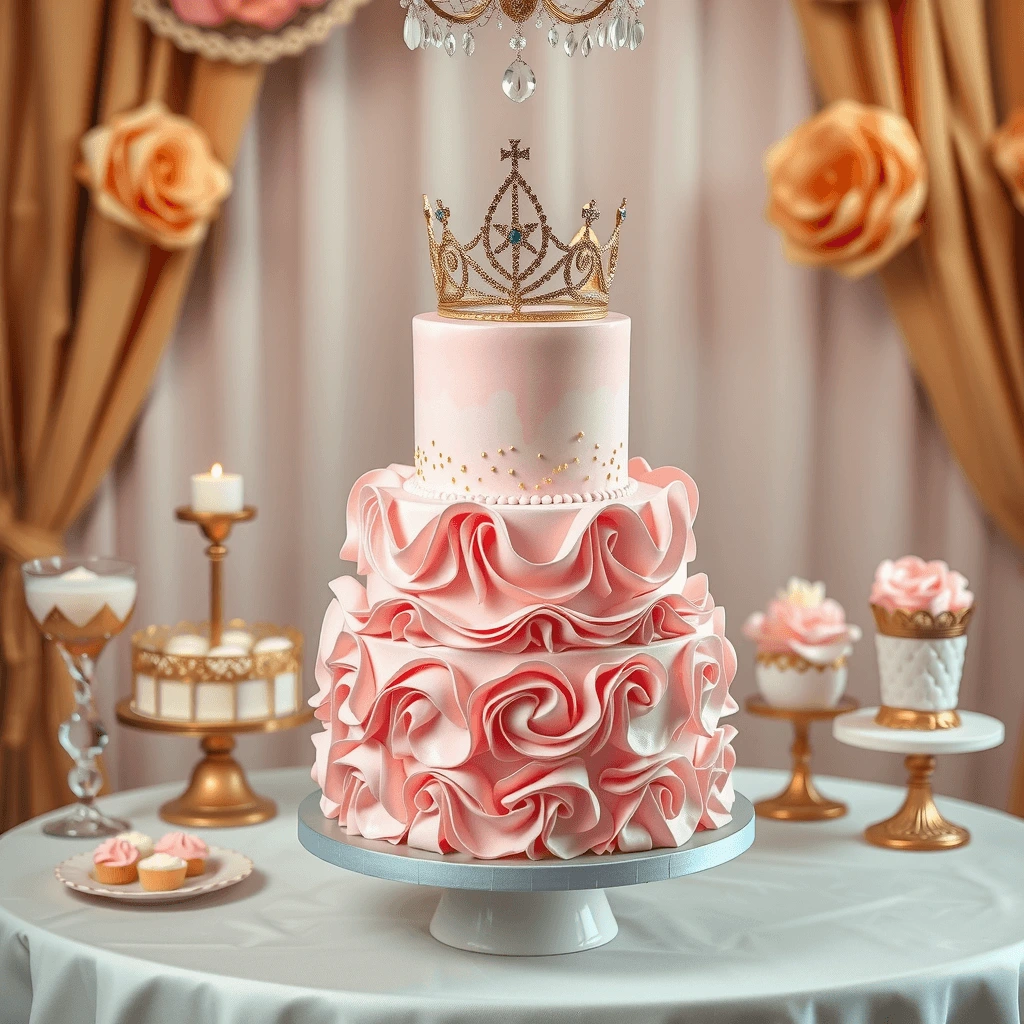
1. Classic Pink and Gold Princess Cake
A Classic Pink and Gold Princess Cake is a timeless and elegant choice for any royal celebration. With its soft pastel pink hues, shimmering gold accents, and delicate decorations, this cake is perfect for a princess birthday party, baby shower, or any regal occasion. Whether decorated with fondant crowns, edible pearls, or intricate piping details, this cake embodies the grace and beauty of a true fairytale.
Choosing the Right Design Elements
A. Fondant vs. Buttercream – Which is Best?
- Fondant: Allows for clean, polished edges and intricate details like gold tiaras, ruffles, and bows.
- Buttercream: Creates a soft, textured look with piping techniques like rosettes and ruffles.
- Combination: Some cakes use a buttercream base with fondant decorations for the best of both worlds.
B. Color Palette for a Royal Look
- Blush pink, pastel rose, and baby pink create a classic princess theme.
- Gold accents in the form of edible glitter, metallic drips, or gold leaf add luxury.
- White and ivory touches balance the bold pink and gold, making the cake look elegant and refined.
C. Edible Decorations for a Regal Finish
- Hand-sculpted fondant crowns with gold dust.
- Sugar pearls and lace patterns for a delicate royal touch.
- Gold-painted fondant bows, stars, or edible glitter for added glamour.
Flavor and Filling Ideas for a Luxurious Taste
A. Best Cake Flavors for a Princess Cake
- Classic vanilla bean cake with a light, fluffy texture.
- Strawberry shortcake with layers of real strawberries and cream.
- White chocolate raspberry cake for a sweet and tart contrast.
B. Decadent Fillings for a Rich Flavor
- Creamy vanilla custard with fresh berries.
- Raspberry jam with white chocolate ganache.
- Strawberry buttercream with a hint of rosewater.
C. Fondant vs. Buttercream for Filling Layers
- Buttercream is ideal for soft, creamy layers that melt in the mouth.
- Fondant-covered cakes often use ganache or thick buttercream to hold their structure.
- Thin jam or curd layers add a fruity contrast to balance the richness.
How to Decorate a Classic Pink and Gold Princess Cake
A. Creating a Smooth and Polished Base
- Chill the cake layers before applying buttercream or fondant for a flawless finish.
- Use a bench scraper and cake turntable for even frosting.
- If using fondant, smooth it out with a fondant smoother to prevent air bubbles.
B. Adding Gold Accents for a Royal Touch
- Use edible gold dust or gold leaf flakes for a shimmering effect.
- Gold-painted fondant bows, beads, or flowers can be placed around the cake.
- A metallic gold drip effect adds a modern twist to a classic princess cake.
C. Topping the Cake with a Stunning Crown
- Handcrafted fondant or gum paste crowns give the cake a majestic look.
- Gold-painted chocolate crowns provide a delicious edible topper.
- Pearl-encrusted tiaras add a royal finishing touch for a birthday princess.
Final Touches for a Picture-Perfect Princess Cake
A. Serving and Presentation Tips
- Display on a white or gold cake stand for an elegant effect.
- Surround the cake with matching cupcakes or edible gold-dusted macarons.
- Add a princess-themed cake topper with the birthday girl’s name in gold lettering.
B. Storing and Transporting the Cake Safely
- Refrigerate the cake until 30 minutes before serving for a perfect texture.
- Use a sturdy cake box and anti-slip mat when transporting.
- Keep away from direct sunlight or heat, as gold accents and fondant decorations can melt.
Final Thoughts
A Classic Pink and Gold Princess Cake is a timeless, elegant, and luxurious choice for any royal celebration. With stunning gold details, soft pink hues, and intricate decorations, this cake is sure to impress and delight. Whether you go for buttercream rosettes or a fondant masterpiece, this cake will be the highlight of your fairytale celebration.
Would you like recommendations on princess-themed cupcakes or matching desserts to go with your cake?
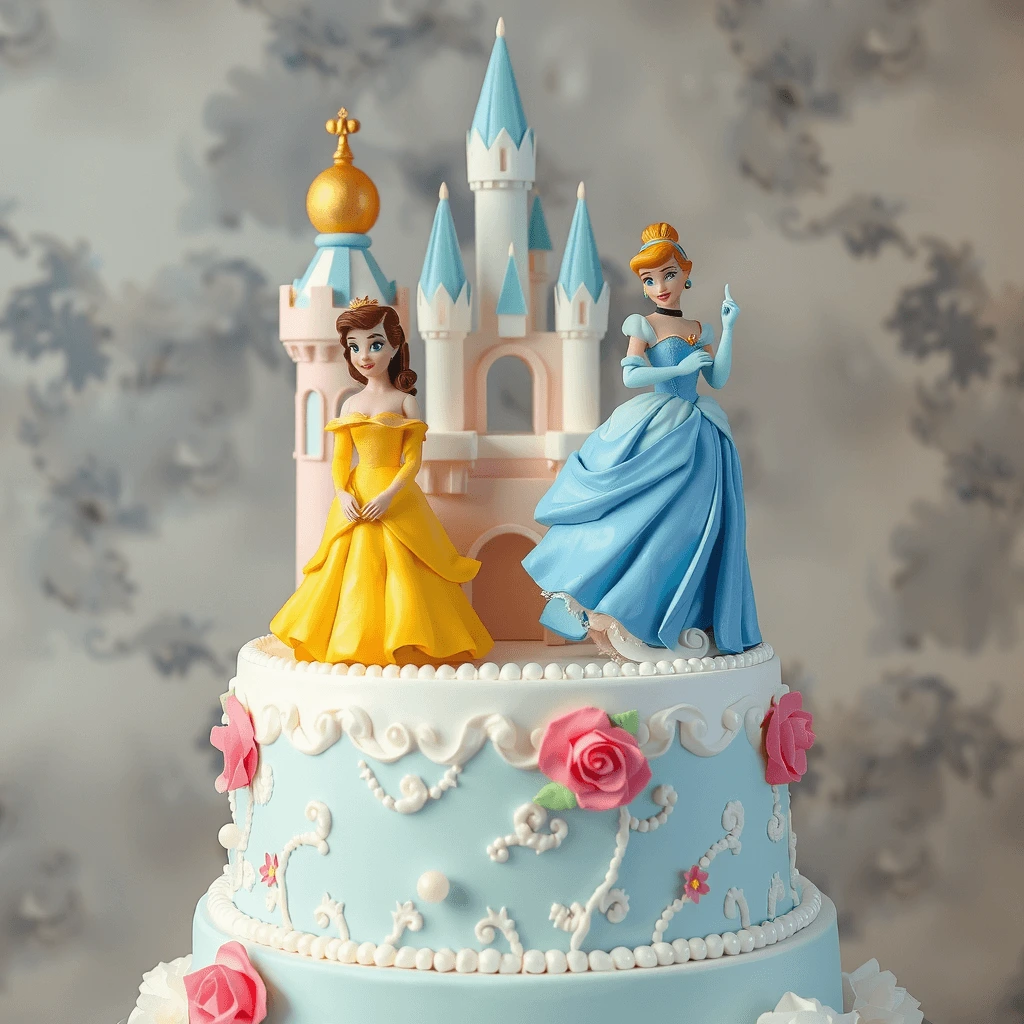
2. Disney Princess-Themed Cake
A Disney Princess-Themed Cake brings the magic of beloved Disney characters to life, making it the perfect centerpiece for a princess birthday party or special celebration. Whether you choose a single princess-inspired cake or a multi-tiered masterpiece featuring multiple Disney princesses, this cake is designed to enchant and delight.
From Cinderella’s carriage and Elsa’s ice palace to Belle’s enchanted rose, there are endless ways to create a Disney-inspired princess cake. Below, we explore the best designs, colors, decorations, and flavors for crafting the ultimate Disney Princess-Themed Cake.
Choosing the Best Disney Princess Theme for Your Cake
A. Single Princess vs. Multi-Princess Design
- Single Princess Cake: Inspired by one specific character, featuring her dress, tiara, or castle as the main design.
- Multi-Princess Cake: A tiered cake with different layers representing different Disney princesses for a grand celebration.
B. Popular Disney Princess Cake Themes
- Cinderella’s Carriage Cake – A light blue and silver cake shaped like her magical pumpkin carriage.
- Frozen Elsa Ice Castle Cake – A stunning icy blue cake with sugar snowflakes and edible ice shards.
- Belle’s Enchanted Rose Cake – A gold and red cake decorated with a glass-like sugar rose.
- Ariel’s Underwater Cake – A mermaid-inspired cake with edible seashells and a shimmering ocean effect.
- Rapunzel’s Tower Cake – A tall, tiered cake resembling her magical tower, complete with sugar flowers and a golden braid.
C. Color Palettes to Match Each Princess
- Cinderella: Baby blue, white, silver, and pearl accents.
- Ariel: Teal, purple, and shimmering oceanic tones.
- Belle: Gold, deep red, and elegant ivory details.
- Rapunzel: Lavender, gold, and floral accents.
- Elsa: Icy blue, white, and glittering snow effects.
Decorating Techniques for a Disney Princess Cake
A. Fondant vs. Buttercream for a Magical Look
- Fondant allows intricate detailing like sculpted tiaras, dresses, and castle elements.
- Buttercream works well for soft, swirled designs and piped floral decorations.
- Combination: Many cakes feature a buttercream base with fondant figurines or accents.
B. Edible Disney Decorations and Cake Toppers
- Hand-painted princess portraits on fondant for a personalized touch.
- Edible tiaras, wands, and shoes made from gum paste or modeling chocolate.
- Sugar pearls, glitter, and edible jewels to add a royal finish.
- Disney princess figurines as cake toppers for an easy, yet stunning design.
C. Special Effects for a Truly Magical Cake
- LED lights inside castle windows or along the base for a glowing fairytale effect.
- Edible glitter and luster dust to create a dazzling royal shimmer.
- Gravity-defying elements like floating magic lamps (Jasmine) or spinning ice shards (Elsa).
Best Flavors and Fillings for a Disney Princess Cake
A. Cake Flavors Inspired by Disney Princesses
- Cinderella’s Vanilla Dream Cake – Classic vanilla bean cake with fluffy white buttercream.
- Belle’s Chocolate Enchantment Cake – Rich chocolate cake with a caramel filling.
- Ariel’s Tropical Delight Cake – Coconut cake with passionfruit curd.
- Elsa’s Snowy White Cake – White chocolate and peppermint-flavored cake.
- Rapunzel’s Lavender Honey Cake – Light lavender cake with honey-infused buttercream.
B. Decadent Fillings for a Royal Treat
- Strawberry mousse with white chocolate ganache.
- Raspberry compote with lemon curd for a refreshing twist.
- Cookies and cream filling for a fun, kid-friendly surprise.
C. Allergy-Friendly and Kid-Approved Variations
- Nut-free cake options for allergy-safe celebrations.
- Gluten-free vanilla sponge with dairy-free buttercream.
- Eggless chocolate cake for a more inclusive dessert.
Final Touches for a Picture-Perfect Disney Princess Cake
A. Adding Princess-Themed Cake Accessories
- Personalized cake toppers with the birthday child’s name in a royal font.
- Mini fondant princess dresses draped around the cake.
- Fairy tale elements like magic mirrors, glass slippers, or enchanted roses.
B. How to Store and Transport Your Disney Princess Cake
- Keep refrigerated until an hour before serving to preserve fondant details.
- Use a sturdy cake box with a non-slip mat to prevent shifting.
- Transport multi-tiered cakes in separate boxes and assemble at the venue.
C. Pairing Disney Princess Cupcakes for a Themed Dessert Table
- Mini cupcakes decorated with matching colors and princess symbols.
- Royal tiara sugar cookies to complement the cake.
- Princess-themed cake pops or chocolate-covered strawberries.
Final Thoughts
A Disney Princess-Themed Cake is the ultimate way to bring fairy tale magic to a birthday or celebration. Whether you create an Elsa-inspired ice castle, Belle’s enchanted rose cake, or a Rapunzel tower masterpiece, this cake will transport everyone to a royal world of imagination.
Which Disney princess cake is your favorite? Let us know in the comments!
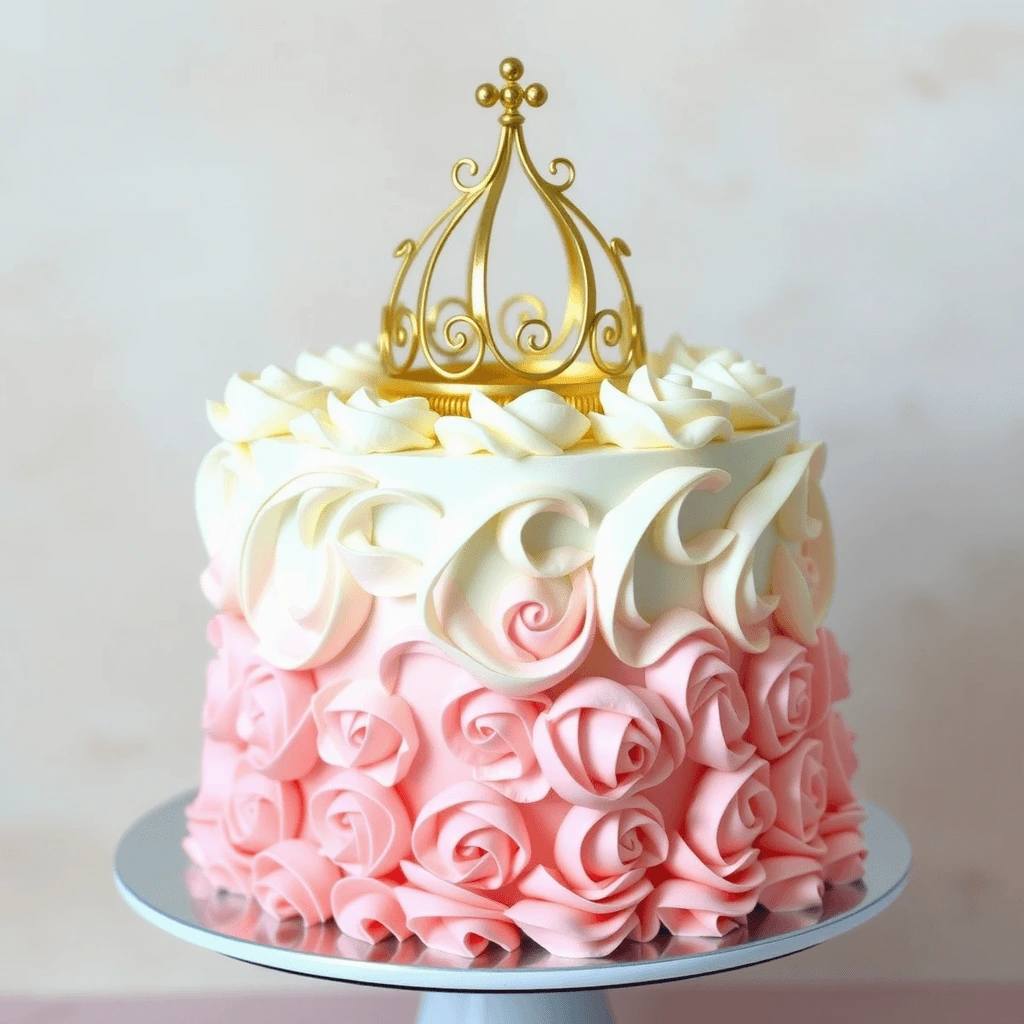
3. Elegant Floral Princess Cake
An Elegant Floral Princess Cake is the perfect combination of grace, beauty, and sophistication, making it ideal for princess-themed birthdays, bridal showers, or elegant celebrations. This cake design incorporates delicate buttercream flowers, edible floral decorations, and soft pastel hues, creating a fairytale-like aesthetic that truly embodies royalty.
From hand-piped rosettes to sugar blossoms and floral lace patterns, there are many ways to make this cake a breathtaking centerpiece. Below, we’ll explore design elements, decorating techniques, and flavor pairings to create the perfect Elegant Floral Princess Cake.
Choosing the Right Floral Theme and Design
A. Classic Floral Designs for a Princess Cake
- Buttercream rosette-covered cake – A full floral cake made with piped buttercream roses.
- Fondant floral appliqué cake – Hand-sculpted edible flowers placed around the cake.
- Floral cascade cake – A waterfall effect with cascading sugar flowers.
B. Popular Color Palettes for an Elegant Look
- Soft blush pink, ivory, and gold for a classic princess aesthetic.
- Lavender, lilac, and silver for a dreamy, magical look.
- Pastel blue and white for a Cinderella-inspired floral cake.
C. Floral-Inspired Cake Shapes and Layers
- Single-tier floral cake for an intimate gathering.
- Two or three-tier floral cake for a grand celebration.
- Hexagonal or ruffled-edge cakes to add an extra touch of uniqueness.
Decorating Techniques for a Stunning Floral Finish
A. Piping Buttercream Flowers for a Natural Look
- Use different piping tips to create realistic buttercream flowers.
- Rosettes, ruffles, and delicate vines enhance the cake’s fairytale charm.
- Incorporate two-tone colors for depth and realism.
B. Using Edible Flowers for a Fresh, Organic Touch
- Pressed flowers like pansies and violets create a delicate look.
- Candied rose petals or lavender buds add elegance and fragrance.
- Ensure all flowers are food-safe and pesticide-free.
C. Hand-Painted Floral Details for a Vintage Feel
- Delicate watercolor-style flowers can be painted onto a fondant-covered cake.
- Metallic gold-painted floral accents give a regal finish.
- Works best with a smooth fondant surface for intricate detailing.
Best Flavors and Fillings for an Elegant Floral Cake
A. Light and Floral-Inspired Cake Flavors
- Vanilla bean and lavender cake for a soft floral taste.
- Rosewater-infused sponge cake with a light aroma.
- Lemon and elderflower cake for a bright, refreshing flavor.
B. Luxurious Fillings for a Sophisticated Taste
- Raspberry and white chocolate mousse for a sweet and tart balance.
- Strawberry rose buttercream to complement the floral theme.
- Honey and mascarpone cream for a rich, smooth texture.
C. How to Achieve a Light and Airy Texture
- Use whipped egg whites for a fluffy sponge.
- Opt for a chiffon or genoise cake base for an airy consistency.
- Incorporate citrus zest or floral extracts to enhance natural flavors.
Final Touches for a Picture-Perfect Floral Princess Cake
A. Elegant Cake Toppers and Floral Arrangements
- Gold or pearl-encrusted tiara cake topper for a regal touch.
- Hand-sculpted sugar flowers for a realistic botanical look.
- Edible lace appliqué to add delicate texture.
B. Matching Desserts for a Themed Dessert Table
- Floral cupcakes with piped buttercream roses.
- Rosewater macarons dusted with edible gold.
- Mini floral-inspired petit fours or tea cakes.
C. Storing and Transporting a Floral Cake Safely
- Keep the cake chilled to preserve buttercream flowers.
- Use a cake box with space to prevent floral decorations from getting crushed.
- Avoid direct sunlight or humidity, which can melt sugar flowers and buttercream.
Final Thoughts
An Elegant Floral Princess Cake is the ultimate choice for a graceful and luxurious celebration. Whether decorated with buttercream rosettes, edible flowers, or hand-painted floral designs, this cake is sure to be a breathtaking centerpiece fit for royalty.
Would you like additional ideas for floral-themed cake pairings and dessert spreads?
How to Choose the Best Princess Cake Design for Your Theme
Consider the Birthday Girl’s Favorite Princess
Choosing a princess-themed cake based on the birthday girl’s favorite princess is the perfect way to make her celebration feel extra special. Whether she dreams of Cinderella’s elegant ball gown, Elsa’s magical ice castle, or Ariel’s underwater kingdom, selecting a cake that reflects her favorite Disney princess ensures a magical and memorable experience.
Below, we’ll explore popular princess themes, cake designs, and special decorations to bring her favorite princess to life in the most enchanting way.
1. Choosing the Right Princess Theme for the Cake
A. Single-Princess vs. Multi-Princess Cakes
- Single-Princess Cake – A cake inspired by one princess, featuring her signature colors, dress design, and royal accessories.
- Multi-Princess Cake – A tiered cake with each layer representing a different Disney princess, perfect for those who love multiple characters.
B. Popular Disney Princess Cake Inspirations
- Cinderella Cake – Features light blue fondant, a glass slipper topper, and delicate pearl details.
- Elsa’s Ice Castle Cake – Decorated with edible ice shards, snowflakes, and a shimmering white and blue palette.
- Belle’s Enchanted Rose Cake – A luxurious gold and red cake with a sugar-crafted enchanted rose.
- Ariel’s Under-the-Sea Cake – An oceanic cake featuring mermaid tails, seashells, and edible pearls.
- Rapunzel’s Tower Cake – A stunning tall cake with cascading sugar flowers and her signature golden braid.
C. Customizing the Cake to Match Her Favorite Princess
- Use matching colors, symbols, and princess elements to tie the cake to the theme.
- Incorporate fondant princess figurines or hand-painted portraits of the chosen princess.
- Add edible decorations such as tiaras, wands, castles, or enchanted objects.
2. Designing the Perfect Cake Based on the Princess Theme
A. Color Palettes to Match Each Princess
- Pink and gold for Aurora (Sleeping Beauty).
- Lavender and gold for Rapunzel.
- Teal and purple for Ariel.
- Light blue and silver for Cinderella.
- Red and gold for Belle.
- Icy blue and white for Elsa.
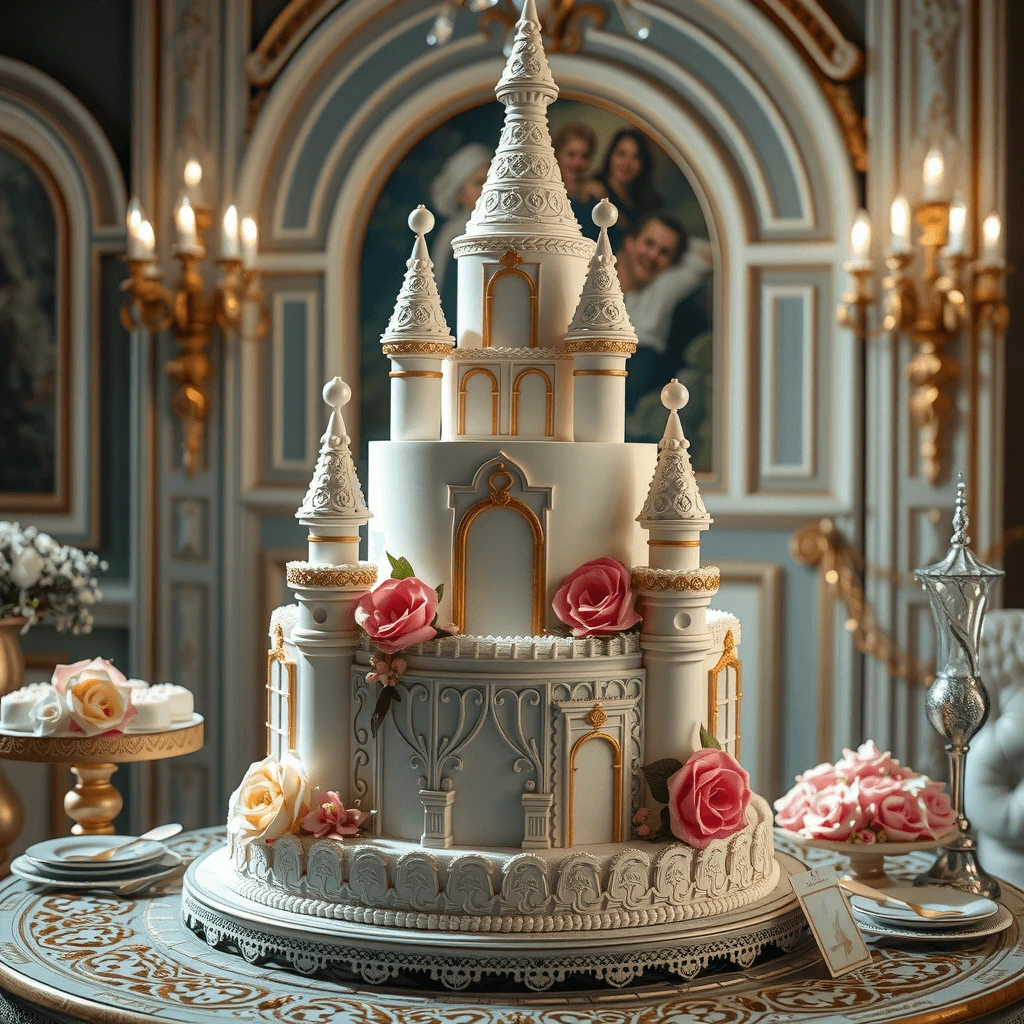
B. Cake Shapes and Structures for a Royal Look
- Castle-shaped cakes with turrets, towers, and sugar gates.
- Doll cakes where a princess figurine is placed inside the cake, forming the shape of her dress.
- Layered cakes with cascading edible flowers and shimmering sugar accents.
C. Special Effects to Enhance the Princess Theme
- Edible glitter and shimmer dust for a royal touch.
- LED lights or glowing sugar decorations for an extra magical effect.
- Gravity-defying elements like floating lanterns (Rapunzel) or spinning ice shards (Elsa).
3. Adding Personal Touches to Make the Cake Extra Special
A. Including the Birthday Girl’s Name and Age
- Personalize the cake with edible gold lettering featuring her name.
- Use a fondant plaque or sugar-crafted banner to display the birthday number.
B. Custom Cake Toppers to Match the Theme
- Edible fondant tiaras or princess figurines.
- Miniature castles, glass slippers, or enchanted roses.
- Gold-painted fondant stars or crowns for an extra royal touch.
C. Coordinating the Cake with the Party Decor
- Match the cake colors to the birthday theme (plates, napkins, table decor).
- Use a beautiful cake stand and a themed backdrop for stunning photos.
- Add matching cupcakes, cake pops, or cookies to complement the main cake.
4. Final Tips for a Magical Princess Cake Experience
A. Best Cake Flavors for Each Princess Theme
- Strawberry shortcake for Aurora (pink cake with a golden crown topper).
- Vanilla bean and blueberry for Elsa’s Frozen-inspired cake.
- Chocolate and caramel layers for Belle’s enchanted theme.
- Lemon and raspberry cake for Rapunzel’s floral tower cake.
B. Presenting the Cake for a Fairytale Moment
- Organize a special cake reveal moment with music from the princess’s movie.
- Capture the moment when the birthday girl sees her cake for the first time.
- Add a sparkler candle or fairy lights for a magical touch when serving the cake.
Final Thoughts
Choosing a princess-themed cake based on the birthday girl’s favorite Disney princess makes the celebration truly magical. Whether she dreams of Cinderella’s castle, Belle’s enchanted rose, or Rapunzel’s floral tower, creating a cake inspired by her favorite character adds a personal and unforgettable touch.
Which Disney princess cake design do you love the most? Let us know in the comments!
Selecting the Right Color Palette
Choosing the perfect color palette for a princess-themed cake is crucial in creating a magical and visually stunning dessert. The right combination of colors will help bring the fairytale theme to life, making the cake an enchanting centerpiece for the celebration. Whether inspired by a specific Disney princess, a regal royal theme, or an elegant floral design, selecting the right hues can transform an ordinary cake into something truly extraordinary.
Below, we explore the best color combinations, popular princess themes, and decorative elements to help you achieve the perfect princess cake color palette.
1. Classic Princess Color Schemes
A. Traditional Princess Colors for a Timeless Look
- Soft blush pink and gold – A classic choice for an elegant, regal theme.
- Lavender and silver – Perfect for a whimsical and enchanting feel.
- Pale blue and white – A Cinderella-inspired color scheme.
- Ivory and champagne gold – A sophisticated palette for a luxurious, royal cake.
B. Bright and Bold Princess-Inspired Colors
- Hot pink and glittering gold – Great for a modern princess cake with a vibrant twist.
- Turquoise and coral – Inspired by Ariel’s underwater kingdom.
- Deep red and royal gold – A striking combination for a Belle-themed cake.
- Purple and yellow – The perfect choice for a Rapunzel-inspired cake.
C. Pastel vs. Vibrant Colors – Choosing the Right Tone
- Pastel shades (blush pink, mint green, baby blue) create a delicate, soft, and dreamy effect.
- Vibrant shades (fuchsia, deep purple, royal blue) make the cake bold, eye-catching, and more dramatic.
- A combination of both (such as soft pinks with a metallic gold accent) creates the perfect balance.
2. Choosing a Color Palette Based on the Princess Theme
A. Cinderella-Inspired Color Palette
- Main colors: Baby blue, white, silver.
- Accent colors: Sparkling silver dust, pearl accents, and icy details.
- Decorations: Glass slipper topper, pearl piping, sugar-carved clock striking midnight.
B. Belle’s Enchanted Rose Theme
- Main colors: Gold, deep red, ivory.
- Accent colors: Dark green for the enchanted forest feel.
- Decorations: Edible sugar roses, gold lace patterns, and a royal crown.
C. Ariel’s Under-the-Sea Theme
- Main colors: Teal, purple, seafoam green.
- Accent colors: Coral pink, pearl white.
- Decorations: Edible seashells, shimmering mermaid scales, and a tail topper.
D. Elsa’s Frozen Ice Castle Theme
- Main colors: Ice blue, white, and silver.
- Accent colors: Frosty lilac and shimmering silver.
- Decorations: Edible snowflakes, ice shard sugar sculptures, and silver pearl dust.
E. Rapunzel’s Floral Tower Theme
- Main colors: Lavender, soft yellow, pink.
- Accent colors: Green vines, rose gold.
- Decorations: Edible flower cascades, a sugar-crafted golden braid, and mini lantern toppers.
3. Enhancing the Color Palette with Edible Decorations
A. Metallic and Glitter Accents for a Royal Touch
- Edible gold leaf or gold-painted details for a luxurious royal effect.
- Silver or pearl dust to create a soft, shimmery glow.
- Glitter sprinkles or luster dust for a magical, fairytale sparkle.
B. Ombre and Watercolor Effects for a Unique Look
- Soft ombre shades fading from one color to another add depth and elegance.
- Hand-painted watercolor effects create a romantic and artistic feel.
- Marbled fondant designs in complementary princess colors enhance the royal aesthetic.
C. Fondant and Buttercream Techniques for Vibrant Colors
- Buttercream piping in different shades for a floral cascade effect.
- Hand-mixed colored fondant to create detailed princess-inspired decorations.
- Airbrushed color effects to achieve a delicate pastel-to-metallic blend.
4. Coordinating the Cake with the Overall Party Theme
A. Matching the Cake Colors to the Party Decor
- Use the same color scheme across balloons, table settings, and party invitations.
- Incorporate princess-themed plates, cups, and napkins in matching hues.
- Create a backdrop that complements the cake’s color palette for stunning photos.
B. Complementary Desserts and Treats for a Themed Dessert Table
- Princess-themed cupcakes decorated with matching color swirls and tiaras.
- Color-coordinated cake pops, macarons, and cookies for a beautiful display.
- Themed drinks or mocktails in pastel pink, blue, or lavender to match the cake.
C. Lighting and Presentation to Enhance Cake Colors
- Use soft, warm lighting to enhance gold and pink tones.
- For icy-themed cakes, incorporate cool-toned LED lights or fairy lights.
- Display the cake on a matching cake stand with gold or silver details for added elegance.
Final Thoughts
Selecting the right color palette for a princess cake is key to creating a visually stunning and magical dessert. Whether you choose soft pastels, vibrant hues, or elegant metallics, the right colors can transform the cake into a show-stopping centerpiece for the celebration.
Which princess-inspired color palette is your favorite? Let us know in the comments!
Choosing Between Fondant and Buttercream
Selecting the right icing or frosting is essential when designing a princess cake. Both fondant and buttercream offer unique advantages in terms of texture, aesthetics, and ease of decorating. The choice between the two depends on the cake’s design, the birthday girl’s preference, and the overall theme of the celebration.
Below, we explore the differences between fondant and buttercream, their pros and cons, and how to choose the best option for a princess cake.
1. Understanding the Differences Between Fondant and Buttercream
A. What is Fondant?
- A smooth, pliable sugar-based icing used to cover cakes for a polished, elegant look.
- Can be rolled out and shaped into intricate decorations like tiaras, bows, or princess figurines.
- Commonly used for professional, high-end cake designs.
B. What is Buttercream?
- A soft, creamy frosting made from butter, powdered sugar, and vanilla (or other flavors).
- Easier to spread and pipe, making it ideal for floral and rosette designs.
- Commonly used for homemade cakes and those with a soft, textured look.
C. Key Differences in Texture and Appearance
- Fondant creates a flawless, smooth finish, whereas buttercream has a more natural, swirled texture.
- Buttercream is creamy and melts in the mouth, while fondant has a chewy, firmer texture.
- Fondant is ideal for sculpted cakes, while buttercream works best for piped and ruffled designs.
2. Pros and Cons of Fondant for Princess Cakes
A. Advantages of Using Fondant
- Smooth, polished look – Ideal for creating regal, princess-worthy cakes.
- Great for sculpting and shaping decorations, such as crowns, bows, and castles.
- Longer shelf life – Keeps the cake fresh for a longer time.
B. Disadvantages of Using Fondant
- Less flavorful than buttercream – Some people find it too sweet or chewy.
- Can be difficult to work with – Requires skill to roll out smoothly without air bubbles.
- More expensive – Fondant is costlier than buttercream due to its ingredients and labor-intensive application.
C. Best Princess Cake Designs for Fondant
- Castle Cakes – Fondant works perfectly for building turrets, windows, and elegant details.
- Doll Cakes – The princess’s gown can be sculpted with fondant, creating realistic folds.
- Crown-Topped Cakes – Fondant is ideal for creating tiaras and gold accents.
3. Pros and Cons of Buttercream for Princess Cakes
A. Advantages of Using Buttercream
- Rich, creamy taste – More flavorful than fondant, making it a crowd favorite.
- Easier to spread and work with – Perfect for homemade cakes and quick frosting applications.
- Allows for beautiful piping designs, such as swirls, ruffles, and floral patterns.
B. Disadvantages of Using Buttercream
- Less structured than fondant – Soft consistency can melt in warm temperatures.
- Can be difficult to achieve a completely smooth finish, especially for large tiered cakes.
- Limited in sculpting capabilities – Not ideal for intricate details like princess figurines or castle elements.
C. Best Princess Cake Designs for Buttercream
- Rosette Cakes – Layers of piped buttercream roses for a soft, floral princess look.
- Ruffle Cakes – Piped buttercream ruffles for a draped ballgown effect.
- Textured Cakes – Rustic, whimsical cakes with swirls, ombre gradients, and pearl piping.
4. Combining Fondant and Buttercream for the Best of Both Worlds
A. Using Buttercream as a Base with Fondant Decorations
- Apply a smooth layer of buttercream before adding fondant accents.
- Works well for cakes that need a soft texture but also structured elements like tiaras.
- Example: A buttercream-covered cake with fondant bows, crowns, and pearls.
B. Creating a Hybrid Cake for Different Textures
- Use fondant on the bottom tier for structure and buttercream on the top tier for flavor.
- Decorate with fondant flowers and lace appliqués over buttercream.
- Works great for multi-tiered princess cakes.
C. Adding a Fondant Layer Over Buttercream for a Flawless Look
- Frost the cake with a thin layer of buttercream before covering it with fondant.
- This method ensures the fondant sticks well and stays smooth.
- Avoid using too much buttercream underneath, as it can cause fondant to slide.
5. How to Choose Between Fondant and Buttercream for a Princess Cake
A. Consider the Birthday Girl’s Preference
- Does she prefer a soft, creamy texture (buttercream) or a sleek, elegant finish (fondant)?
- If she loves floral, ruffled cakes, buttercream is the best option.
- If she wants a fairytale castle or sculpted tiara cake, fondant is the better choice.
B. Weather and Storage Conditions
- Fondant holds up better in warm weather, while buttercream can melt easily.
- If the cake will be displayed outdoors or in a warm venue, fondant is the safer choice.
C. Budget and Time Considerations
- Buttercream cakes are generally more affordable and quicker to make.
- Fondant cakes require more skill and time, making them more expensive.
- If you’re short on time, a simple buttercream cake with fondant accents is a great solution.
Final Thoughts
Choosing between fondant and buttercream depends on the cake’s design, the birthday girl’s preference, and the overall theme. While fondant is perfect for sculpted, detailed cakes, buttercream is the go-to choice for soft, textured designs with a rich flavor.
If you want the best of both worlds, combining buttercream with fondant accents can create a beautiful and delicious princess cake.
Which frosting do you prefer for a princess cake—buttercream or fondant? Let us know in the comments!
Best Flavors and Fillings for a Royal Cake
Popular Cake Flavors for Princess Cakes
A princess cake is more than just a beautifully decorated dessert—it should also taste as magical as it looks! Choosing the right cake flavor is key to ensuring that the birthday girl and guests enjoy every bite. Whether you prefer classic vanilla, rich chocolate, or floral-infused flavors, the perfect princess cake flavor should complement the theme and create a deliciously royal experience.
Below, we explore the best cake flavors for princess-themed cakes, including classic, fruity, floral, and luxurious options.
1. Classic Cake Flavors for a Timeless Princess Cake
A. Vanilla Bean Cake – A Royal Favorite
- A soft, buttery vanilla sponge made with real vanilla bean for a rich aroma.
- Pairs well with buttercream, fruit fillings, or chocolate ganache.
- A perfect base for fondant cakes, as it provides a stable structure.
B. Chocolate Fudge Cake – A Decadent Choice
- A rich and moist chocolate cake for princesses who love indulgent desserts.
- Works beautifully with raspberry, caramel, or hazelnut fillings.
- Ideal for multi-tiered cakes, as its dense texture supports intricate decorations.
C. Red Velvet Cake – A Princess-Perfect Treat
- A moist, lightly chocolate-flavored cake with a vibrant red color.
- Traditionally paired with cream cheese or vanilla buttercream frosting.
- A great choice for red and gold princess themes like Belle or Snow White.
2. Fruity Cake Flavors for a Light and Refreshing Taste
A. Strawberry Shortcake – A Fairy Tale Delight
- A soft vanilla sponge layered with fresh strawberries and whipped cream.
- Provides a light and airy texture that’s perfect for spring and summer celebrations.
- Best paired with white chocolate or strawberry buttercream.
B. Lemon Raspberry Cake – A Bright and Zesty Option
- Lemon-infused cake layers filled with tangy raspberry compote.
- A perfect flavor for Rapunzel or Cinderella-themed cakes.
- Works well with Swiss meringue buttercream for a smooth, elegant finish.
C. Coconut and Pineapple Cake – A Tropical Princess Treat
- A moist coconut sponge cake layered with pineapple curd or coconut cream.
- A great flavor option for Ariel’s under-the-sea theme.
- Enhances the cake’s lightness while adding a refreshing tropical touch.
3. Floral and Elegant Cake Flavors for a Sophisticated Princess Cake
A. Lavender Honey Cake – Fit for a Royal Tea Party
- A light sponge cake infused with dried lavender and sweetened with honey.
- Complements princess cakes with elegant floral decorations.
- Best served with whipped honey buttercream or lemon glaze.
B. Rosewater and Almond Cake – A Luxurious Floral Blend
- A delicate almond cake with subtle hints of rosewater for a sophisticated flavor.
- Perfect for Belle’s enchanted rose cake or Sleeping Beauty’s fairytale theme.
- Works beautifully with white chocolate ganache and sugared rose petals.
C. Earl Grey and Vanilla Cake – A Royal Tea-Infused Flavor
- A classic vanilla sponge infused with aromatic Earl Grey tea.
- The perfect cake for princess-themed high tea parties.
- Best paired with vanilla bean buttercream or lavender-infused frosting.
4. Indulgent and Luxurious Cake Flavors for a Grand Celebration
A. White Chocolate Raspberry Cake – A Gourmet Delight
- A moist white chocolate sponge cake layered with fresh raspberry compote.
- A sophisticated choice for gold-accented or Cinderella-inspired cakes.
- Best paired with white chocolate ganache or raspberry Swiss meringue buttercream.
B. Salted Caramel and Chocolate Cake – A Decadent Dream
- A rich chocolate cake layered with salted caramel buttercream.
- Perfect for bold and glamorous princess cake designs.
- Works well with gold decorations and pearl embellishments.
C. Champagne Cake – A Truly Regal Choice
- A light sponge cake infused with champagne or sparkling wine.
- Often paired with strawberry or raspberry buttercream for a fruity balance.
- Ideal for princess cakes celebrating milestone birthdays or elegant occasions.
5. Allergy-Friendly and Special Diet Cake Flavors
A. Gluten-Free Vanilla or Chocolate Cake
- Uses almond flour or gluten-free flour blend for a soft, tender crumb.
- Can be paired with buttercream, fruit fillings, or dairy-free ganache.
B. Dairy-Free Coconut Cake
- A moist coconut cake made with dairy-free milk and coconut oil.
- Pairs well with vegan vanilla frosting or fruit-based buttercream.
C. Eggless Strawberry Cake
- A light and fluffy strawberry sponge cake made without eggs.
- Best paired with whipped coconut cream or dairy-free buttercream.
Final Thoughts
The right princess cake flavor should match the birthday girl’s taste and the theme of the cake. Whether you choose a classic vanilla bean cake, a refreshing lemon raspberry combination, or an elegant floral-infused sponge, each flavor brings its own unique charm and deliciousness.
Which flavor would you love for your princess cake? Let us know in the comments!
Delicious Fillings for Extra Flavor
A princess cake isn’t just about its stunning decorations—it should also be rich in flavor and texture! The right cake filling can enhance the overall taste experience, providing a creamy, fruity, or decadent contrast to the cake layers. Whether you prefer light and refreshing fruit fillings, indulgent chocolate ganache, or velvety buttercream, the perfect filling can take your princess cake to the next level.
Below, we explore the best cake fillings for princess cakes, from classic options to luxurious and allergy-friendly choices.
1. Classic Fillings for a Timeless Princess Cake
A. Vanilla Bean Buttercream – A Traditional Favorite
- Made with butter, powdered sugar, and vanilla bean extract for a smooth, creamy texture.
- Pairs well with vanilla, chocolate, and red velvet cakes.
- Provides a light and fluffy filling without overpowering the cake’s flavor.
B. Chocolate Ganache – A Rich and Decadent Option
- A blend of melted chocolate and heavy cream for a silky-smooth filling.
- Works perfectly with chocolate, vanilla, and salted caramel cakes.
- Can be used as a drip layer for added elegance.
C. Cream Cheese Frosting – A Sweet and Tangy Delight
- A smooth, slightly tangy filling made with cream cheese and powdered sugar.
- Pairs beautifully with red velvet, carrot cake, and cinnamon-spiced cakes.
- Adds a rich contrast to sweet buttercream frosting.
2. Fruity Fillings for a Fresh and Light Taste
A. Strawberry Compote – A Classic and Kid-Friendly Choice
- Made with fresh strawberries and a touch of sugar for a natural sweetness.
- Ideal for strawberry shortcake, vanilla bean, and white chocolate cakes.
- Provides a light, refreshing contrast to creamy frosting.
B. Raspberry Buttercream – A Tart and Sweet Balance
- Combines fresh raspberries with buttercream for a fruit-infused flavor.
- Pairs well with lemon, chocolate, and champagne cakes.
- Creates a vibrant pink filling that matches princess-themed cakes beautifully.
C. Lemon Curd – A Zesty and Refreshing Option
- A silky, tangy filling made from fresh lemon juice, eggs, and butter.
- Works well with vanilla sponge, coconut, and poppy seed cakes.
- Balances sweet buttercream with a burst of citrus flavor.
3. Luxurious and Unique Fillings for a Royal Touch
A. White Chocolate Mousse – A Light and Creamy Delight
- Made with melted white chocolate and whipped cream for a delicate, airy texture.
- Pairs well with raspberry, red velvet, and champagne cakes.
- Perfect for an elegant, light filling that complements fondant-covered cakes.
B. Salted Caramel – A Sweet and Savory Indulgence
- A rich caramel filling with a hint of sea salt to balance sweetness.
- Best paired with chocolate, banana, and peanut butter cakes.
- Adds a gourmet touch to multi-tiered princess cakes.
C. Pistachio Cream – A Nutty and Sophisticated Choice
- A smooth filling made with ground pistachios, cream, and sugar.
- Enhances almond, honey, and floral-infused cakes.
- A unique flavor that adds an exotic, royal-inspired twist.
4. Dairy-Free and Allergy-Friendly Fillings
A. Coconut Whipped Cream – A Light Dairy-Free Alternative
- Made from chilled coconut cream and a touch of vanilla.
- A great option for tropical cakes like pineapple, mango, or coconut sponge.
- Provides a light, fluffy texture without dairy.
B. Vegan Chocolate Avocado Mousse – A Healthy and Rich Option
- Blends ripe avocados with cocoa powder and maple syrup for a creamy, chocolatey filling.
- Works well with chocolate, banana, and nutty cakes.
- A delicious plant-based alternative to traditional mousse.
C. Dairy-Free Lemon Custard – A Fresh, Zesty Filling
- Uses coconut milk instead of dairy for a silky-smooth custard.
- A perfect pairing for gluten-free vanilla or almond cakes.
- Delivers a tart and creamy balance without heavy ingredients.
5. Pairing Fillings with Cake Flavors for the Best Combination
A. Best Filling Combinations for Classic Cakes
- Vanilla cake + strawberry compote for a fresh and fruity contrast.
- Chocolate cake + salted caramel filling for a rich and indulgent bite.
- Red velvet cake + cream cheese frosting for a classic, balanced taste.
B. Best Fillings for Floral and Light Cakes
- Lavender cake + honey mascarpone cream for a delicate and floral pairing.
- Lemon sponge + raspberry buttercream for a citrusy, refreshing finish.
- Coconut cake + white chocolate mousse for a tropical, creamy experience.
C. Best Fillings for Unique and Luxurious Cakes
- Champagne cake + white chocolate ganache for a sophisticated celebration.
- Pistachio cake + rosewater buttercream for an exotic Middle Eastern twist.
- Earl Grey cake + lemon curd filling for a refined tea party-style princess cake.
Final Thoughts
The perfect princess cake filling should complement the cake’s flavors and theme, creating a harmonious balance of sweetness, texture, and richness. Whether you opt for classic buttercream, fresh fruit compotes, or gourmet fillings like salted caramel or white chocolate mousse, the right choice will make your princess cake truly unforgettable.
Which cake filling would you choose for your dream princess cake? Let us know in the comments!
Making the Cake Extra Special with Edible Glitter
Adding edible glitter to a princess cake is the perfect way to give it a magical, shimmering touch that elevates the design. Whether you want a subtle sparkle or a full-on dazzling effect, edible glitter can transform any cake into a royal masterpiece. It works beautifully on buttercream, fondant, and even cake decorations, creating an enchanting glow that fits any princess-themed celebration.
Below, we explore the best types of edible glitter, how to apply it effectively, and creative ways to use it to make your princess cake shine like royalty.
1. Understanding the Different Types of Edible Glitter
A. Edible Luster Dust for a Soft, Elegant Shine
- A fine, pearlized powder that adds a soft shimmer to the cake’s surface.
- Works well on fondant, buttercream, and even chocolate decorations.
- Comes in a range of colors like gold, silver, pink, and pearl white for a luxurious effect.
B. Edible Glitter Sprinkles for a Bold, Sparkling Look
- Made of tiny, sparkling sugar crystals or colored food-grade flakes.
- Ideal for buttercream cakes, cupcake toppings, and cake pops.
- Provides more texture and sparkle than luster dust alone.
C. Edible Metallic Paint for a Dazzling Finish
- A liquid or gel-based edible paint used to create glossy, metallic effects.
- Best applied with a small brush or airbrush for even coverage on fondant and decorations.
- Perfect for painting gold crowns, silver tiaras, and royal embellishments.
D. Edible Gold and Silver Leaf for a Luxurious Touch
- Thin sheets of real edible gold or silver that can be delicately placed on the cake.
- Works beautifully for creating a regal look on multi-tiered princess cakes.
- Ideal for wedding-style princess cakes or high-end celebrations.
2. How to Apply Edible Glitter for Maximum Impact
A. Applying Edible Luster Dust for a Shimmering Glow
- Dry brush method: Use a soft food-grade brush to dust luster powder lightly over fondant or buttercream.
- Wet application: Mix luster dust with a few drops of clear vanilla extract or lemon juice to create a paintable liquid.
- Best used for creating a soft, pearlescent effect on dress-style cakes or tiered designs.
B. Sprinkling Glitter on Buttercream for a Sparkly Texture
- While the buttercream is still slightly wet, sprinkle edible glitter over the surface for an even shine.
- Use a fine-mesh sieve to distribute glitter evenly without clumps.
- Best for buttercream rosette cakes or princess-themed cupcakes.
C. Dusting Fondant with Edible Glitter for a Royal Effect
- Lightly brush a thin layer of edible glue or water onto fondant before applying glitter.
- Use a dry soft-bristled brush to gently dab glitter onto specific areas like fondant ruffles, bows, and tiaras.
- Works beautifully for Cinderella or Frozen-inspired cakes that need an icy, sparkling effect.
D. Using a Glitter Airbrush for a Professional Finish
- Load an airbrush with a diluted edible glitter solution and spray evenly over the cake.
- Creates a seamless, professional shimmer effect without visible brush strokes.
- Ideal for ombre princess cakes or full-tier metallic gold and silver cakes.
3. Creative Ways to Use Edible Glitter on a Princess Cake
A. Creating a Glitter Gradient for a Magical Ombre Effect
- Start with a soft layer of shimmer at the top and gradually intensify the glitter toward the bottom.
- Works well for pastel princess cakes with blended pink, lavender, or baby blue tones.
- Best applied with a large, fluffy food brush or an airbrush for smooth blending.
B. Highlighting Details with Glitter Accents
- Apply a concentrated amount of edible glitter on tiaras, dress swirls, or floral details.
- Can be used on edible lace appliqués or filigree piping to create elegant metallic finishes.
- Perfect for cakes inspired by Belle, Aurora, or Cinderella’s ballgown designs.
C. Adding a Glitter Drip Effect for a Regal Look
- Mix metallic edible paint or luster dust with a thicker glaze or ganache.
- Drizzle carefully over fondant-covered cakes for a melting gold or silver effect.
- Complements luxurious princess cakes with gold crowns or fairy tale castle designs.
D. Using Glitter on Cake Toppers for a Sparkling Finish
- Apply edible glitter to fondant or gum paste crowns, wands, or bows.
- Works well for princess figurines, magic mirror details, or royal scepters.
- Can be used to decorate the edges of edible sugar tiaras or lace.
4. Matching Edible Glitter with the Cake’s Color Palette
A. Soft Pastel Colors with a Subtle Shine
- Pink and gold shimmer for a classic princess cake.
- Lavender with silver dust for a Rapunzel-inspired cake.
- Pale blue with pearl shimmer for a Cinderella-themed design.
B. Bold and Vibrant Colors for a Dramatic Effect
- Deep red and gold glitter for a Snow White-inspired cake.
- Emerald green and silver luster for a Tiana-themed cake.
- Turquoise and purple sparkle for a Little Mermaid-inspired under-the-sea cake.
C. Metallic and Royal Hues for an Elegant Look
- Rose gold edible glitter on an ivory or blush princess cake.
- Silver shimmer on deep royal blue cakes for a Frozen or fairytale winter theme.
- Gold flakes and luster dust on a black and gold cake for a luxurious royal celebration.
5. Tips for Storing and Preserving Edible Glitter Effects
A. Keeping the Cake Fresh Without Losing Its Sparkle
- Store in a cool, dry place away from humidity to prevent glitter from dulling.
- Avoid covering with plastic wrap, as moisture can cause glitter and luster dust to fade.
B. Transporting the Cake Without Smudging the Glitter
- Use a cake box with enough height to avoid touching glitter-covered surfaces.
- Transport tiered cakes separately and assemble at the venue for best results.
C. Refreshing the Glitter Before Serving
- Lightly dust extra edible glitter before presenting the cake.
- For metallic details, touch up with a small brush dipped in edible glitter paint.
Final Thoughts
Edible glitter transforms a princess cake into a sparkling masterpiece, adding elegance, magic, and royal charm. Whether applied as a subtle shimmer or a bold, glittery statement, this decorative element enhances the fairytale feel of the celebration.
Which edible glitter technique would you love to try on a princess cake? Let us know in the comments!
How to Decorate a Princess Cake Like a Pro
Creating the Perfect Princess Crown Topper
A princess cake isn’t complete without a royal crown topper! The crown serves as the grand focal point of the cake, symbolizing elegance, royalty, and fairytale magic. Whether you choose an edible fondant crown, a shimmering gold topper, or a sugar-crafted tiara, the right princess crown topper will elevate your cake’s design and make it a true showstopper.
Below, we explore materials, techniques, and decorative elements to create the perfect princess crown topper that fits seamlessly with any royal-themed cake.
1. Choosing the Right Type of Crown Topper
A. Edible Fondant Crown – A Classic and Elegant Choice
- Made from rolled fondant or gum paste, shaped into a delicate tiara or royal crown.
- Can be air-dried or baked slightly to hold its shape.
- Perfect for cakes inspired by Cinderella, Belle, or Aurora (Sleeping Beauty).
B. Gold or Silver Sugar Tiara – A Dazzling Statement Piece
- Crafted from melted sugar or isomalt, then shaped into a delicate tiara.
- Often painted with edible metallic gold or silver dust for extra shine.
- Works beautifully for Frozen-themed cakes (Elsa’s ice crown) or glamorous princess cakes.
C. Non-Edible Keepsake Crown for a Regal Look
- A small, decorative crown made of metal, rhinestones, or plastic placed atop the cake.
- Can be given to the birthday girl as a keepsake after the party.
- Ideal for first birthday cakes, quinceañeras, and milestone celebrations.
2. How to Make an Edible Fondant or Gum Paste Crown
A. Materials Needed for a Fondant Crown
- Fondant or gum paste (stiffened with tylose powder for durability).
- Edible metallic paint or gold dust for a regal look.
- Small pearl sprinkles or sugar gems for embellishments.
- Piping gel or edible glue to attach decorations.
B. Step-by-Step Guide to Crafting a Fondant Crown
- Step 1: Rolling and Shaping the Crown
- Roll out fondant or gum paste to a thickness of about ⅛ inch.
- Cut out a strip long enough to wrap around a cylindrical mold (like a can or bottle).
- Use a crown stencil or freehand cut-out to shape the top edge into points.
- Step 2: Drying and Setting the Crown Shape
- Wrap the cut fondant strip around a lightly greased cylindrical mold.
- Allow to dry for at least 24 hours to ensure it holds its shape.
- If using gum paste, it dries faster and becomes more stable.
- Step 3: Adding Royal Decorations
- Brush the dried crown with edible gold, silver, or pearl luster dust for a shimmering effect.
- Attach small edible sugar pearls or rhinestones for a luxurious look.
- Use piping gel or edible glue to attach mini sugar flowers, lace appliqués, or tiny edible bows.
- Step 4: Placing the Crown on the Cake
- Carefully remove the dried crown from the mold and place it on top of the cake.
- If needed, use a small amount of royal icing or melted chocolate to secure it.
3. Creating a Sugar or Isomalt Crown for a Stunning Shine
A. Why Choose an Isomalt or Sugar Crown?
- Gives a crystal-clear, glass-like effect, perfect for Frozen or fairytale princess cakes.
- Can be colored with food-safe gel to match the cake’s theme.
- Works well for a sleek, elegant, and ultra-luxurious design.
B. How to Make a Sugar Crown at Home
- Step 1: Preparing the Sugar Mixture
- Heat isomalt or sugar syrup to 340°F (170°C) until fully melted.
- Add a drop of food coloring for a tinted effect (blue for Elsa, pink for Aurora).
- Step 2: Molding the Sugar into a Crown Shape
- Pour the melted sugar into a silicone crown mold or freehand shape on parchment paper.
- Allow to cool completely before handling.
- Step 3: Decorating for a Royal Effect
- Dust with edible silver, blue, or gold shimmer for a glittering look.
- Attach small edible gems or sugar flowers to add texture.
- Carefully position on the cake for a striking final touch.
4. Enhancing the Crown Topper with Extra Details
A. Adding a Touch of Edible Glitter and Luster Dust
- Lightly dust gold, silver, or pearl luster dust over the crown for an elegant shimmer.
- Use a dry food-grade brush to apply fine edible glitter to highlight certain areas.
- Works beautifully for ballgown-style cakes or delicate tiara toppers.
B. Creating a Floral Crown for a Soft, Romantic Look
- Decorate the crown with tiny fondant or sugar flowers in pastel hues.
- Adds a fairytale charm, perfect for Rapunzel, Belle, or Sleeping Beauty cakes.
- Attach flowers using edible glue or royal icing.
C. Using Edible Pearls and Gemstones for Extra Sparkle
- Arrange sugar pearls along the edges of the crown for a regal appearance.
- Use colored sugar gems (ruby red, sapphire blue, or emerald green) to mimic real jewels.
- Pairs beautifully with royal blue, gold, and deep red cake themes.
5. Matching the Crown to the Princess Cake Theme
A. Gold Crowns for a Classic Royal Princess Cake
- Best suited for Aurora (Sleeping Beauty), Belle, or Cinderella cakes.
- Complements cakes with soft pink, ivory, or pastel gold colors.
B. Silver and Crystal Crowns for an Ice Princess Theme
- Ideal for Elsa’s Frozen-themed cakes or winter wonderland princess cakes.
- Pairs well with white, blue, and shimmer dust decorations.
C. Floral Tiaras for a Whimsical Fairytale Cake
- Matches Rapunzel, Snow White, or woodland princess cakes.
- Works best with buttercream rosettes, vines, and floral cascades.
6. Tips for Storing and Transporting a Crown-Topped Cake
A. Keeping the Crown Intact Until Serving
- If using fondant, store in a cool, dry area away from humidity.
- Sugar crowns should be kept in an airtight container to avoid moisture damage.
B. Transporting the Cake Without Damaging the Crown
- Place non-edible crowns separately and attach at the venue.
- For delicate sugar crowns, use support rods or a cake stand with stability.
C. Touching Up the Crown Before Presentation
- If glitter fades, lightly brush with edible shimmer dust before serving.
- Ensure all gems and pearls are secure before moving the cake.
Final Thoughts
A princess crown cake topper is the ultimate way to bring regal elegance to a cake. Whether you choose a fondant tiara, sugar crown, or a dazzling gold keepsake, the right crown will make the birthday girl feel like royalty.
Which crown topper style would you love for a princess cake? Let us know in the comments!
Using Piping Techniques for a Stunning Buttercream Finish
Buttercream piping is an essential skill for creating a stunning princess cake with intricate, elegant, and decorative details. From delicate ruffles and rosettes to intricate lace patterns and pearl accents, the right piping techniques can elevate a cake’s design and make it look truly royal.
Below, we explore different buttercream piping techniques, the best tools to use, and expert tips for achieving a flawless, fairy-tale-worthy cake design.
1. Choosing the Right Buttercream for Piping
A. American Buttercream – The Most Common Choice
- Made with butter, powdered sugar, and vanilla extract.
- Stiff enough for piping, making it ideal for rosettes, ruffles, and swirls.
- Can be colored and flavored easily, perfect for princess-themed cakes.
B. Swiss Meringue Buttercream – Smooth and Silky Finish
- Made by whipping egg whites and sugar, then adding butter.
- Less sweet and ultra-smooth, giving a luxurious texture.
- Holds intricate piping designs well, but requires chilling in warm weather.
C. Italian Meringue Buttercream – Elegant and Stable
- Made with hot sugar syrup mixed into whipped egg whites.
- Lighter and silkier than American buttercream, yet stable for piping.
- Works well for lace piping, pearl borders, and delicate floral patterns.
2. Essential Tools for Buttercream Piping
A. Piping Bags and Nozzles for Different Designs
- Disposable or reusable piping bags for better control.
- Couplers to switch between nozzles easily.
- Use sturdy, high-quality piping tips for clean, defined shapes.
B. Best Piping Tips for Princess Cake Designs
- Large star tip (1M, 2D) – For rosettes, swirls, and ruffled textures.
- Petal tip (104, 125) – For buttercream ribbons and cascading ruffles.
- Round tip (3, 5, 8) – For pearls, dots, and lace details.
- Leaf tip (352) – For realistic floral accents on princess cakes.
C. Turntable and Scraper for a Smooth Base
- A turntable allows for even piping around the entire cake.
- Offset spatula and bench scraper create a smooth buttercream base before decorating.
3. Popular Buttercream Piping Techniques for Princess Cakes
A. Rosette Piping – Elegant and Romantic Swirls
- Use a 1M or 2D star tip to pipe rose-like swirls across the cake.
- Best for creating an ombré princess cake effect.
- Works beautifully for Belle’s enchanted rose cake or floral-themed princess cakes.
B. Ruffled Buttercream Borders – A Soft, Dress-Like Effect
- Use a petal tip (104) to pipe ruffles in layers.
- Ideal for cakes inspired by princess ball gowns.
- Works well in pastel pinks, soft purples, and gold tones.
C. Pearl Piping for a Luxurious Look
- Use a round tip (3 or 5) to create small pearls along the edges.
- Can be used for lace-like designs, borders, and elegant detailing.
- Enhances Cinderella, Aurora, and classic royal-themed cakes.
D. Lace and Scrollwork for a Vintage Touch
- Use a fine round piping tip (1 or 2) for delicate lace patterns.
- Works beautifully on fondant-covered cakes with an intricate lace overlay.
- Adds a sophisticated, timeless look to princess cakes.
E. Ombre Buttercream for a Magical Gradient Effect
- Create a blended transition of color from light to dark.
- Best achieved using a spatula and piping bag with different shades of buttercream.
- Works great for Frozen-inspired cakes, soft pink princess cakes, or mermaid princess designs.
4. Step-by-Step Guide to Piping a Stunning Buttercream Cake
A. Step 1: Preparing the Cake for Piping
- Apply a thin crumb coat to seal in crumbs before the final layer of buttercream.
- Smooth the surface using an offset spatula or scraper.
- Chill the cake for 15–30 minutes before piping to ensure a solid base.
B. Step 2: Choosing the Right Piping Technique
- For a floral princess cake – Use rosettes and ruffles for a soft, dreamy look.
- For a regal look – Pipe lace details and pearl accents.
- For a dress-inspired cake – Layer buttercream ruffles in a cascading design.
C. Step 3: Applying the Piping Designs Evenly
- Start from the bottom up for layered designs (ruffles, ombré).
- For borders, pipe small pearls or swirls around the edges.
- Rotate the turntable slowly while piping to maintain even spacing.
D. Step 4: Finishing Touches for a Fairytale Effect
- Dust with edible glitter or luster dust for a magical shimmer.
- Add small sugar pearls or gold accents for an extra regal touch.
- Pipe delicate vines, bows, or floral accents for extra detail.
5. Troubleshooting Common Buttercream Piping Issues
A. Fixing Buttercream That’s Too Soft or Melting
- If buttercream is too soft, refrigerate for 10–15 minutes before piping.
- Add extra powdered sugar or meringue powder for better structure.
- Avoid piping in hot, humid conditions to prevent melting.
B. Smoothing Out Piping Mistakes
- Use a small spatula or damp brush to fix minor errors.
- Pipe extra swirls or pearls over mistakes to blend them in.
- If needed, scrape off the mistake and reapply buttercream.
C. Preventing Air Bubbles in Piped Designs
- Always press air out of the piping bag before starting.
- Pipe in a continuous motion to avoid gaps or breaks.
- Use a gentle, steady hand to keep the piping flow smooth.
6. Matching Buttercream Piping to Your Princess Theme
A. Cinderella-Inspired Piping Designs
- Light blue and white buttercream swirls for an icy, elegant effect.
- Pearl-dotted lace piping for a sophisticated finish.
B. Belle’s Enchanted Rose Cake Piping
- Golden ruffled layers to mimic Belle’s ballgown.
- Buttercream red roses piped in a cascading pattern.
C. Frozen-Themed Buttercream Piping
- Pale blue ombré effect for an icy texture.
- Delicate snowflake patterns piped with a fine round tip.
D. Rapunzel’s Floral Garden Piping
- Lavender and yellow rosettes to match her signature colors.
- Piped buttercream vines and tiny flowers for a fairytale look.
Final Thoughts
Using piping techniques is one of the best ways to create a stunning buttercream finish on a princess cake. Whether you go for elegant rosettes, delicate pearl accents, or a cascading ruffle effect, the right technique will add magic and elegance to the design.
Which buttercream piping style would you love to try for a princess cake? Let us know in the comments!
Adding Edible Jewels, Lace, and Pearls
One of the best ways to elevate a princess cake is by adding edible jewels, lace patterns, and sugar pearls for a luxurious and elegant look. These decorative elements can transform a simple cake into a royal masterpiece, creating a stunning fairytale effect that fits any princess-themed celebration. Whether you’re designing a Disney-inspired cake, a regal golden crown cake, or a soft pastel floral cake, these elements bring glamour, elegance, and texture to the design.
Below, we explore how to create and apply edible jewels, lace, and pearls for the ultimate princess cake decoration.
1. Using Edible Jewels for a Sparkling Princess Cake
A. What Are Edible Jewels?
- Edible sugar gems made from isomalt, gelatin, or rock candy to mimic real gemstones.
- Available in various shapes, sizes, and colors (sapphires, rubies, emeralds, diamonds).
- Adds a glamorous touch to princess cakes, making them look luxurious and enchanted.
B. How to Make Edible Jewels at Home
- Step 1: Preparing the Sugar Mixture
- Heat isomalt or sugar syrup until fully melted.
- Add gel food coloring to match the cake’s theme (e.g., blue for Cinderella, pink for Aurora).
- Step 2: Molding the Jewels
- Pour the mixture into silicone gem molds for a realistic jewel shape.
- Allow the jewels to cool completely before removing them.
- Step 3: Decorating the Cake with Edible Jewels
- Arrange jewels in clusters along the cake borders or around the crown topper.
- Use gold or silver edible paint to create a shimmering gemstone effect.
- Attach with clear piping gel or royal icing for a seamless finish.
C. Best Cake Themes for Edible Jewels
- Cinderella Cake: Blue sugar sapphires arranged along the base.
- Frozen Cake: Ice-blue crystal-like gems mimicking Elsa’s ice castle.
- Belle’s Rose Cake: Ruby-red sugar gems accentuating golden cake layers.
2. Creating Edible Lace for a Delicate and Elegant Look
A. What is Edible Lace?
- A thin, flexible sugar decoration that mimics the look of intricate fabric lace.
- Adds a delicate, royal touch to cakes without overpowering the design.
- Works beautifully for tiered princess cakes, vintage-inspired cakes, or wedding-style designs.
B. How to Make Edible Lace at Home
- Step 1: Choosing the Right Ingredients
- Use store-bought edible lace mix or make your own with egg whites, sugar, and tylose powder.
- Gel food coloring can be added for a custom lace color.
- Step 2: Molding and Drying the Lace
- Spread the lace mixture into a silicone lace mat and smooth it out evenly.
- Allow it to air dry or bake at low heat until it becomes flexible but firm.
- Step 3: Attaching Lace to the Cake
- Brush the cake surface with a thin layer of piping gel or edible glue.
- Carefully press the lace onto the fondant or buttercream surface.
- Trim any excess and add pearl embellishments for extra glamour.
C. Best Princess Cakes for Edible Lace
- Aurora’s Royal Cake: Blush pink cake with white lace details.
- Elegant Vintage Princess Cake: Soft pastel cake with gold-trimmed lace appliqués.
- Victorian Tiara Cake: Ivory cake with delicate lace patterns and sugar pearls.
3. Decorating with Edible Pearls for a Regal Finish
A. Why Use Edible Pearls?
- Small sugar or fondant pearls that create a luxurious, polished look.
- Available in gold, silver, pearl white, or pastel shades to match any theme.
- Can be used for borders, floral arrangements, or crown embellishments.
B. How to Make and Apply Edible Pearls
Step 1: Creating Edible Pearls at Home
- Roll tiny fondant balls and coat them in pearl dust or edible shimmer.
- Use melted white chocolate or piping gel to attach them to the cake.
Step 2: Placing Pearls for a Royal Effect
- String pearl borders around cake tiers for an elegant finish.
- Scatter pearls over fondant drapes or buttercream swirls.
- Use pearls to outline lace designs for extra detail.
C. Best Princess Cakes for Edible Pearls
- Cinderella’s Ballroom Cake: White and pearl-trimmed tiered cake.
- Frozen Snowflake Cake: Silver pearls decorating a blue ombré buttercream cake.
- Rapunzel’s Flower Garden Cake: Gold pearls outlining delicate floral piping.
4. Combining Jewels, Lace, and Pearls for a Royal Masterpiece
A. Coordinating Colors for a Harmonious Design
- Gold and deep red accents for a Belle or Snow White-themed cake.
- Silver and baby blue decorations for a Cinderella-inspired cake.
- Blush pink and white lace patterns for an Aurora or ballerina princess cake.
B. Placement for Maximum Elegance
- Arrange jewels in clusters around cake toppers or tiaras.
- Use lace to frame the top and bottom tiers for an elegant layered effect.
- Scatter pearls between lace patterns to add a three-dimensional texture.
C. Balancing the Decorations Without Overcrowding
- Stick to one or two main decorative elements for a balanced look.
- Use a mix of soft lace, shimmering pearls, and a few bold jewel accents.
- Ensure decorations enhance the cake rather than overpower it.
5. Storing and Handling Cakes with Edible Decorations
A. Keeping Edible Jewels Shiny and Intact
- Store cakes with sugar jewels in a dry place to prevent melting.
- Avoid refrigerating as condensation may dull the shine of edible gems.
B. Preventing Lace from Breaking or Drying Out
- Attach lace at the last minute to avoid cracks.
- If lace becomes stiff, lightly brush it with edible glue to regain flexibility.
C. Ensuring Edible Pearls Stay in Place
- Press pearls into soft buttercream before it sets.
- For fondant cakes, use a tiny amount of royal icing as an adhesive.
Final Thoughts
Adding edible jewels, lace, and pearls transforms a princess cake into a royal showpiece. These details create a luxurious, fairy tale effect that fits any elegant or whimsical cake theme. Whether you choose delicate lace appliqués, shimmering sugar gems, or classic pearl borders, these decorations will make your princess cake truly unforgettable.
Which decorative element would you love to try on a princess cake? Let us know in the comments!
Final Tips for Making the Perfect Princess Cake
Best Cake Tools to Use for Flawless Decorating
Creating a stunning princess cake requires the right set of baking and decorating tools. Whether you’re crafting an elegant fondant design, delicate buttercream piping, or intricate sugar decorations, having the proper equipment ensures precision, smooth finishes, and flawless details.
Below, we explore the must-have cake decorating tools, their uses, and expert tips for achieving a picture-perfect princess cake.
1. Essential Cake Tools for a Smooth Base and Even Layers
A. Cake Turntable – The Key to Even Frosting
- Allows for easy, consistent icing application by rotating the cake while decorating.
- Ideal for spreading buttercream, smoothing fondant, and creating piped designs.
- Choose a non-slip turntable with a sturdy base for better control.
B. Offset Spatula – Achieving a Professional Buttercream Finish
- A must-have for spreading buttercream evenly over cake layers.
- Works best for applying crumb coats, leveling frosting, and creating textured designs.
- A longer offset spatula is ideal for tiered cakes, while a small angled spatula is great for detailed work.
C. Bench Scraper – Perfecting the Smoothness of Frosting
- Ensures a clean, sharp finish on buttercream or ganache-covered cakes.
- Helps achieve straight edges and smooth textures when paired with a turntable.
- Metal scrapers work best for firm buttercream, while plastic scrapers are great for softer finishes.
D. Cake Leveler – Ensuring Even Layers for Stacking
- Creates uniform cake layers, preventing uneven tops.
- A sharp cake leveler or serrated knife helps trim domed tops for a flat surface.
- Ensures stability, especially for multi-tiered princess cakes.
2. Tools for Fondant Work and Intricate Cake Designs
A. Fondant Rolling Pin – Achieving a Smooth, Even Surface
- Helps roll out fondant evenly without creases or air bubbles.
- A non-stick rolling pin is best for preventing fondant from sticking.
- Works well for rolling thin sugar paste for lace appliqués or delicate ruffles.
B. Fondant Smoother – Perfecting the Cake’s Appearance
- Used to press and smooth fondant onto cakes without wrinkles.
- Essential for seamless finishes on princess-themed cakes.
- Works best when used with light, even pressure to avoid tearing.
C. Silicone Molds – Creating Intricate Decorations with Ease
- Perfect for making fondant crowns, tiaras, pearls, and lace patterns.
- Choose molds with princess-themed designs like bows, flowers, and gems.
- Can be used with chocolate, gum paste, or edible gold embellishments.
D. Edible Lace Mats – Adding a Delicate, Regal Touch
- Used for creating sugar lace appliqués that mimic delicate fabric lace.
- Lace patterns can be dusted with gold or silver shimmer for an elegant effect.
- Ideal for Aurora, Cinderella, or Victorian-style princess cakes.
3. Piping Tools for Stunning Buttercream and Royal Designs
A. Piping Bags – The Foundation for Elegant Cake Designs
- Available in disposable or reusable options for easy decorating.
- Use multiple bags with different colors for gradient or ombré effects.
- Best used with strong, flexible bags to prevent tearing.
B. Piping Tips – Creating Rosettes, Ruffles, and Borders
- 1M and 2D tips – Perfect for buttercream rosettes and floral swirls.
- 104 petal tip – Used for ruffles and delicate gown-like draping.
- Round tips (3, 5, 8) – Best for pearl piping, lace details, and lettering.
- Leaf tip (352) – Creates fondant or buttercream leaves for floral cakes.
C. Couplers – Switching Piping Tips Easily
- Allows for quick tip changes without switching the entire piping bag.
- Essential when using multiple piping techniques on the same cake.
- Works best for fine-detail work and lace piping designs.
D. Airbrush Kit – Achieving a Royal Ombre and Pearl Finish
- Used for blending soft pastel colors for a magical princess cake.
- Helps apply edible shimmer dust evenly for a radiant glow.
- Ideal for Frozen, Cinderella, or fairytale-inspired cakes with soft gradients.
4. Specialty Tools for Decorating and Finishing Touches
A. Stencil Sheets – Creating Beautiful, Intricate Patterns
- Helps achieve symmetrical lace, filigree, and royal designs.
- Works well with edible dust, royal icing, or airbrushing.
- Best for gold-trimmed cakes, castle-themed princess cakes, or vintage designs.
B. Gold and Silver Edible Paint – Adding a Regal Touch
- Used for highlighting lace details, royal tiaras, and edible pearls.
- Apply with a fine brush or sponge for precision.
- Works well with Belle’s golden ballgown cake or vintage princess cakes.
C. Edible Glitter and Luster Dust – Bringing the Cake to Life
- Creates a sparkling, magical effect on any princess cake.
- Apply with a brush for subtle shimmer or sprinkle over fondant for a bold effect.
- Matches well with fairytale, Frozen, or royal princess cakes.
D. Cake Toppers – Completing the Princess Cake Theme
- Can be edible (fondant tiaras, sugar crowns) or non-edible (gold acrylic toppers, rhinestone crowns).
- Helps personalize the cake with names, numbers, or princess figurines.
- Works best when secured firmly to prevent tilting.
5. Tips for Using Cake Tools Like a Pro
A. Preparing the Cake Before Decorating
- Always chill the cake before applying buttercream or fondant.
- Use a crumb coat to lock in moisture and create a smooth base.
- Let fondant-covered cakes sit before decorating to prevent sagging.
B. Cleaning and Maintaining Your Cake Tools
- Wash piping tips, spatulas, and molds immediately after use.
- Keep fondant smoothers and lace mats dry to prevent damage.
- Store piping bags and couplers in an airtight container to avoid contamination.
C. Practicing Before Decorating the Final Cake
- Pipe buttercream onto parchment paper to test designs before applying.
- Roll out small fondant pieces to practice smoothing techniques.
- Try airbrushing a practice cake to perfect ombré and shimmer effects.
Final Thoughts
The right cake decorating tools can turn a simple cake into a royal masterpiece fit for a princess-themed celebration. Whether you’re working with fondant, buttercream, or edible glitter, these tools help ensure precision, elegance, and creativity in every detail.
Which cake tool do you love the most for decorating princess cakes? Let us know in the comments!
How to Store and Transport Your Princess Cake Safely
A princess cake is a beautifully decorated masterpiece, but it requires proper storage and careful transportation to maintain its structure, freshness, and intricate decorations. Whether you’re working with buttercream, fondant, or delicate sugar decorations, taking the right precautions will ensure your cake stays intact and picture-perfect from creation to serving.
Below, we’ll explore the best methods for storing and transporting your princess cake to prevent damage, melting, or smudging.
1. Storing a Princess Cake Before Serving
A. Determining the Right Storage Method Based on Cake Type
- Buttercream cakes: Best stored in a cool, dry area or the refrigerator to maintain the frosting’s stability.
- Fondant-covered cakes: Should be stored at room temperature to avoid condensation issues.
- Cakes with edible pearls, lace, or jewels: Need a humidity-controlled environment to prevent decorations from melting.
B. Keeping Buttercream Cakes Fresh
- Store in a cake box or airtight container to prevent exposure to air.
- Avoid direct sunlight or heat, which can cause buttercream to soften and melt.
- If refrigerating, let the cake come to room temperature for 30–45 minutes before serving to enhance flavor and texture.
C. Storing Fondant Cakes Without Ruining the Finish
- Never refrigerate fondant cakes unless necessary, as condensation can cause the surface to become sticky.
- Keep the cake in a cool, dry room (between 65-72°F) away from humidity.
- Place a thin layer of cornstarch or powdered sugar on exposed fondant elements to absorb excess moisture.
D. Preserving Cakes with Delicate Sugar Decorations
- Sugar flowers, pearls, and lace should be stored separately and added before serving.
- If decorations must stay on the cake, keep the cake in a humidity-controlled box.
- Avoid placing metallic-painted elements in the fridge, as condensation can dull the finish.
2. Choosing the Right Cake Box for Safe Storage
A. Selecting a Cake Box for Different Cake Sizes
- Use a box at least 2 inches taller and wider than the cake to prevent smudging.
- For multi-tiered cakes, choose a box with a sturdy base and structured sides.
B. Using Cake Carriers for Smaller Cakes
- Airtight plastic cake carriers are ideal for single-tier princess cakes.
- Ensure the lid fits snugly without touching the cake’s decorations.
C. Preparing the Box for Extra Protection
- Add a non-slip mat or grip liner inside the box to prevent shifting.
- For delicate cakes, place bubble wrap or soft padding around the sides of the cake board for extra security.
3. Transporting Your Princess Cake Safely
A. Placing the Cake Securely in the Vehicle
- Always transport cakes on a flat surface, like the trunk or the floor of the car, instead of the seat.
- Use a non-slip mat or towel underneath the cake box to prevent movement.
- Avoid stacking other items near the cake to prevent accidental tipping.
B. Keeping the Cake Cool During Transport
- If traveling in warm weather, turn on the air conditioning before placing the cake in the car.
- Avoid direct sunlight on the cake box to prevent buttercream from melting.
- For extra heat protection, use frozen gel packs around the box (but not directly touching the cake).
C. Transporting Multi-Tiered Cakes
- If the cake has multiple tiers, transport the tiers separately and assemble on-site.
- Use dowel rods or internal supports to prevent shifting and collapsing.
- Have extra buttercream or royal icing on hand for minor touch-ups after transport.
D. Driving Carefully with a Cake in the Car
- Avoid sudden stops and sharp turns that could cause the cake to shift.
- Drive at a steady speed, especially on bumpy roads or uneven terrain.
- If possible, have a passenger hold the cake box securely while traveling.
4. Assembling and Final Touch-Ups After Transport
A. Assembling Multi-Tier Cakes On-Site
- Place the bottom tier on the cake stand first.
- Carefully stack each tier, securing them with dowel rods or cake separators.
- Make any necessary touch-ups with buttercream or royal icing before serving.
B. Reattaching Any Loose Decorations
- If edible pearls, lace, or jewels fall off during transport, use piping gel or melted chocolate to reattach them.
- Bring extra sugar flowers, gold dust, or edible pearls for last-minute decorating fixes.
C. Final Checks Before Presentation
- Dust with extra luster dust or edible glitter for a fresh, magical touch.
- Ensure the crown topper or tiara is securely positioned.
- Check for any smudges or dents and smooth them with an offset spatula.
5. Storing Leftover Princess Cake
A. Keeping Leftover Cake Fresh
- Store slices in airtight containers to retain moisture.
- Buttercream cakes can last 3–4 days at room temperature or up to a week in the fridge.
- Fondant cakes should be kept in a cool, dry place to avoid condensation issues.
B. Freezing Cake for Future Enjoyment
- Wrap individual cake slices in plastic wrap and aluminum foil before freezing.
- Store in an airtight container to prevent freezer burn.
- Thaw at room temperature for 2–3 hours before serving.
C. Reviving a Stored Cake for the Best Taste
- If buttercream appears dry, lightly mist the cake with simple syrup before serving.
- Avoid microwaving fondant-covered cakes, as it can melt the sugar decorations.
- Bring refrigerated cake to room temperature 30 minutes before serving for the best texture and flavor.
Final Thoughts
Properly storing and transporting your princess cake ensures it stays fresh, intact, and beautifully decorated for the big celebration. Whether you’re dealing with delicate buttercream flowers, edible lace, or a multi-tiered masterpiece, following these steps will help you deliver a flawless cake from start to finish.
What’s your biggest challenge when transporting cakes? Let us know in the comments!
Where to Order a Custom Princess Cake if You’re Not a Baker
Not everyone has the time, tools, or skills to create a show-stopping princess cake, but that doesn’t mean you have to settle for an ordinary dessert. If you’re not a baker, you can order a custom princess cake from a professional bakery, ensuring you get a beautifully crafted and delicious masterpiece for your special event.
Below, we explore the best places to order a custom princess cake, what to consider when choosing a bakery, and tips for ensuring you get the perfect cake.
1. Local Bakeries Specializing in Custom Cakes
Many local bakeries offer custom cake services, allowing you to order a beautifully decorated princess cake tailored to your theme and preferences.
A. How to Find the Best Local Bakery for a Princess Cake
- Search for bakeries that specialize in custom or themed cakes.
- Read online reviews and check social media for customer photos.
- Visit the bakery in person to view cake samples and discuss design options.
B. Questions to Ask Before Ordering from a Local Bakery
- Do they have experience making princess-themed cakes?
- Can they accommodate special flavors, dietary restrictions, or custom designs?
- What is the price range for a custom princess cake?
C. Benefits of Ordering from a Local Bakery
- You get personalized service and can discuss details in person.
- Many bakeries offer freshly made cakes with high-quality ingredients.
- Some bakeries provide delivery and setup services to ensure safe transport.
2. Custom Cake Designers and Boutique Cake Shops
For a one-of-a-kind, high-end princess cake, consider ordering from a boutique cake designer or independent cake artist who specializes in detailed, luxury cakes.
A. How to Find a Professional Cake Designer
- Search Instagram, Pinterest, or Etsy for local cake artists with experience in custom designs.
- Ask for recommendations from friends, event planners, or wedding vendors.
- Look at portfolios of previous princess cakes to evaluate their style and skill.
B. What to Expect from a Boutique Cake Designer
- High attention to detail with hand-sculpted decorations, sugar flowers, and intricate lacework.
- More customization options (color schemes, themes, edible gold, hand-painted designs).
- Cakes that are often larger and more structurally complex, perfect for grand celebrations.
C. Things to Consider Before Ordering from a Boutique Cake Designer
- Higher price points due to craftsmanship and custom work.
- Longer lead times—most custom cake designers require weeks to months of advance notice.
- Limited availability, as many high-end cake designers only take a few orders per week.
3. Online Cake Ordering Services and Nationwide Delivery
If you need a custom cake but don’t have a great local option, several online cake services offer nationwide shipping and delivery.
A. Popular Online Cake Delivery Services
- Goldbelly – Offers a selection of luxury cakes from top bakeries across the U.S.
- We Take the Cake – Specializes in hand-decorated custom cakes with national delivery.
- Milk Bar – Known for creative, whimsical cakes that can be personalized.
B. How Online Cake Ordering Works
- Choose from pre-designed princess cakes or submit a custom request.
- Select the size, flavor, and decorative elements.
- The cake is shipped frozen with instructions for thawing before serving.
C. Pros and Cons of Ordering a Cake Online
✔ Convenient – Order from home without visiting a bakery.
✔ Access to high-end cakes that might not be available locally.
✘ Less customization than ordering from a local baker.
✘ Shipping costs can be high, and cakes must be handled carefully upon arrival.
4. Grocery Stores and Wholesale Bakeries for Budget-Friendly Options
If you need a princess cake on a budget, many grocery store bakeries and wholesale retailers offer affordable custom cake options.
A. Grocery Stores That Offer Custom Cakes
- Walmart Bakery – Offers affordable princess cakes with basic designs.
- Publix Bakery – Specializes in custom sheet cakes and tiered designs.
- Safeway and Kroger – Provide decorated cakes with edible princess toppers.
B. Ordering a Custom Cake from a Grocery Store
- Call at least a week in advance to place an order.
- Choose from pre-set princess themes or request a custom design.
- Confirm the pickup time and storage instructions for best results.
C. Pros and Cons of Grocery Store Cakes
✔ Affordable – Significantly cheaper than boutique bakeries.
✔ Quick turnaround time – Some stores offer same-day or next-day pickup.
✘ Limited customization – Most grocery stores don’t offer hand-painted or sculpted decorations.
✘ Basic flavors and fillings – Fewer options compared to professional cake artists.
5. Custom Cake Orders from Party Supply Shops or Event Planners
Some party supply stores and event planners work with cake decorators to provide fully customized princess cakes as part of their event packages.
A. How to Order a Cake Through a Party Supply Shop
- Ask about pre-arranged cake packages that match party themes.
- Choose from pre-designed princess cakes or request a custom order.
- Ensure the cake matches the party décor, colors, and theme.
B. Event Planners and Custom Cake Collaborations
- Some event planners partner with bakeries to provide cakes along with party services.
- They handle the ordering, pickup, and setup, making it easier for busy hosts.
- This option is ideal for large events, birthdays, and high-end celebrations.
Final Thoughts
Ordering a custom princess cake is a great way to ensure a beautiful, delicious centerpiece for your celebration without the stress of baking. Whether you choose a local bakery, a boutique cake artist, an online delivery service, or a grocery store option, there are plenty of great choices to fit your budget and needs.
Where would you order a princess cake from? Let us know in the comments!
Conclusion
A princess cake is more than just a dessert—it’s a magical centerpiece that brings elegance, creativity, and joy to any royal celebration. Whether you choose a classic buttercream rosette cake, a luxurious fondant design, or an intricate multi-tiered masterpiece, the right techniques and decorations can make your cake truly fit for a princess.
From selecting the perfect color palette and flavors to adding edible jewels, lace, and pearls, every detail plays a role in creating a show-stopping cake. If you’re a baker, mastering piping techniques, fondant work, and edible embellishments will elevate your cake artistry. If you prefer to order a custom cake, choosing the right bakery or online service ensures a flawless result.
Most importantly, a princess cake should reflect the birthday girl’s dreams and personality—whether it’s inspired by Disney princesses, regal gold crowns, or whimsical fairy tales. With the right storage and transportation tips, you can also ensure your cake stays beautiful and intact until the big moment.
No matter how you design or order your princess cake, the most important thing is the smiles and joy it brings. So go ahead—create a masterpiece that will make the celebration unforgettable!
Which princess cake design is your favorite? Let us know in the comments!
1 thought on “10 Stunning Princess Cake Ideas Fit for a Royal Celebration”